Create Manual Payment Request
Manual Payment Request is the primary way to initiate a payment via our system. It is a simple process combining the basic request flow and the additional steps with the information that can be added if needed. The request page consists of several sections: Payments, Customer, Flow options and Metadata.
Payments
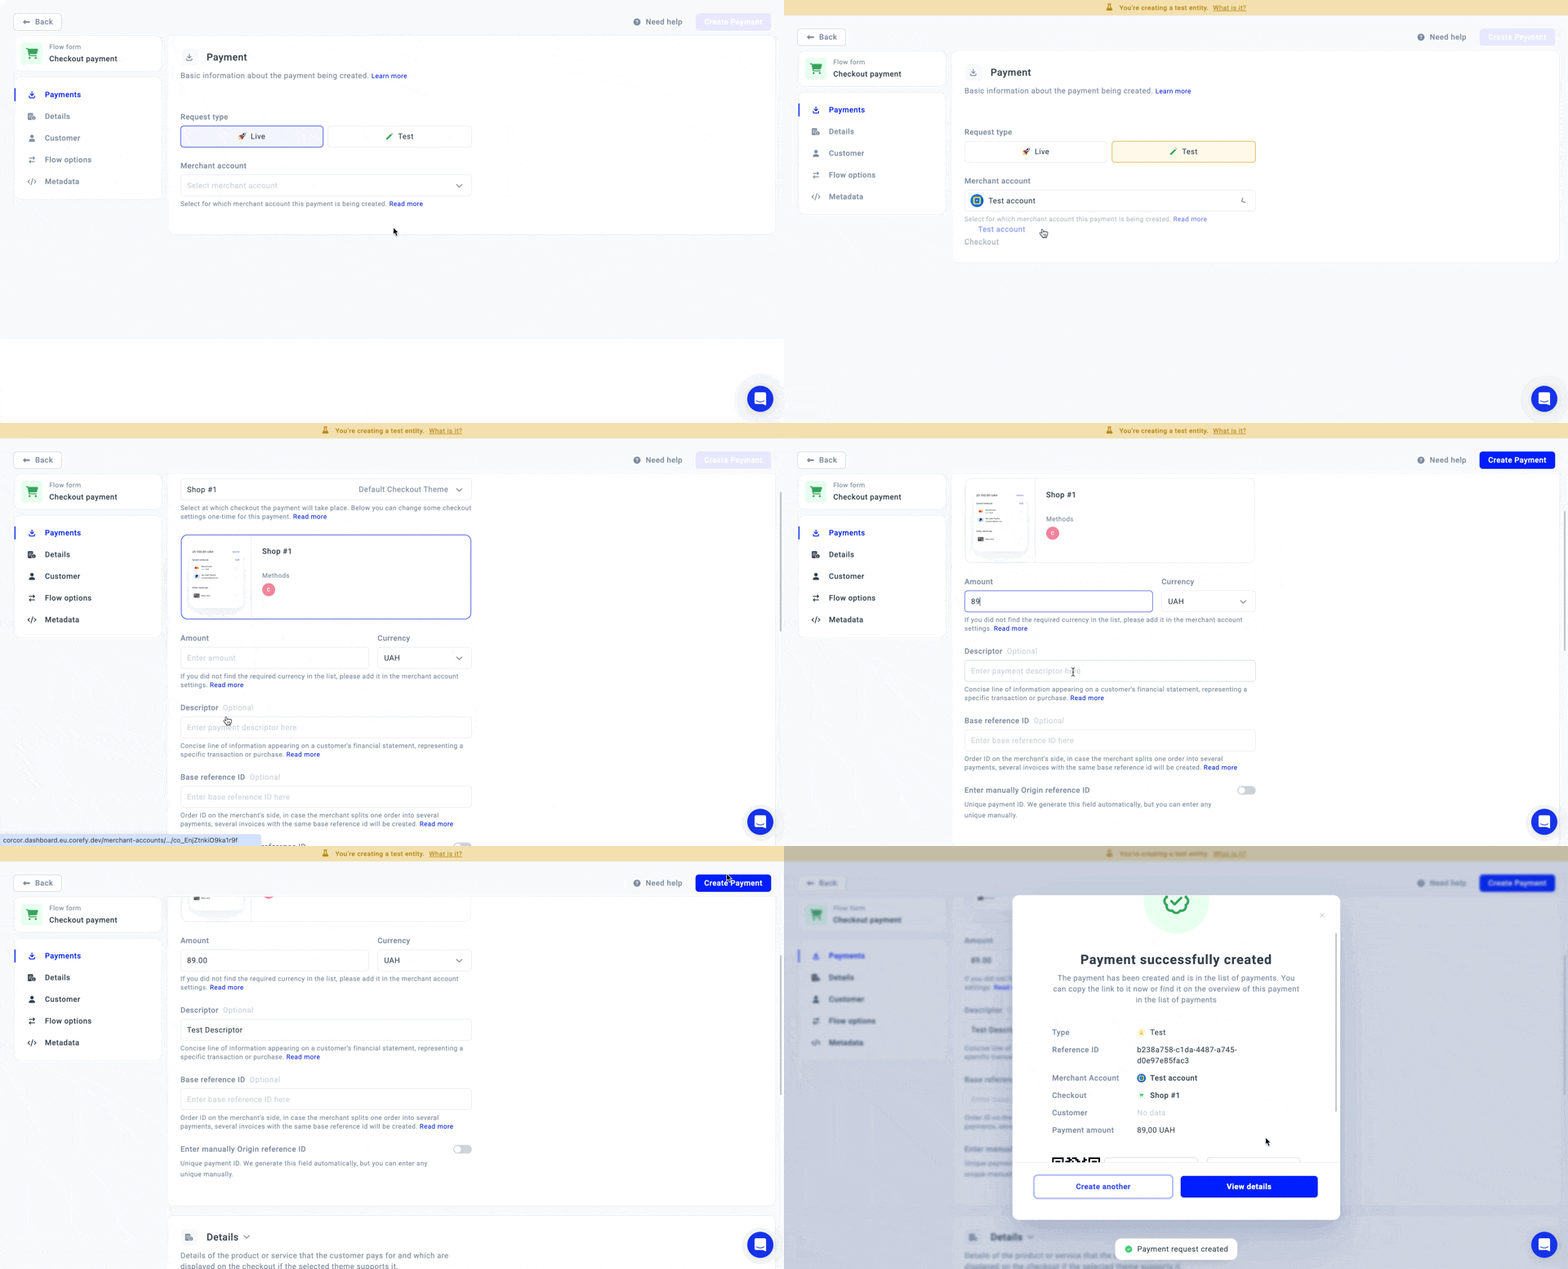
Our system presupposes two flows for making a Payment Request. We advise you to try making a Payment Request in the test environment first to ensure everything works as intended. Then, feel free to go live and follow the live flow.
Payment Request → General flow
Required steps:
- Go to Transactions and click Create Payment.
- Choose the Test or Live Request type depending on the environment you use to initiate a payment. Remember that the test run is safe, and no real money is transferred.
- Choose a Merchant account you want to use when creating a Payment Request.
- Choose the Checkout that you want to use in a Payment Request. If you have not created a Checkout yet, the system automatically adds a Default Checkout to your request.
- Insert the Amount that is going to be charged and the Currency, and click Create Payment. The Currency list is based on the currencies used for a Payment scheme.
Optional:
- You can add a Descriptor to your request by entering it in the corresponding text field. It is a brief piece of information that appears on a Customer's financial statement. Its principal function is to clarify what the Customer is charged for.
- Enter the Base reference ID if needed or click Enter Origin reference ID manually:
- Base reference ID is used when the order is split into several payments. All those payments should have the same Base reference ID.
- An Origin reference ID is a unique ID you can link to your Merchant account.
If no data is linked to those ID fields, the system fills them automatically.

Details
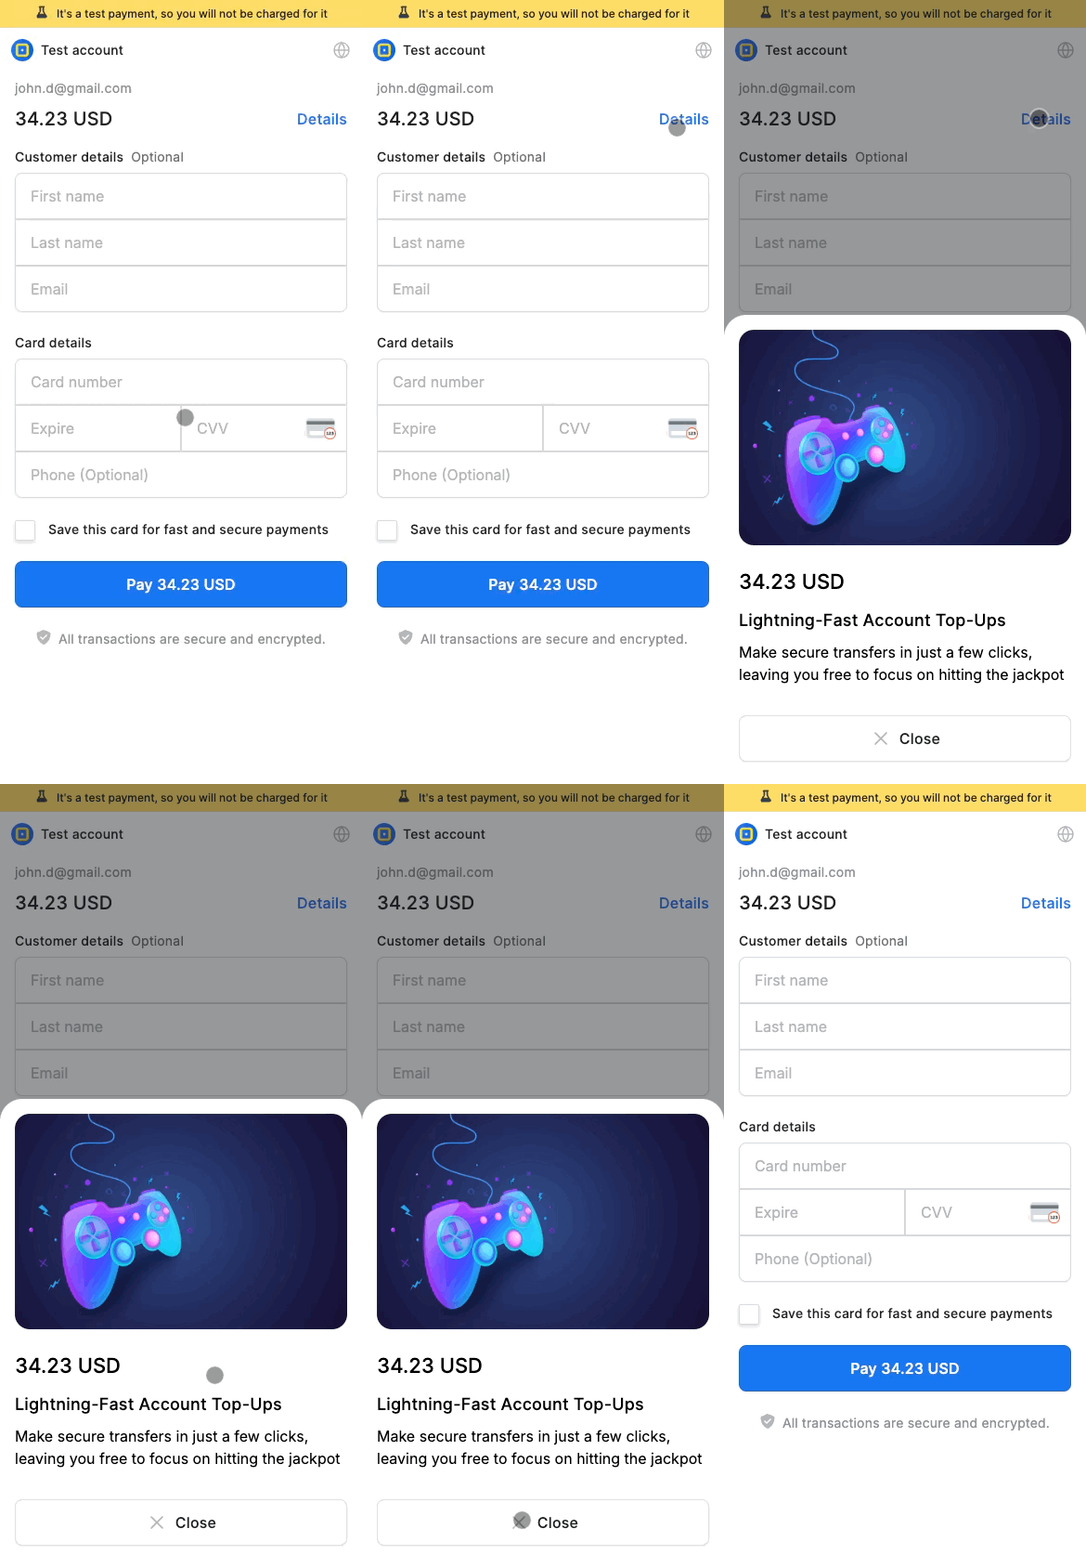
The section represents all the textual and visual data that may be displayed at Checkout if the related theme supports it.
- First of all, you can add a visual representation of the product the Customer pays for. Thus, enter the URL of the image that is supposed to be demonstrated into a corresponding field.
- To add more textual information regarding the product being purchased, add its Title and a Description with the relevant details.

Customer
The following section concerns the Customer who takes part in the Payment Commit. Preconditions that you need to know before dealing with this data block:
- You can create a Payment Request without specifying a particular Customer.
- Also, you can choose the given Customer from the existing list if you previously added Customers to the system. Click Select existing and choose your Customer from the combo box.
- Create a new Customer if necessary by clicking Create from fields. Then, enter the relevant data into the fields. You can also manually enter the Reference ID for your Customer. If you do not consider adding a unique ID, the system should fill this field automatically. To learn more, go to the Create a Customer for payment guide.
Flow options
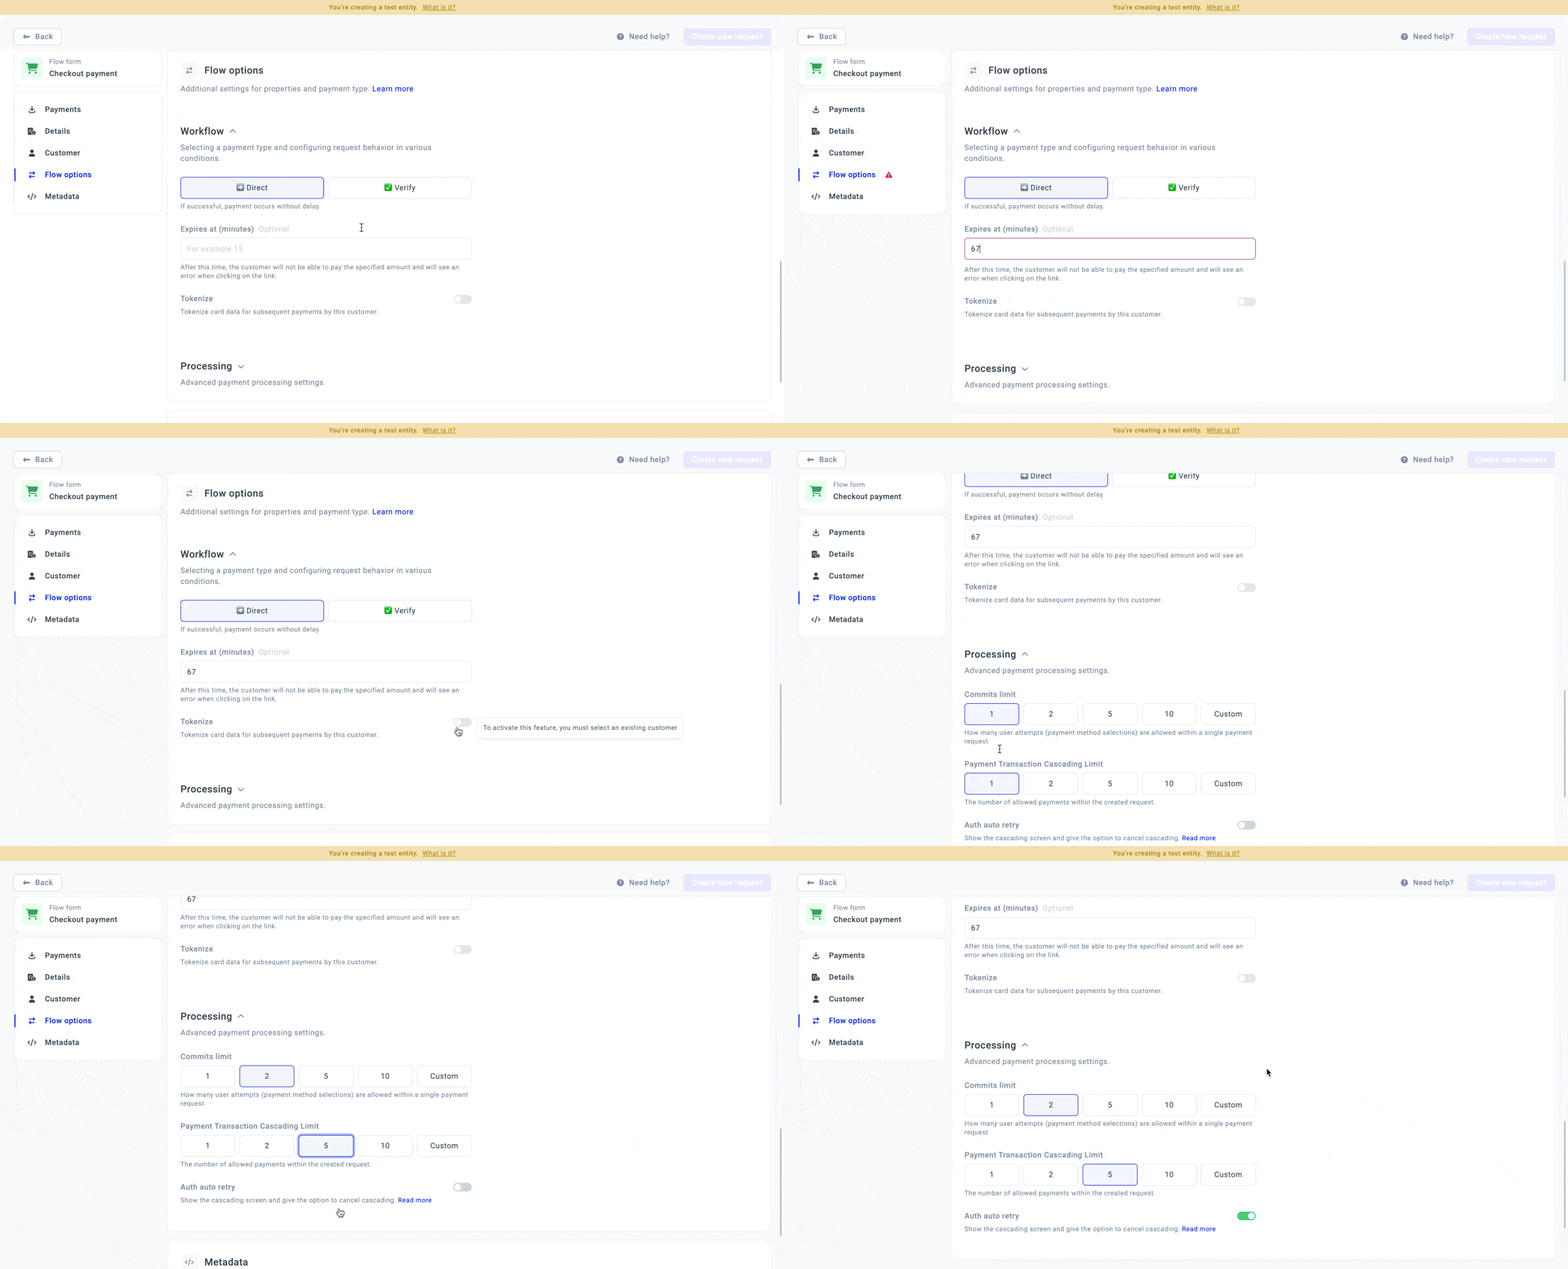
Flow options determine the request behavior based on the conditions you set.
1. Workflow
| Feature | Description |
| Payment type |
|
| Expires at | Set the specific time after which the payment link should expire and cannot be used. Enter the time number in the corresponding field. The value should be greater than 61. If you decide to skip this field, the system should fill it in automatically with the default value, which equals 15 minutes. |
| Tokenise | Tokenisation is storing sensitive payment account data (mainly card data) by assigning it a public key, a Token that can then be used as an alternative to sensitive data. Thus, you can store the token on your side, linking it to the Customer corresponding Payment account. You can use the Token for recurrent payments, for example.
|
2. Processing
| Feature | Description |
| Commits limit | You can select the number of allowed commits within the given request.
|
| Payment Transaction Cascading Limit | You can also establish the number of allowed payments within the created request.
|
| Auth auto retry | The system opens the Cascading screen and permits you to cancel Cascading if needed. To be more precise, If there are any issues in the payment process and you want to use the alternative Route:
|

Metadata
Metadata is the additional information that provides the valuable details on the created Payment Request.
- To add Metadata, enter the Key and the Value in the corresponding fields.
- To add another Keyand Value, click Add a new key.
Updated 3 months ago
