Create & Manage Checkout
Creating Checkout enables you to accept payments and efficiently facilitate the successful purchasing process.
Follow our step-by-step instructions to create and manage the Checkout within our system.
Create Checkout
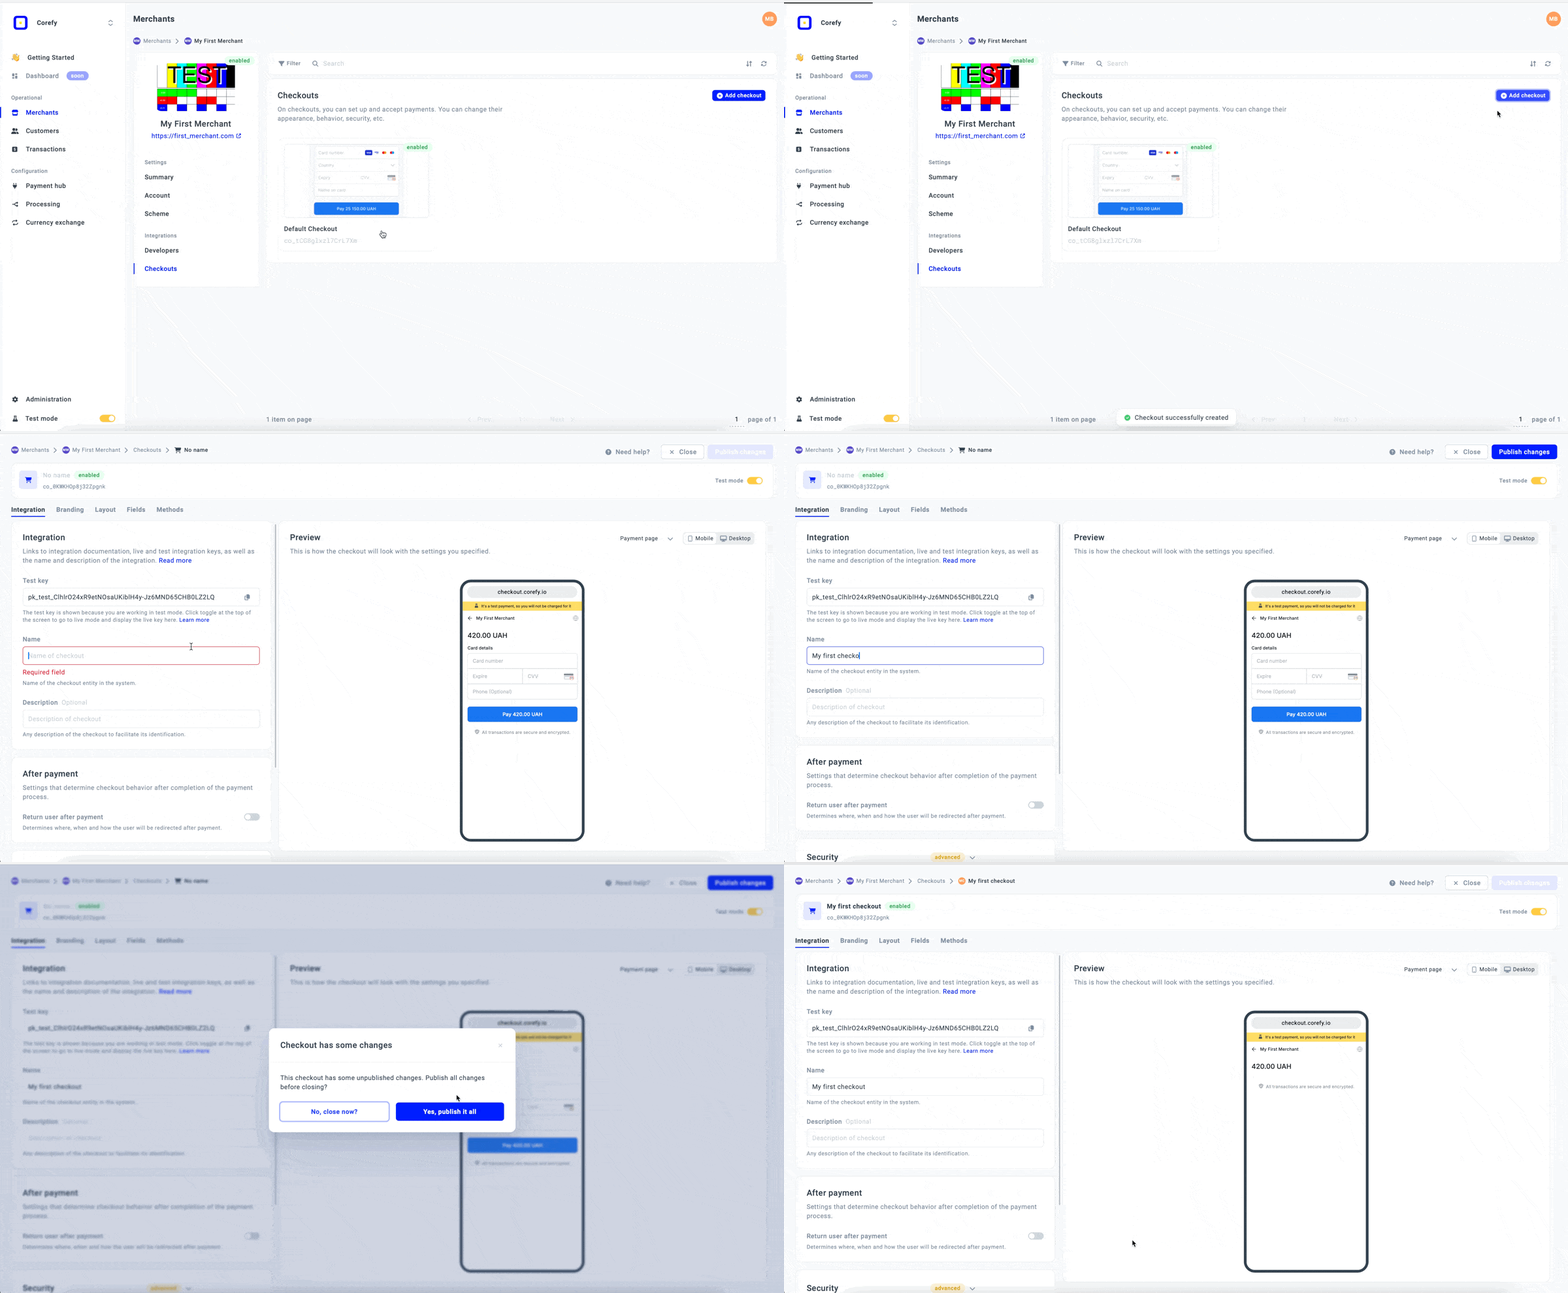
Here is the general flow for creating a Checkout:
- Go to Merchants and choose the Merchant account you previously created on the grid.
- If you still need to create the account, go to the Add Merchant account guide to learn the details.
- Go to the Checkouts tab of the specific Merchant account. Click Add Checkout.
- Enter Name and Description. When you skip the Name, this field fills in with No Name Checkout by default, and you can edit it later.
- The Test or Live key is predetermined automatically and is switched on depending on the mode you are using. To learn more, go to [Checkout integration].
- Click Publish changes to save the updates or continue applying other settings for a current Version: Branding, Layout, Fields and Methods.

Manage Checkout
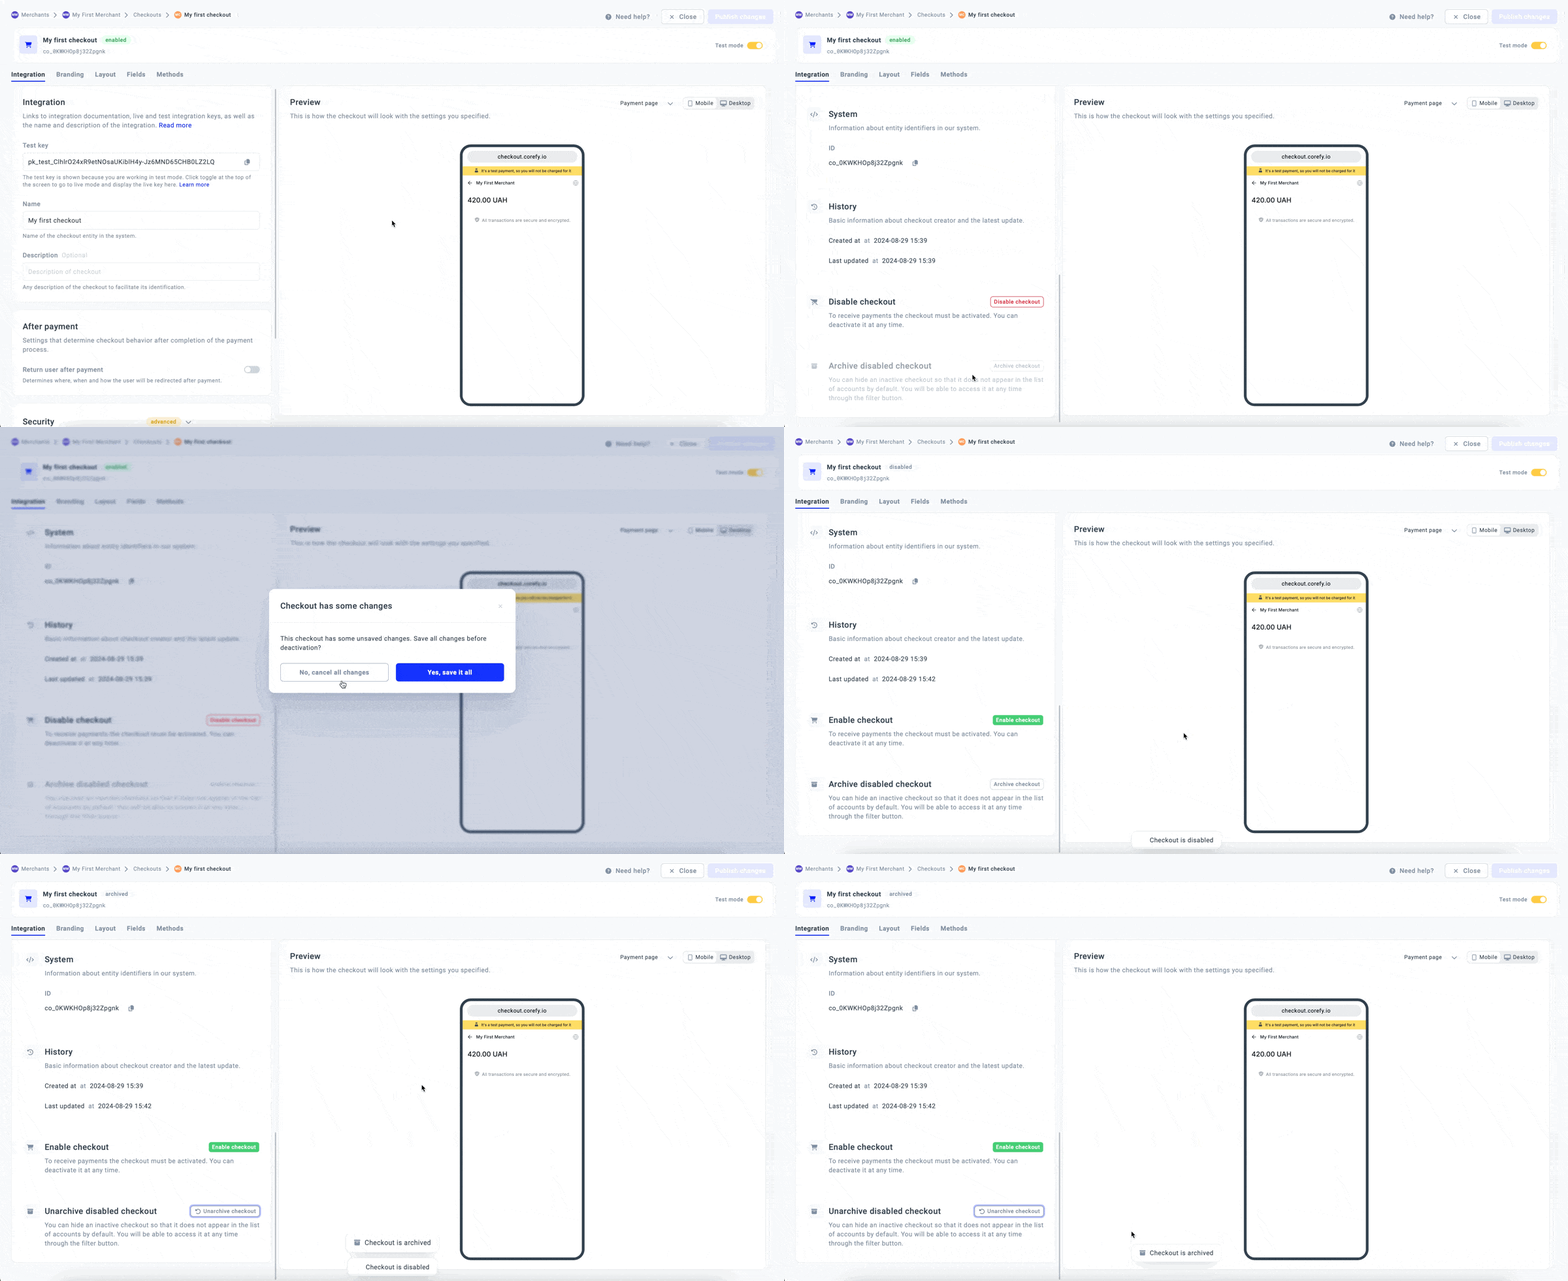
- Go to Merchants and choose the Merchant account on the grid.
- Navigate to the Checkouts tab and choose the Checkout you want to proceed with. Scroll to the Administration settings.
- You can review the System section, which includes the ID and the checkout History, which contains basic information about the checkout Creator and the Latest update.
- If you no longer need the Checkout, click Disable. If necessary, you can Enable it at any time later.

- When the Checkout is disabled, you can click Archive to remove it from the Checkouts section. To switch it back to the Disabled status, click Unarchive.
- The overview of all possible statuses the Checkout can obtain:
| Status | Description |
| Enabled | The Checkout becomes automatically Enabled after you create it in the system. |
| Disabled | When you Disable the Checkout, you cannot use it in the payment process. |
| Archived | If you Archive the Checkout, it no longer appears in the Checkouts section. You can access it only through the Filter button. |
Updated 3 months ago
