Create API key
API keys are the elements that can significantly reinforce security and data control. The main idea behind the API key usability is that the keys can be assigned to specific accounts and establish obligatory permissions to restrict unauthorised access.
In this guide, you can learn how to create the API key and set up the permissions appropriately.
Create API key via Dashboard
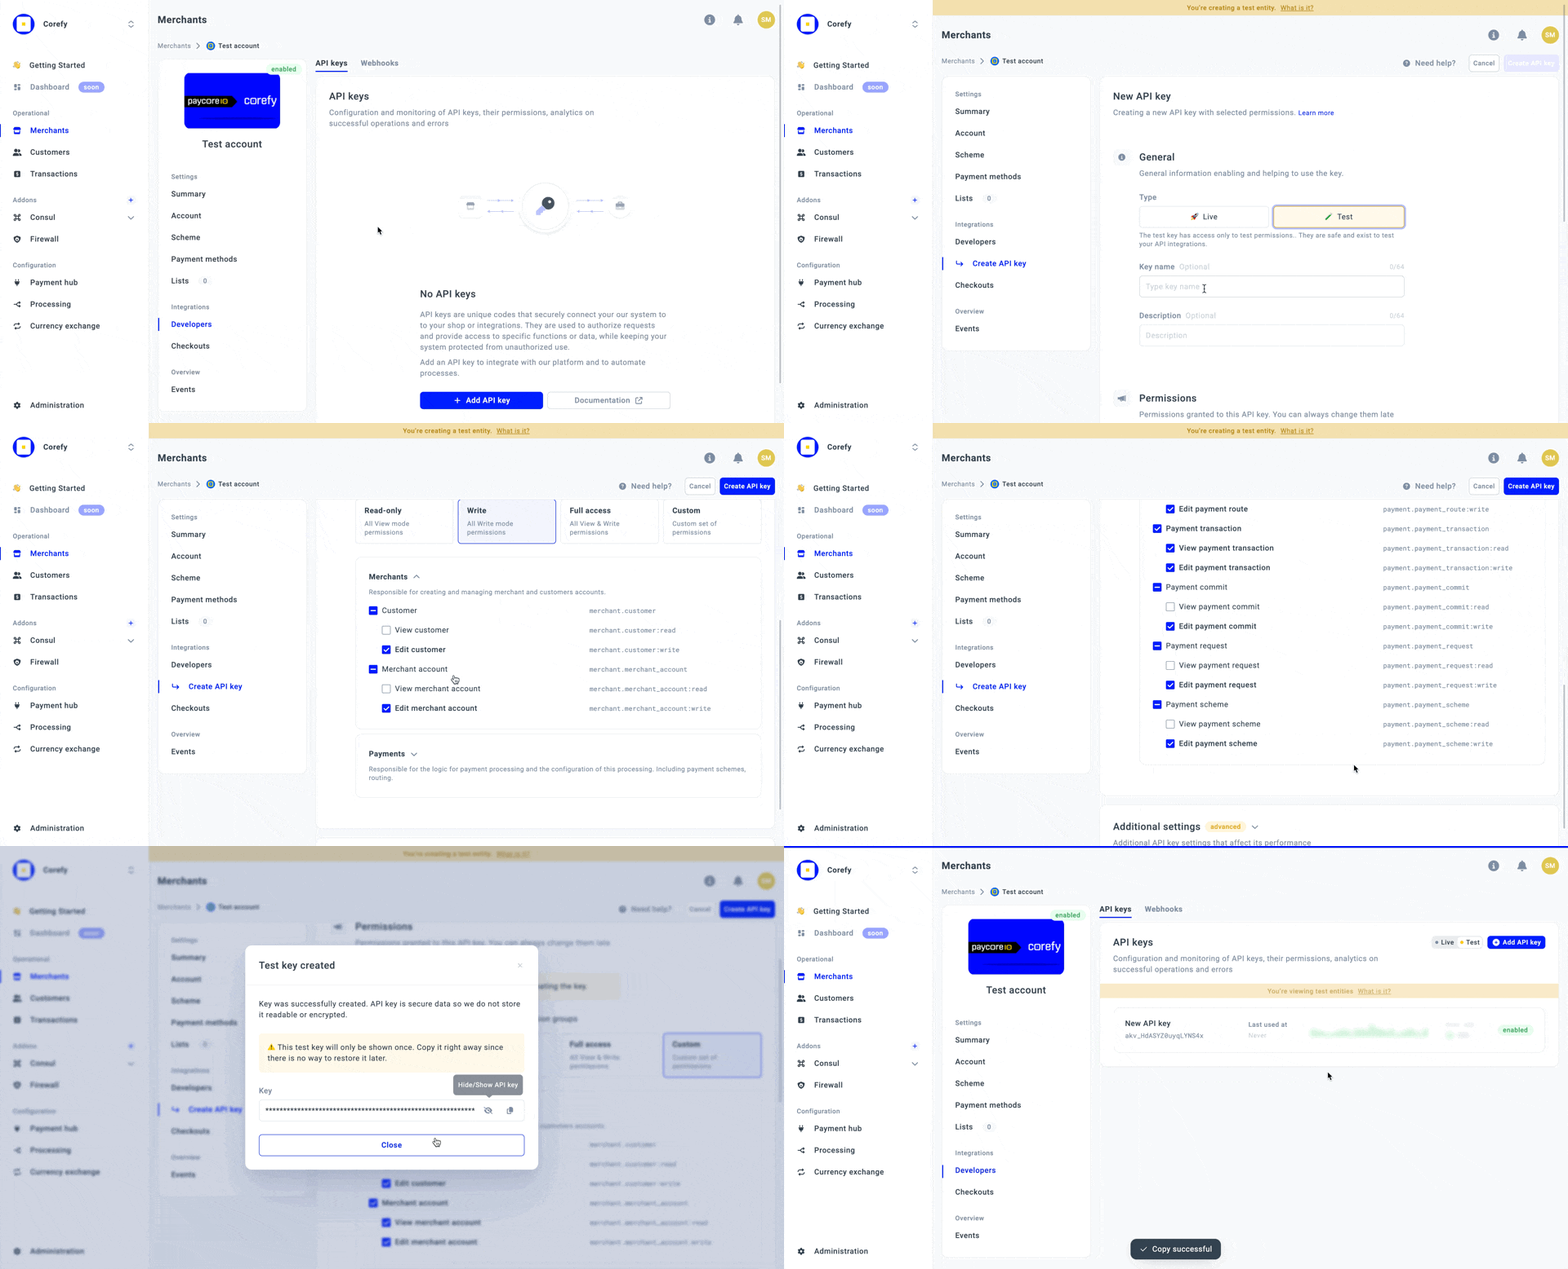
- Go to the Merchants tab and click the Merchant account on the grid.
- If you have not created the Merchant account, go to the Add Merchant account guide to learn the details.
- Then, navigate to the Developers tab of the specific Merchant account and click Add API key.
- Fill in the General information block. Select the key Type.
| Key Type | Description |
| Live | The Live key sets access only to live permissions. Ensure you check all the preconditions via the Live key before initiating the integration process. |
| Test | The Test key specifies access only to test permissions. It is safe to use this key in the test environment. Its principal function is to examine and test the API integrations carefully. |
- After that, you can optionally enter the key Name and Description.
- After you start the creation of the API key, it is crucial to establish the permissions due to security reasons. You can use our global presets to quickly configure all permission groups:
- Merchant scope
| Permission type → Entities ↓ |
Read-only | Write | Full access | |
| Customer | View Customer | ✅ | ❌ | ✅ |
| Edit Customer | ❌ | ✅ | ✅ | |
| Currency account | View Currency account | ✅ | ❌ | ✅ |
| Edit Currency account | ❌ | ✅ | ✅ | |
| Merchant account | View Merchant account | ✅ | ❌ | ✅ |
| Edit Merchant account | ❌ | ✅ | ✅ | |
- Payments scope
| Permission type → Entities ↓ |
Read-only | Write | Full access | |
| Payment route | View Payment route | ✅ | ❌ | ✅ |
| Edit Payment route | ❌ | ✅ | ✅ | |
| Payment statement | View Payment statement | ✅ | ❌ | ✅ |
| Edit Payment statement | ❌ | ✅ | ✅ | |
| Payment transaction | View Payment transaction | ✅ | ❌ | ✅ |
| Edit Payment transaction | ❌ | ✅ | ✅ | |
| Payment commit | View Payment commit | ✅ | ❌ | ✅ |
| Edit Payment commit | ❌ | ✅ | ✅ | |
| Payment request | View Payment request | ✅ | ❌ | ✅ |
| Edit Payment request | ❌ | ✅ | ✅ | |
| Payment command | View Payment command | ✅ | ❌ | ✅ |
| Edit Payment command | ❌ | ✅ | ✅ | |
| Payment scheme | View Payment scheme | ✅ | ❌ | ✅ |
| Edit Payment scheme | ❌ | ✅ | ✅ | |
- In case you need a different set of permissions that should cover the specific needs, you can create a Custom group of permissions. Simply switch on/off the specific permissions, and the system should automatically mark the group as Custom.
Pay attention!You can establish the permissions only when creating the API key without the possibility to modify it later.
- After selecting all the appropriate options, click Create API key.
- The system initiates opening a modal stating that the key is successfully created. It also includes the key itself. Be aware that you can view or copy it only once.

Updated 3 months ago
