

Initiate Route configuration
Routes establishment and configuration is a feature that enables creating specific Routing strategies and distributing the payment/payout flow in the most pertinent way.
For your information!Routes are the lower-level elements that function within a particular Method and work at the core of processing.
Configure Routes
- Go to Processing and choose the Payment scheme you previously created on the grid.
- Navigate to the Payment methods or Payout methods tab of the specific Payment scheme and click the specific Method on the grid.
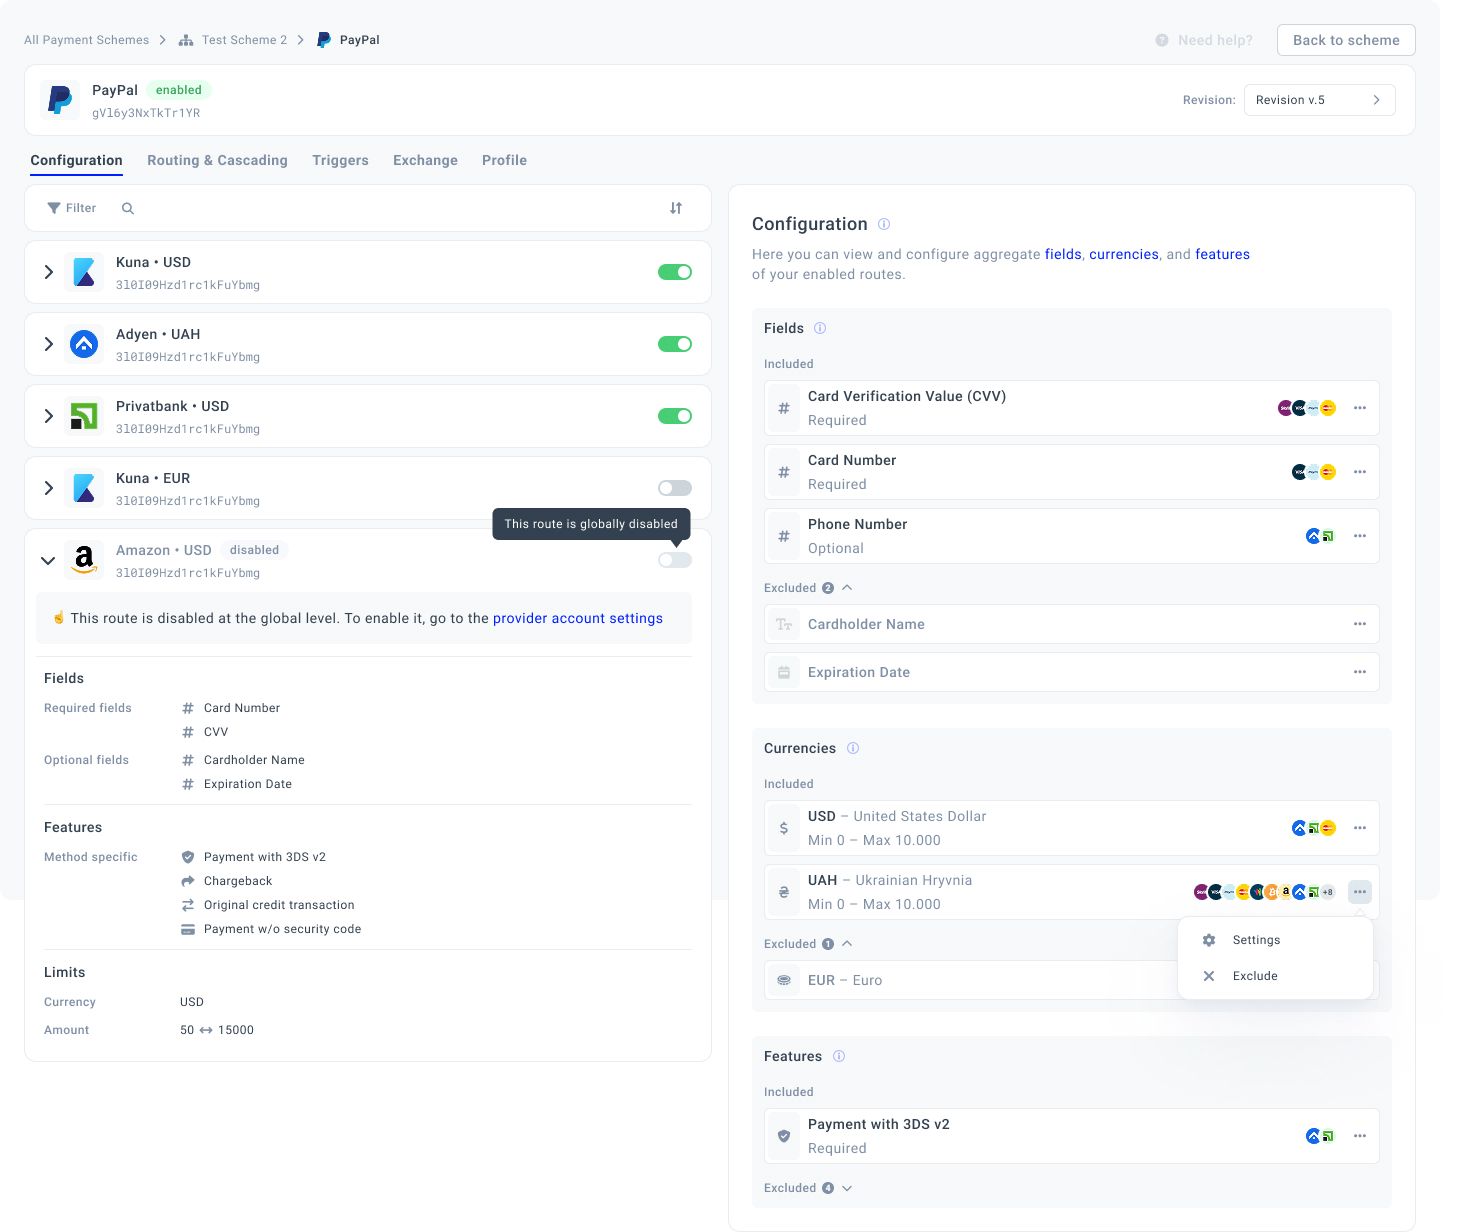
- Then, go to the Routes & Configuration tab. The page is divided into two parts. On the left side, you can review the list of Routes incorporated into the particular Method. You can also sort the Routes using the Filter icon or initiate a search of the desired Routes according to certain criteria via a Search icon.
- Each Route possesses a definite status:
| Status | Description |
| Enabled | The Route configuration requires the Route to be Enabled within the given Method. It becomes Enabled after you click its corresponding toggle. |
| Inactive | The Route becomes Inactive after you switch off the corresponding toggle. |
| Disabled | The Route becomes Disabled only when you switch it off in the Provider account settings. It cannot be used in processing. |
- You can review the Route configuration parameters by clicking the side chevron, which contains the following:
- Processing fields that are required or optional for this specific Route (e.g. Card Number, CVV, etc.);
- Features the Route supports (e.g. Payment with 3DS, etc.);
- Limits of the amount for a given Route (minimum and maximum values).
- On the right part of the page, you can review the Configuration that presupposes aggregating Routes parameters into one list based on similar peculiarities of each Route.
- The Configuration parameters are divided into three categories, namely Fields, Currencies and Features.
| Category | Description |
| Processing fields |
|
| Currencies |
|
| Features |
|
- You can Include or Exclude the specific field. Click the Action icon and choose the corresponding action:
- The Include option switches on the Inactive Route. Beware that it does not refer to the Disabled Routes.
- The Exclude option simply cuts off the related field.
- Then, you can save the new Version and use the Payment scheme that was previously configured or the Default Payment scheme in further interactions.
- You can also proceed with establishing the Routing scheme.