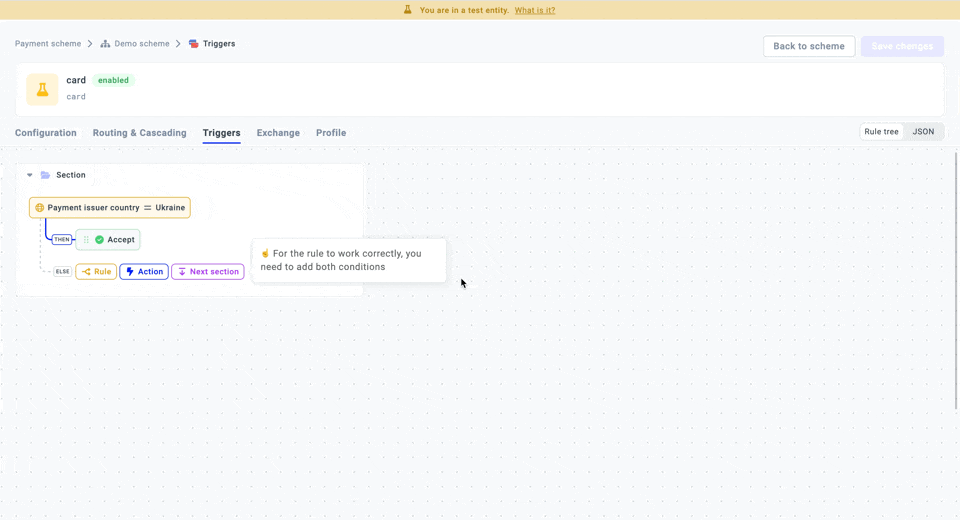
While dealing with Routing, you can set additional conditions or restrictions that should determine the transaction status and distribution. The Trigger scheme, just like the Routing tree, can contain a set of specific Rules and Actions brought together to establish the correct payment/payout functioning and workflow. When the Trigger conditions are met, the system initiates the Routing process and allocates the payments to the corresponding Routes.
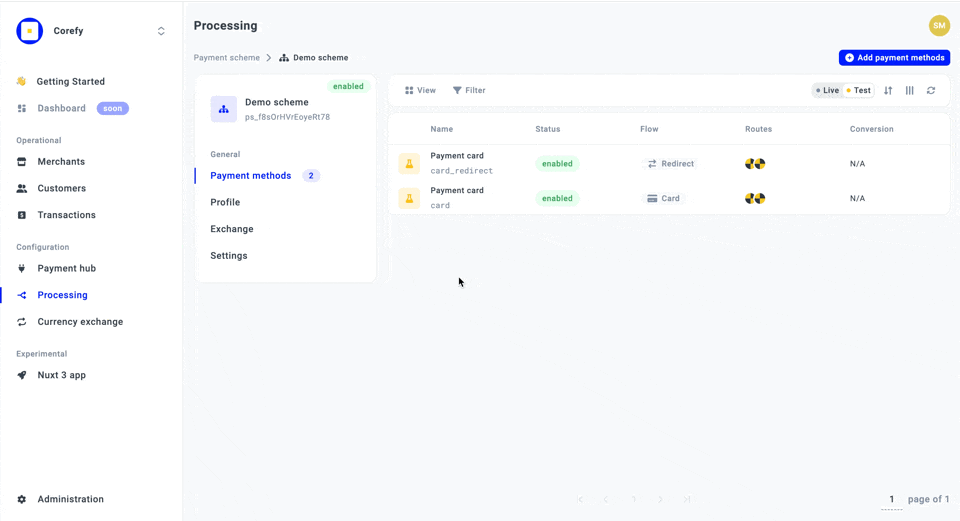
- Go to Processing and choose the Payment scheme you previously created on the grid.
- Navigate to the Payment/Payouts methods tab of the specific Payment scheme and click the particular Method on the grid.
- Go to the Triggers tab and click Create Trigger scheme.
- Click the Default strategy applied for every Method, then choose the Edit option. Navigate to the Rule tab.
- Each Rule specifies the condition, which consists of three parts: the Condition property, Operator and Value field.
- Choose the Condition property, apply the Operator and insert the Value into the corresponding field.
- To learn more about all the Properties, Operators, and value Preconditions, look at the tables below.
| Relational symbol/operator → chosen |
Description |
| Represents a direct equality between the Property and the Value and shows that the condition is fulfilled if the Property corresponds to the Value. |
| Indicates that the condition can be fulfilled if the Property and the Value are not equal and do not match. |
| Shows that the target Property value should be greater than the specified Value to fulfil the condition. |
| Shows that the target Property value should be greater than or equal to the specified Value to fulfil the condition. |
| Indicates that the target Property value should be less than the specified Value to meet the condition. |
| Indicates that the target Property value should be less than or equal to the specified Value to meet the condition and allow the system to choose the appropriate Route. |
| Shows that the Property value should be equal to one of several specified Values. |
| Shows that the Property value is not supposed to be equal to one of several specified Values. |
| Indicates an equality but can also include the partial match between the Property and the specified Value. |
| Signifies that the Property item or value is included in a List. If the List is created in the system, you can choose it from the dropdown list. If you have not created it previously, click Create List. |
| Signifies that the Property item or value is not supposed to be included in a List. You can point out a List in the Value field. |
- Go to the Triggers tab. Click the Default strategy applied for every Method , then choose the Edit option.
- Navigate to the Rule tab. After creating a Rule, click Add group.
- Choose the logical operator AND/OR depending on what condition you want to establish and what result you aim to get in your Trigger scheme.
| Logical operator |
Description |
| Requires all conditions to be true to get the specific result and allow the system to apply a corresponding Route. |
| Requires at least one condition to be true to initiate Routing. |