Employ Routing actions & Cascading
It is crucial to implement a Routing strategy to start the Routing process and ensure the system distributes the payment load to the right Route. The Strategy defines the algorithm that dictates how traffic should be delivered in the predetermined order and way.
Choose Routing strategy
| Routing strategy → switched on | Description | Actions Cascading |
| Direct | The Routing is performed on a single Route and does not presuppose any alterations. You can choose any Route presented in the system and build the Routing based on it. | In this case, the Cascading is not fully presented as the direct method presupposes one Route. If it is unavailable and no other Actions are applied for a particular condition, the payment is terminated. The Cascading moves to the next Action if it is applied. |
| Optimal |
The system makes the appropriate calculations and then selects the Route that leads to the highest conversion rates. The payments should be distributed using the first appropriate Route. If the route is unavailable due to some technical reasons, the load is delivered on the second available Route. This case depends mainly on the amount of transactions in the Payment Request. When you switch on the Select all Routes and automatically add new ones option, the system allows you to link new Providers and build the Routes for them while automatically adding them to the Optimal Routing strategy. |
The Cascading is initiated starting from the Route with the highest conversion potential. If it is unavailable, the payment distribution should be made via the next available Route with a lower conversion mark than the previous one. The number of all the recursive attempts is equal to the number of Routes added to the Optimal Routing strategy. |
| Turnover Limit | The system stops Routing for a particular Route with the set Turnover Limit after the maximum transaction volume of total processed payments is reached. The limitation is applicable 24 hours. After that period, the Route becomes accessible again and may be used further.
|
The Cascading is performed based on the priorities and initiated after the Turnover Limit is reached for the highest prioritised Route. After that, the system should attempt the Routes that go next in order and thus have a lower priority accordingly. In addition, the system shows the established Turnover Limit per Route right on the Routing tree. |
| By Weight | You can establish the Routing and plan how the payment traffic should be divided in the percentage equivalent. |
The Cascading is initiated on the first appropriate Route after the system calculations so that the percentage mark can be equal among all the Routes. If the Route is unavailable, the system continues reaching the Routes that are more relevant among other ones. |
| By Priority | You can set the priorities based on the Provider requirements, and the payment traffic should be distributed to the Routes with higher priority. If the Route with the highest priority is unavailable due to some technical reasons, the system automatically uses the second Route with the highest priority among all other ones. | The Cascading works firstly from the Route with the highest priority. If it is unavailable, the system should consequently make attempts to the Routes with lower priority. |
| By Balance | The system sets up the Routing based on the route with the lowest balance. It results in risk diversification, and the payments should be distributed equally to the medium balance mark. | The Cascading strives to distribute payments via the Routes with the lowest balance. If the given Route is unavailable, the system attempts to work with the next Route with the low balance. |
| Terminate | The system stops Routing on a particular condition and specifies the reason for the termination. You can set the resolution the system should display based on your needs and preferences. | The Cascading is fully stopped when the Terminate action is applied. |
Set up Action group
The Action group is responsible for initiating the Cascading feature that significantly minimises the amount of failed transactions. It can eventually lead to higher conversion rates and risk prevention. Such a process presupposes building separate groups per different Routing peculiarities and forming a continuous workflow that stops after the transaction execution. Furthermore, the system can require further investigation practice after a certain number of attempts.
How does it work on a higher level?
- The system automatically chooses the following Action based on the previous payment resolution.
- Also, you can set the Payment transaction limit in the Payment method settings, which should influence the Cascading. The default number of the concurring attempts equals 5.
- When creating a Payment Request, you can change the attempt settings and their number regardless of what is established on the Method level.
- Actions cascading work similarly to the By Priority Routing strategy.
- If the system fails to initiate the transaction on a particular Route, the Route cannot be used in the further Routing process.
Use Drag-and-drop for Rules and Actions
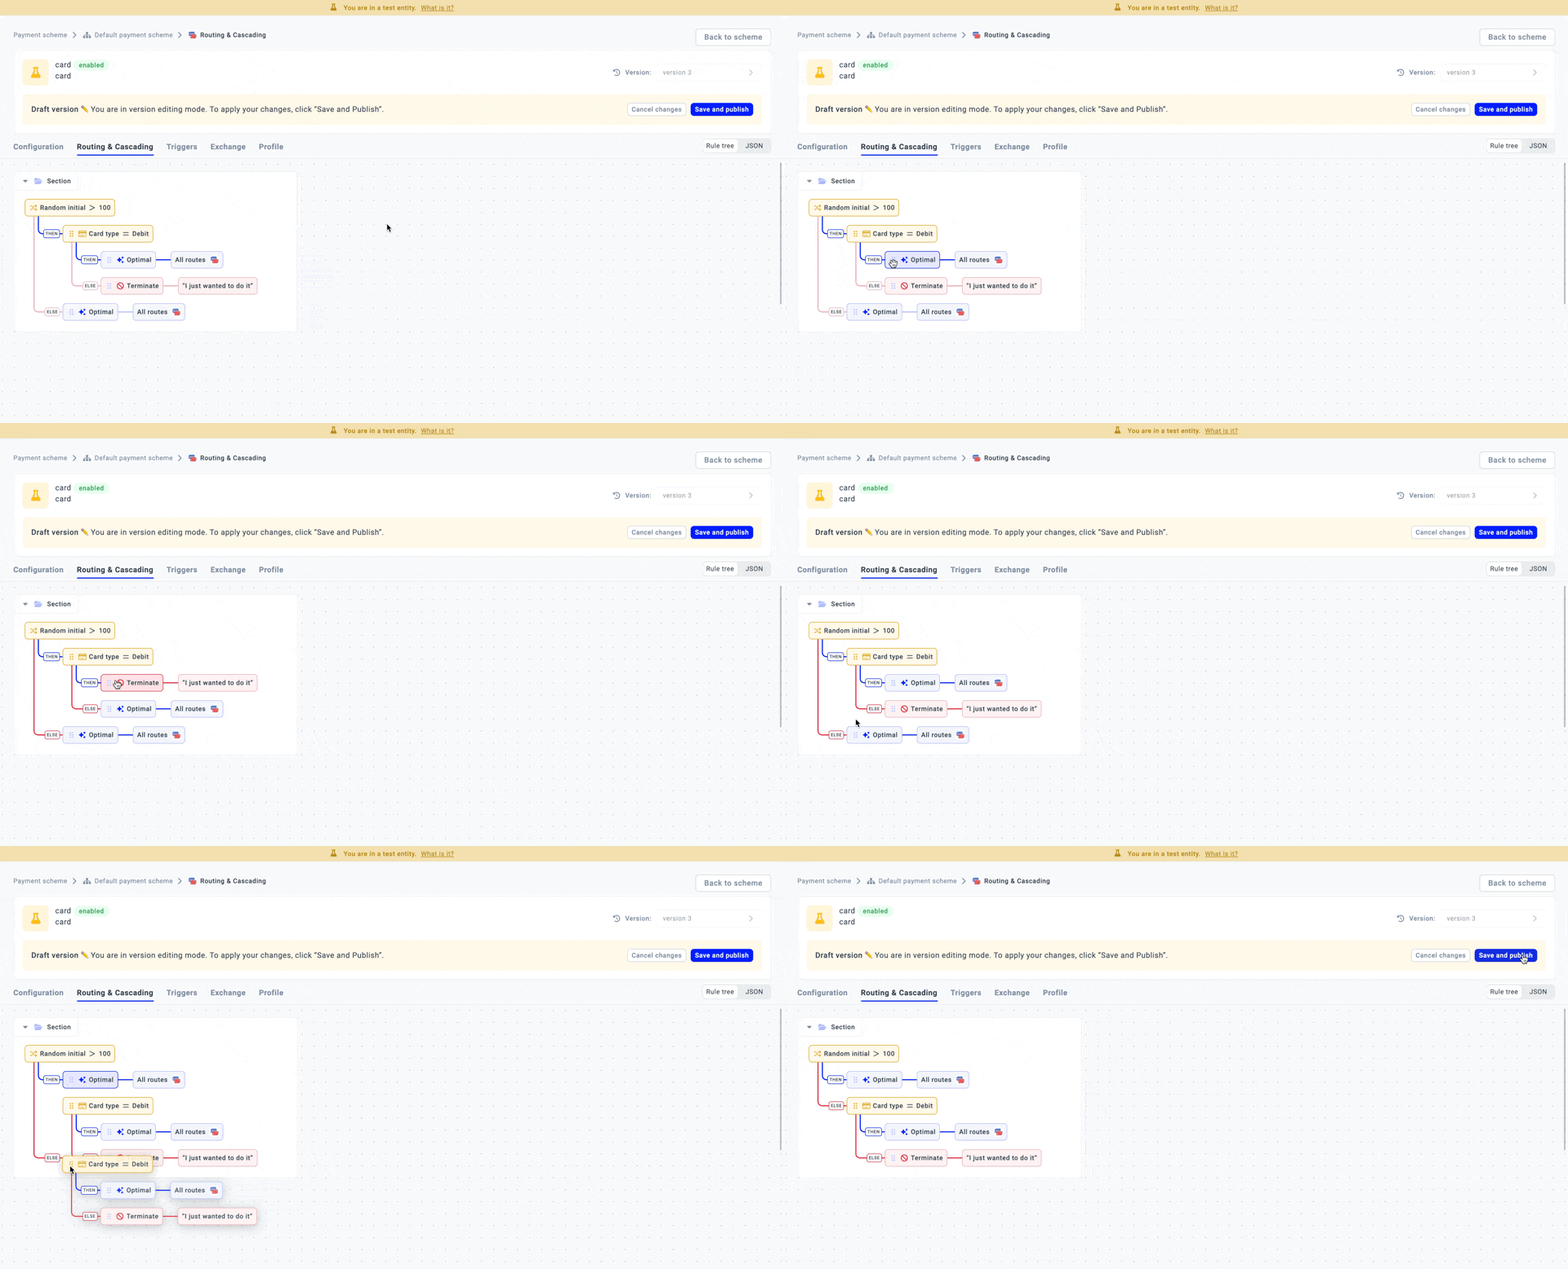
Drag-and-drop functionality allows you to reorder Rules and Actions according to your needs. Thus, you do not need to establish a new Routing scheme for rearrangements.
- Go to the Routing & Cascading tab of the particular Payment method.
- Select the Rule or Action you want to drag and move it in the appropriate direction.
- Click Save and publish. The system should create a new Version of Routing that can be used or modified further. To learn more about Versions, go to the Discover Versions guide.

Review options in JSON editor
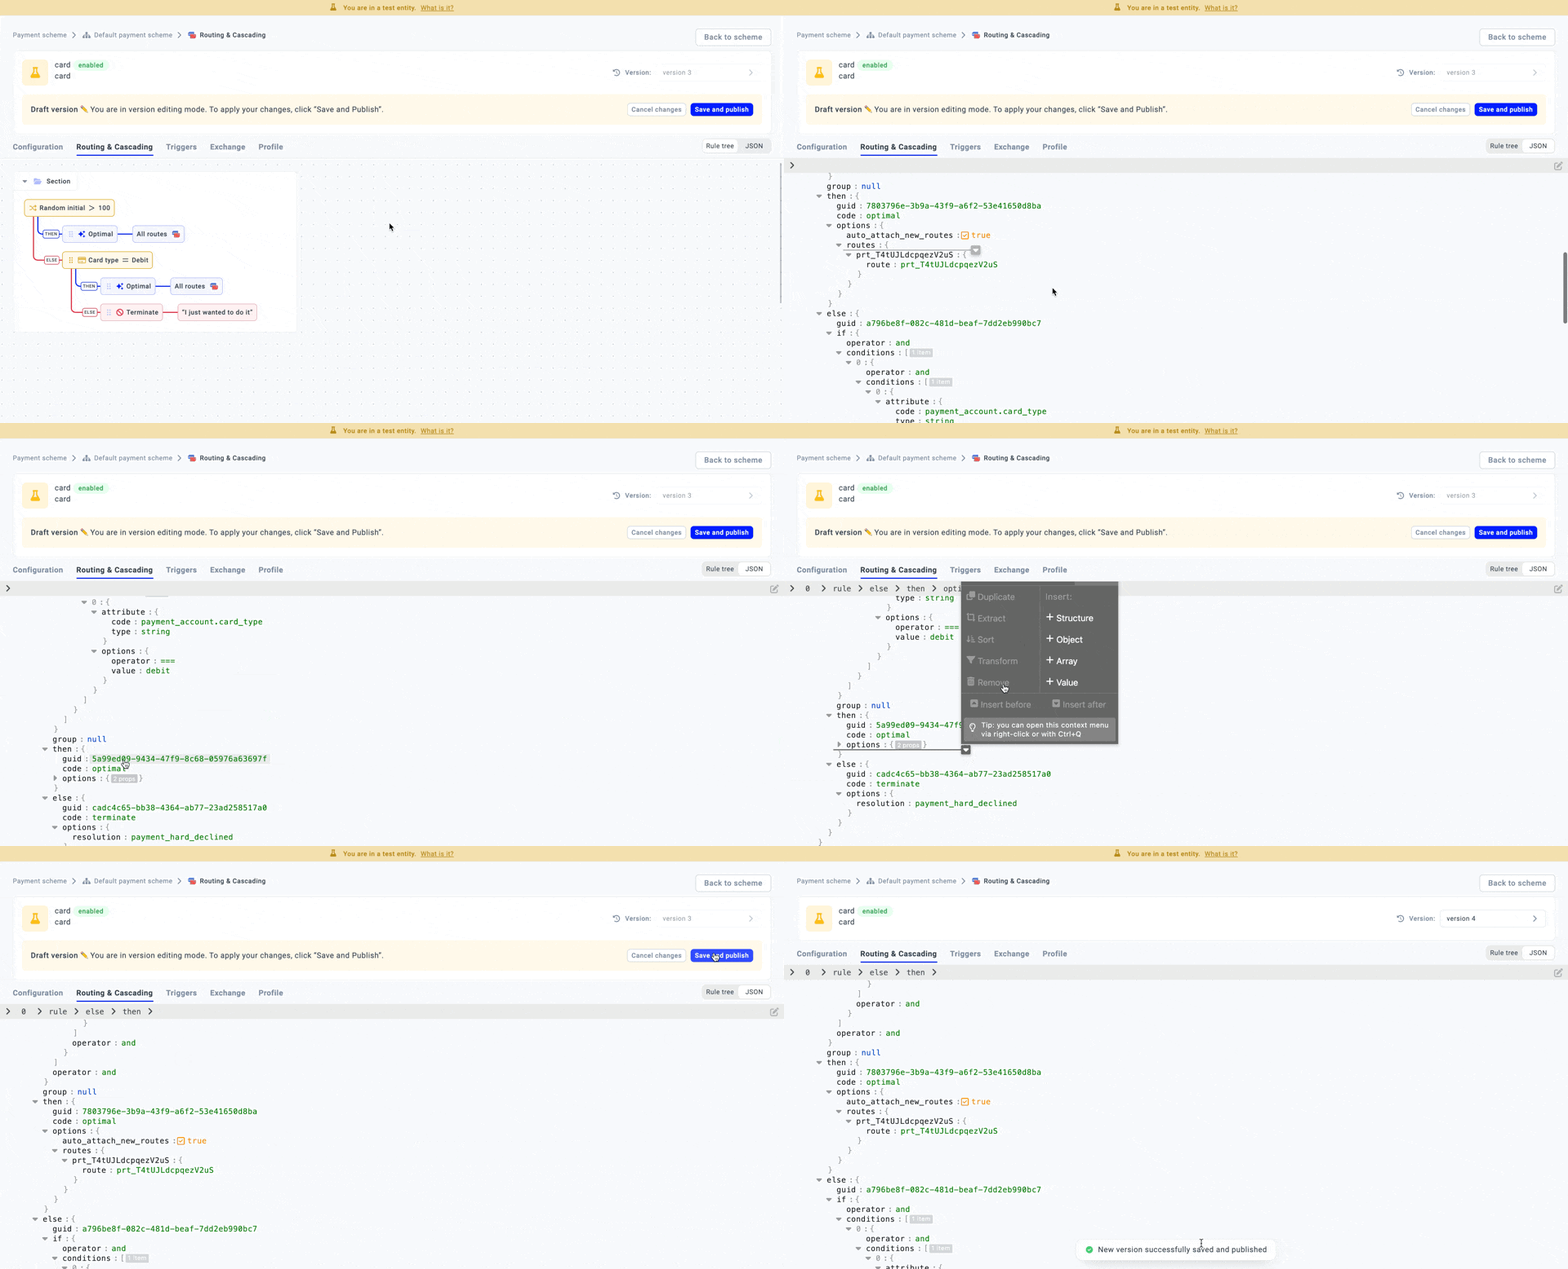
You can use the JSON editor to review and update the Routing scheme under the hood.
- Go to the Routing & Cascading tab of the particular Payment method.
- Switch from the Rule tree to the JSON editor.
- Review the Routing scheme in the JSON format and make changes accordingly.
- You can also import and export the data as necessary.
Be aware!When the scheme structure is lost, you cannot save the changes.

Updated about 2 months ago
