Add Merchant to a List
Lists are convenient forms of aggregating data of similar types, allowing one to examine certain elements more closely, compare data, and analyse it from different angles. Our system provides you with various options for creating Lists.
Regarding the Merchants, you can add a Merchant to a definite List in two ways, using:
Administration tab
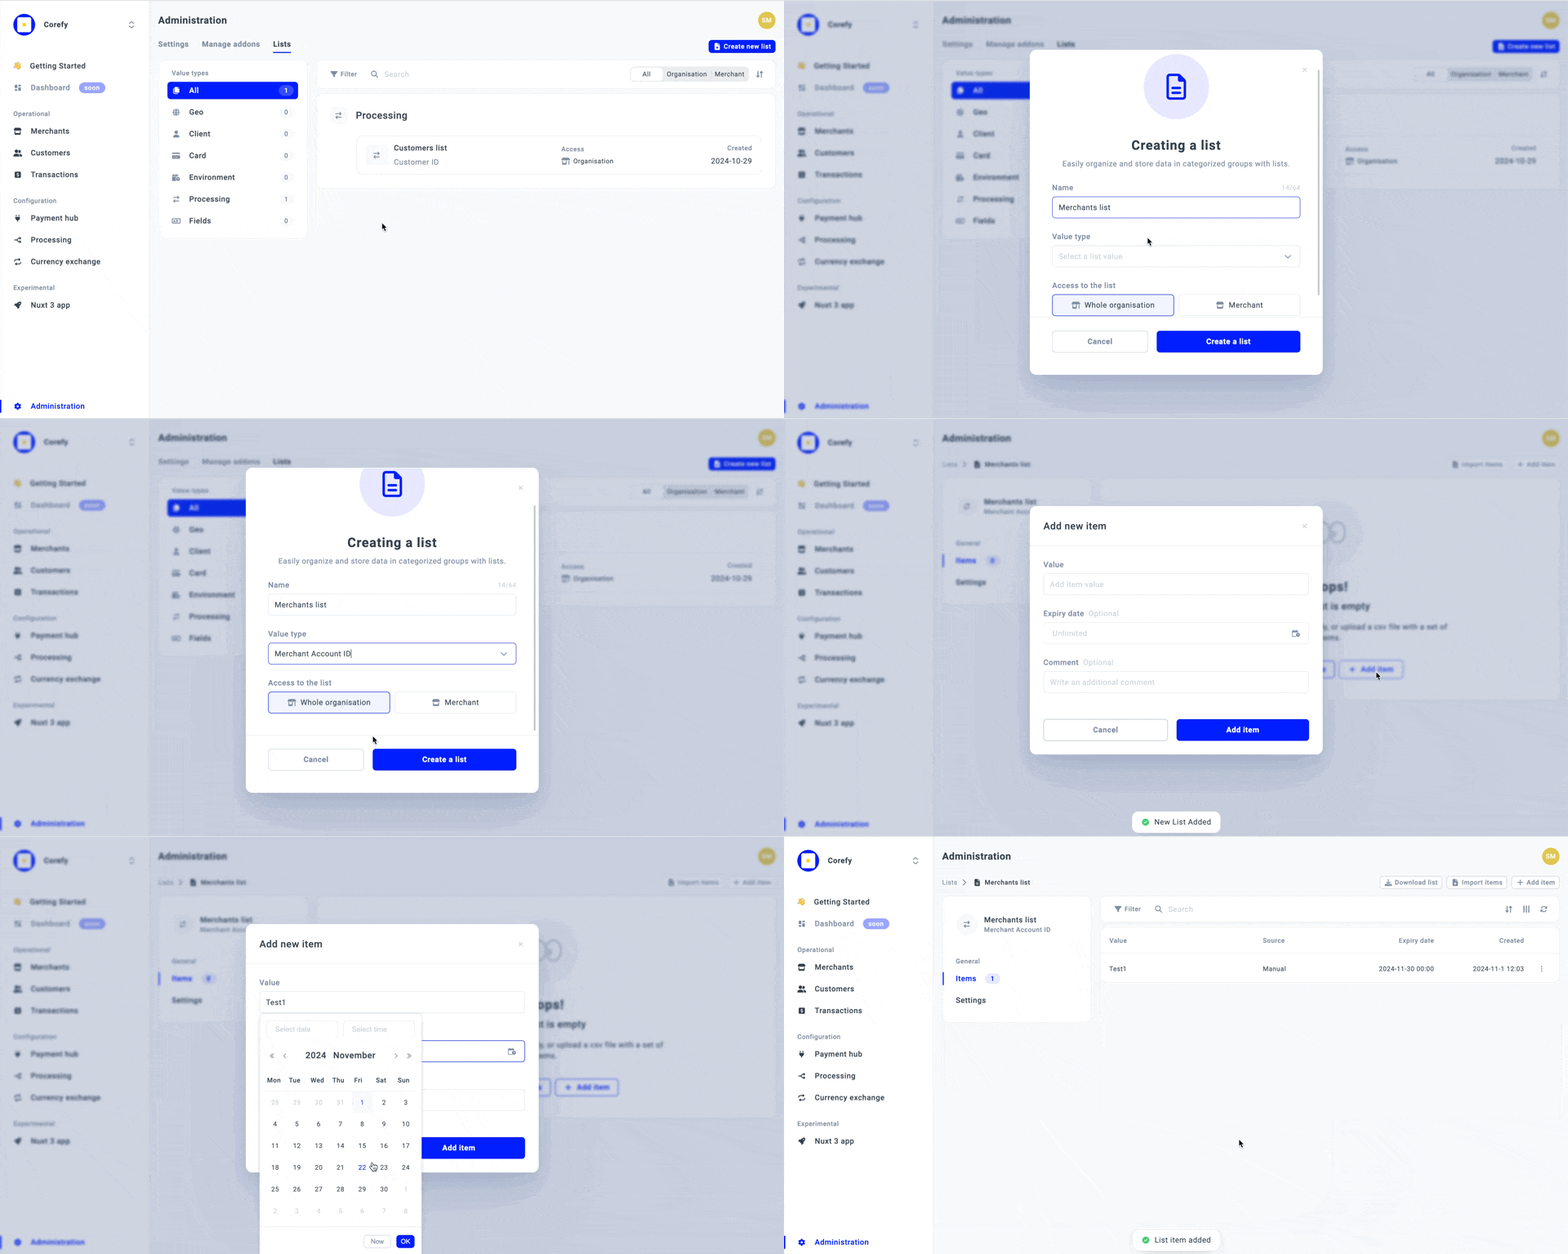
- To add a Merchant to a new List, go to the Administration tab.
- Then, go to the Lists tab and click Create New list.
- The system initiates opening a modal. Enter the list Name in the corresponding text field.
- Then, select the Value type from the combo box. The Value type determines what information should be stored in the given List.
- Choose who can access the list. Click Whole Organisation to grant access to its every Member. To enable limited access, click Merchant and select the Merchant account in the combo box below. Click Create a List.
- To add items to the List, click Add item. Enter the item Value manually, and add the Expiry date and a Comment if needed. Click Add item.
- If you decide to add the Expiry date, be aware that the item is no longer valid after it expires.

Merchant overview
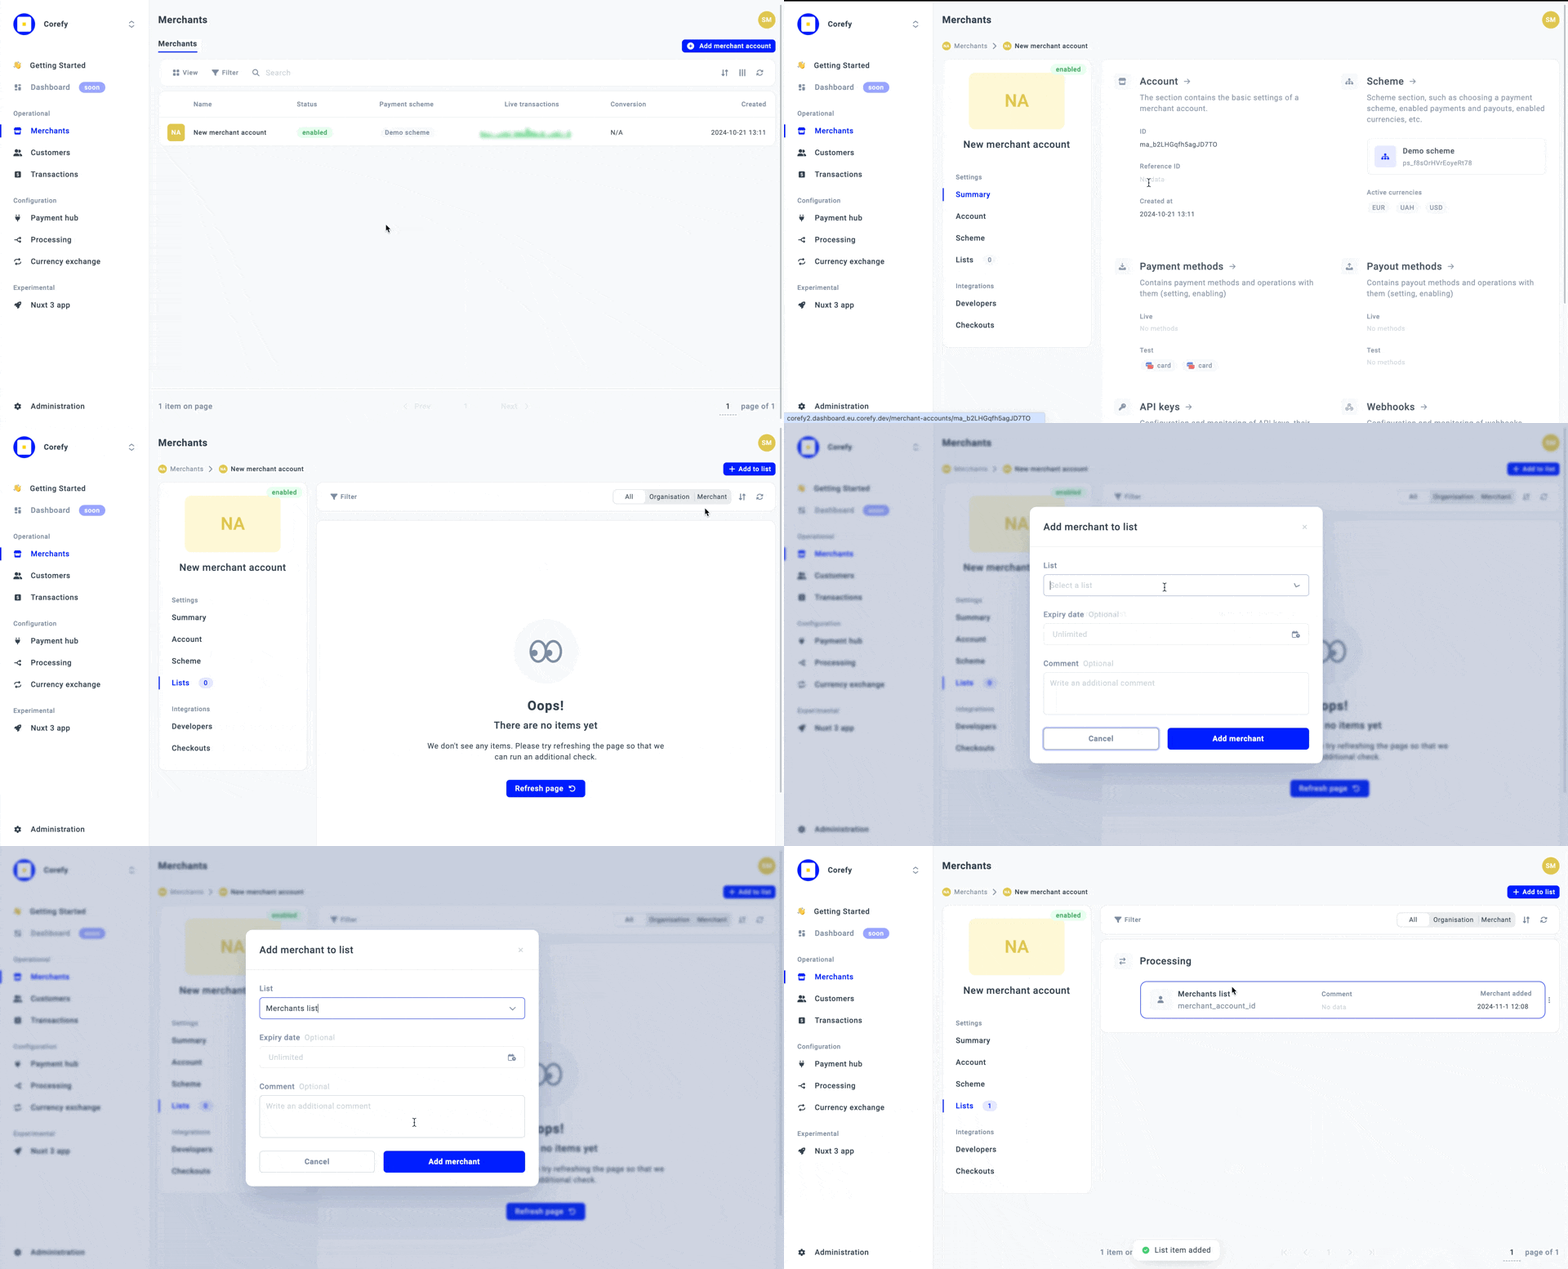
- To add a Merchant to an existing List, go to the Merchants tab.
- Click the specific Merchant account on the grid and navigate to Lists section.
- Then, click Add to List. It triggers the opening of a modal.
- Select a List you want to add the Merchant to from the combo box. Add Expiry date and a Comment if needed.
- Click Add Merchant.

Updated 3 months ago
