🛠️ Views & Toolbar
Establishing and creating easy-to-use views can seriously influence your perception of big chunks of data and facilitate the process of data tracking. Our intuitive functionality is designed to assist you with structuralisation and provide a toolbar capable of organising data from different angles and aspects.
It also aims to enable you to interact with the valuable information meaningfully.
Set up filters for your fields, manage columns, save different views and apply the most appropriate ones where needed.
Understand the List View logic
The list view is practically simple but highly efficient in data representation and management. While creating different entities within our system, they are stored in the form of lists & grids. Thus, you can look at different list fields, sort them out and rearrange them based on your preferences. It allows you to keep your data clean and up-to-date and use it accordingly for further payment processing.
1. Create a View
You can create a View to arrange the fields for the specific entities you previously added to the system, such as Payment schemes, Merchant accounts, etc.

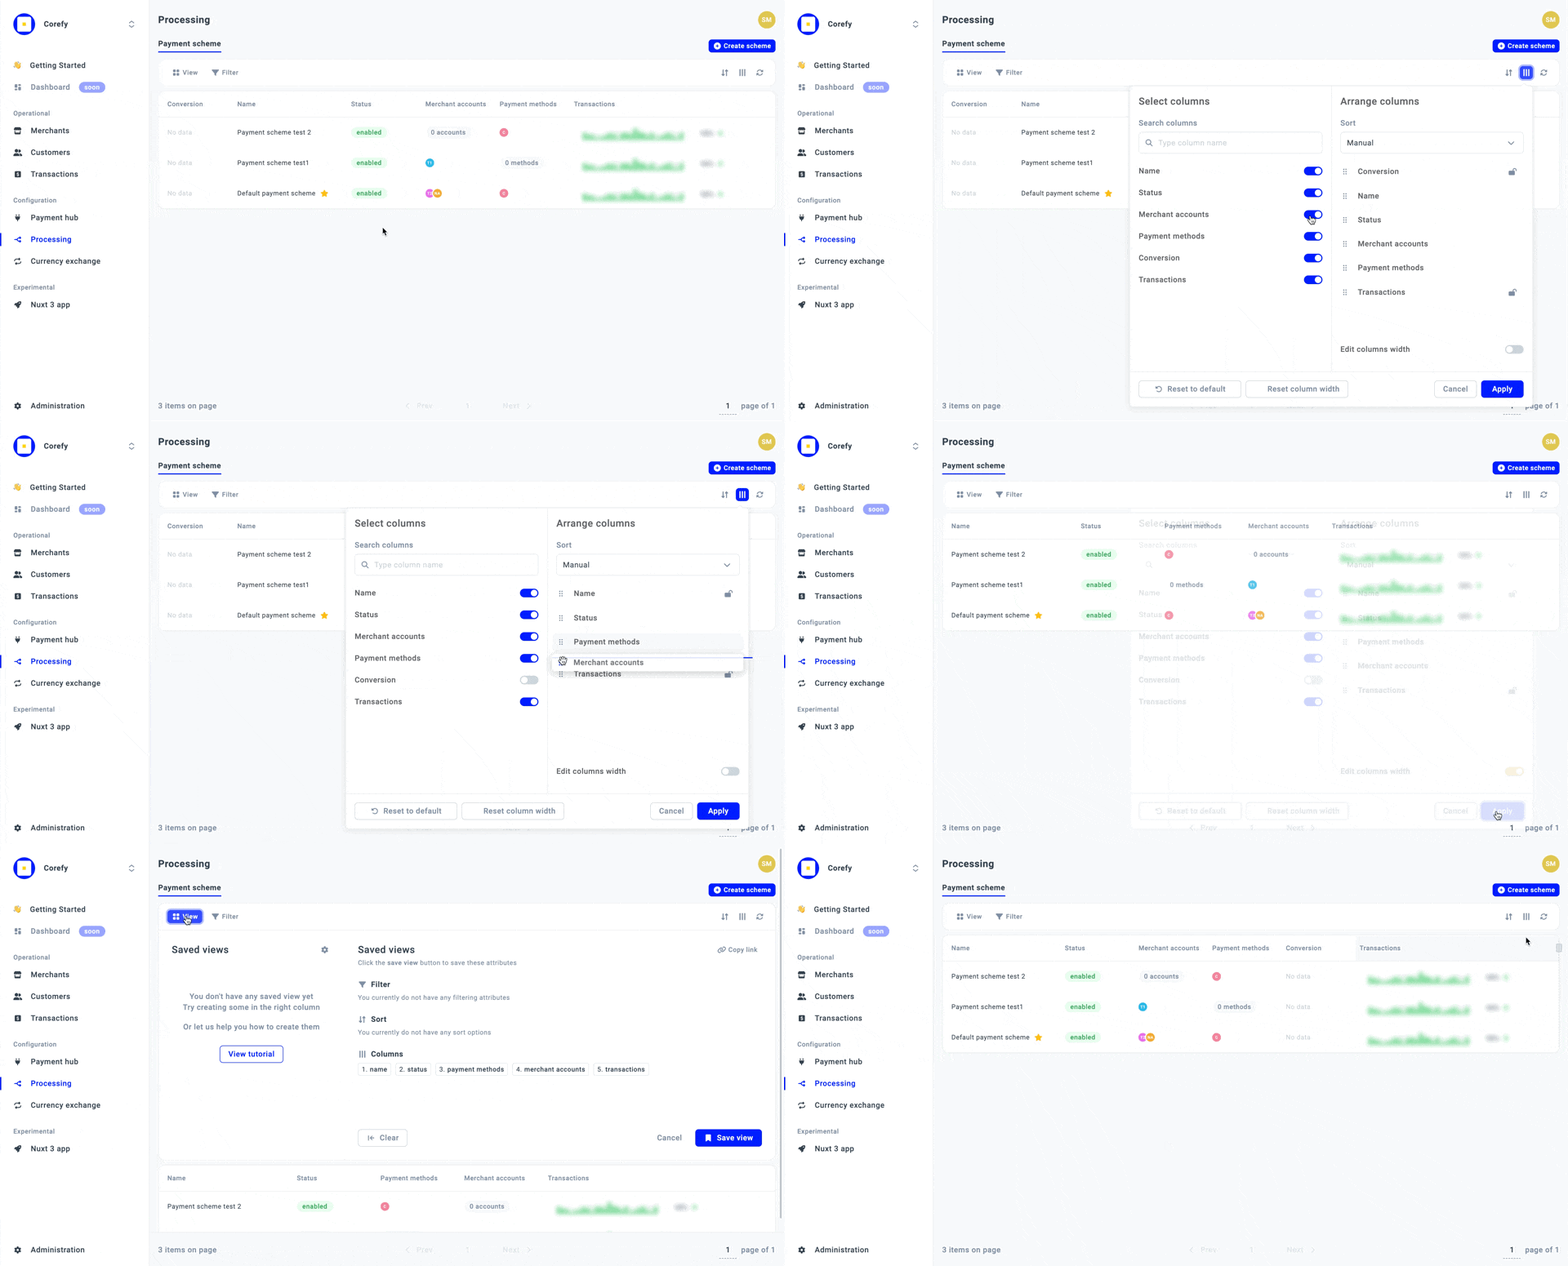
Use our toolbar that contains such elements as:
| Toolbar element | Description |
| View | When you click this option, you can review the created Views and choose the one that best represents your current requirements and tracking approach. |
| Filter |
The Filter option allows you to sort out the entities by their Status in our system (created, enabled, disabled). You can also decide whether to show or Hide the archived entities by clicking the corresponding toggle. |
| Rearrange Data | The option enables sorting and arranging data in Ascending or Descending order. |
| Manage Columns | To manage the columns, you can select the entities and arrange them manually by dragging the entities or putting them in Ascending or Descending order. |
| Refresh Data | The option helps you keep the data up-to-date and easy to comprehend. |
2. Apply & Clear a View
- When you establish the desired View for your list with entities, you need to apply the changes. Thus, click Apply after all the fields are managed and when the layout is formed.
- When you have any Views created beforehand, you can choose one of them in the View window and click Apply.
- If the View is irrelevant and does not suit your requirements, you can click Clear.

3. Save a View
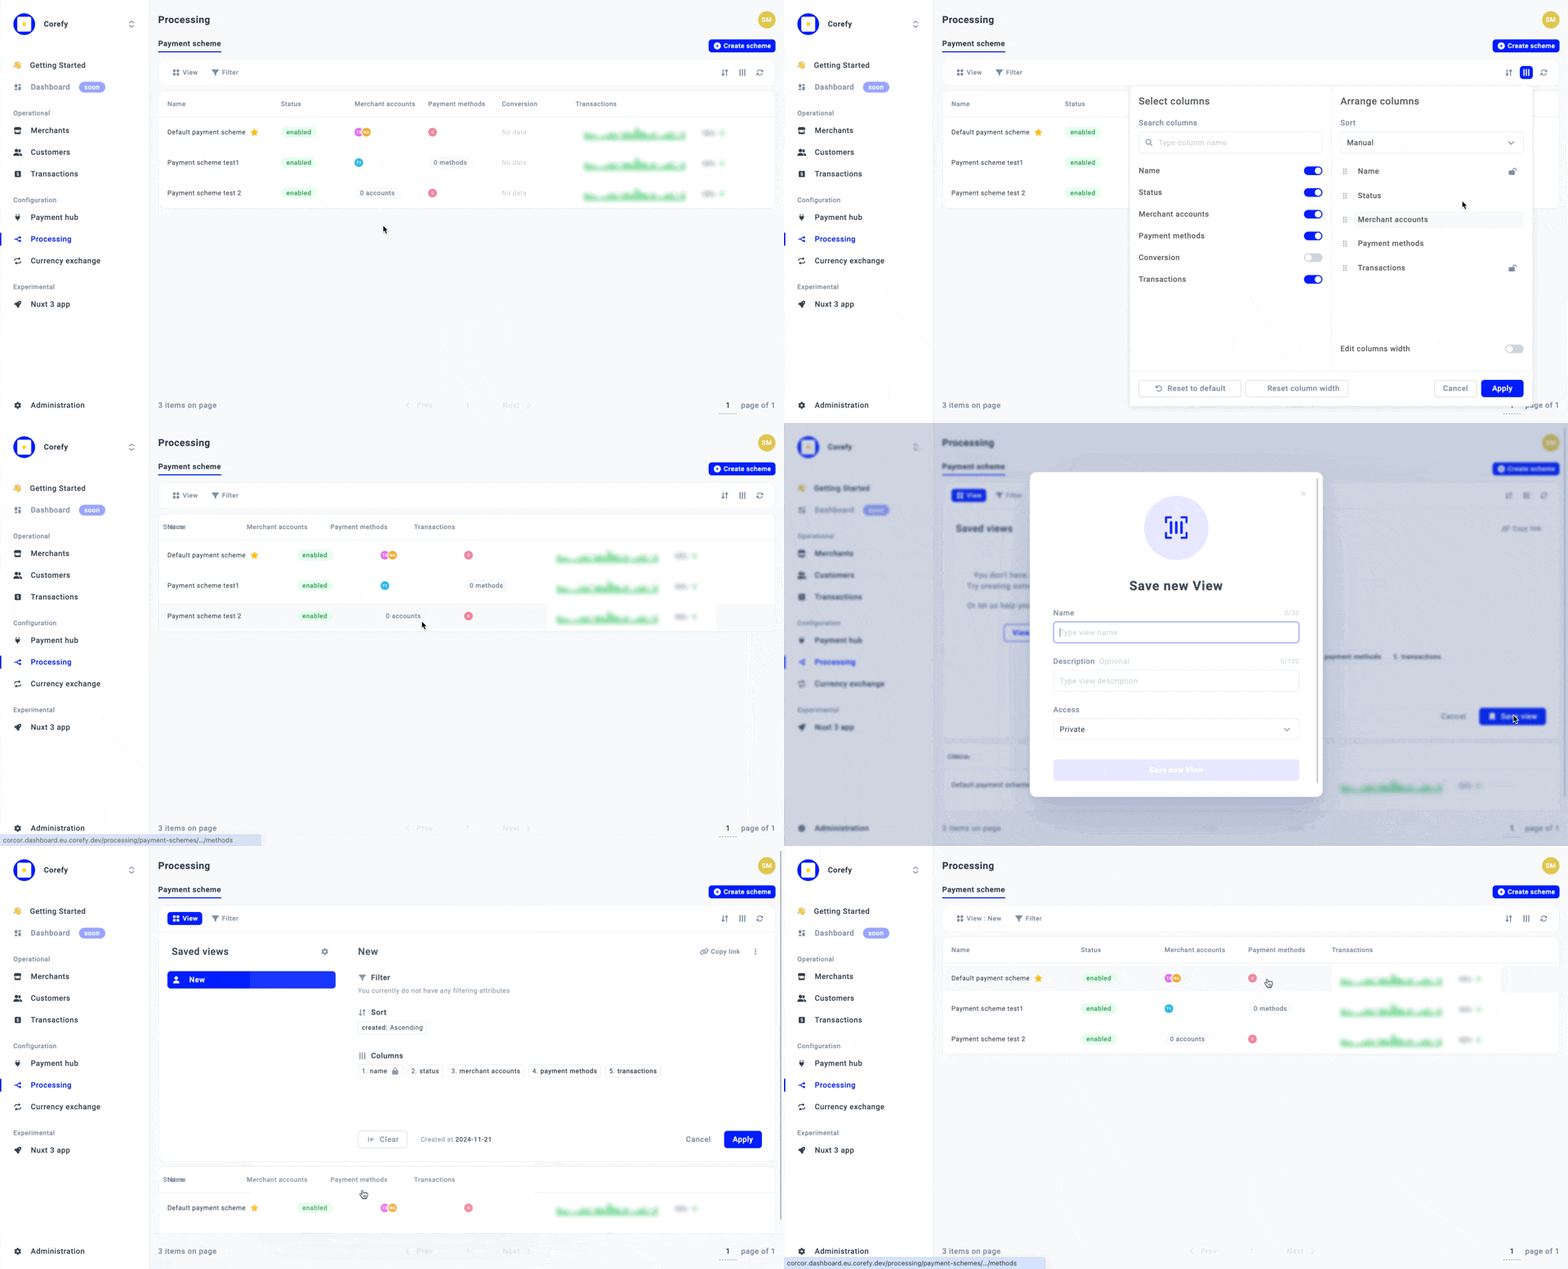
After editing your View, you can save it and reuse it in the subsequent data analysis sessions. It is a good practice while working with different View options and a high data load. Therefore, it should be more convenient to track your specified fields and single out the ones you need to look at and examine precisely.
- When you finish building the View, go to the View icon and click Save.
- Enter the view Name, Description and Access type: Private or Share.
| Toolbar element | Description |
| Private | The Private access type states that access can be granted only to the user who created the View. |
| Share | Share access type presupposes distributing the View access to the Members of the given Organisation. |
- Click Save New view.

4. Delete a View
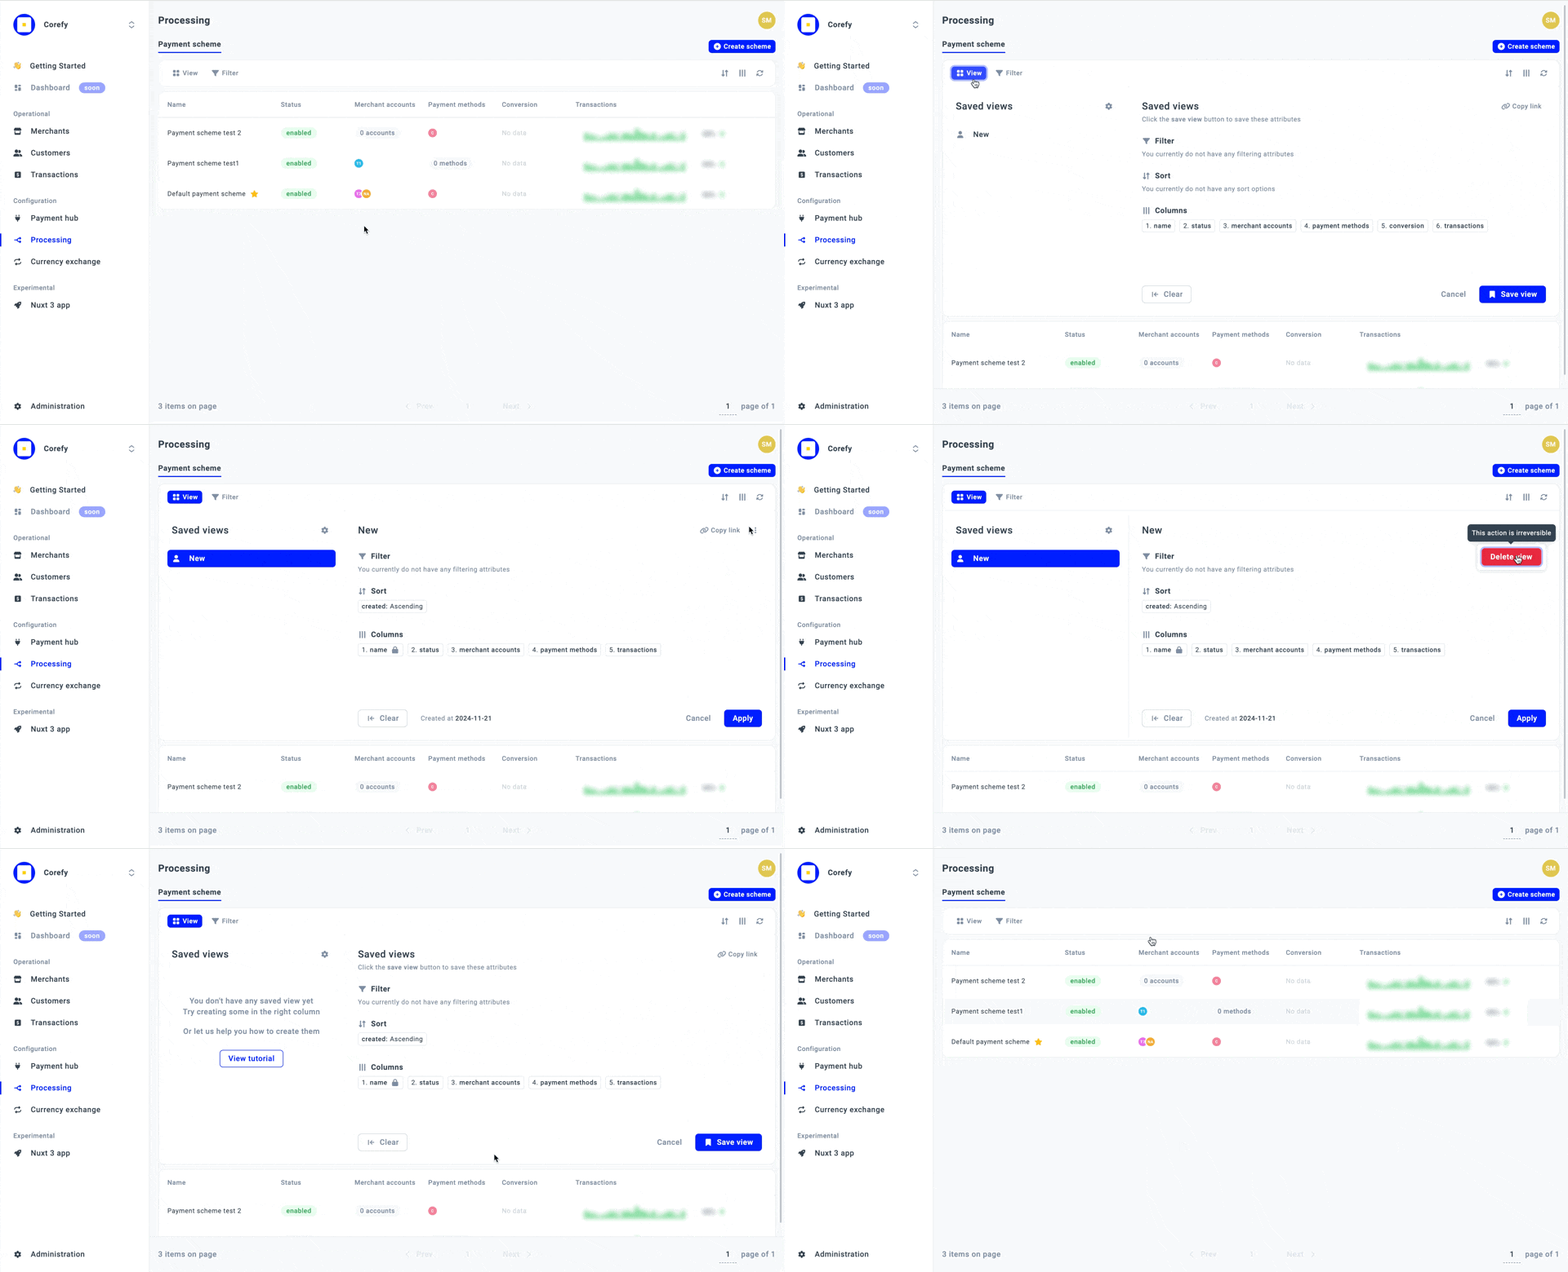
- You can delete the View if you no longer need it.
- Go to the View icon and select the View you want to delete. Click the kebab menu icon. Then, click Delete. The system should remove the previously applied View.

Updated 3 months ago
