Manage Permissions
Managing Permissions is key to maintaining security and control within the platform. This guide walks you through the steps of selecting and assigning the right Permissions.
The Permissions section provides the ability to change global user access within the Merchant account. Thus, the system provide access control at the authorised user level, limiting access to functionality and data according to the individual Permissions. Data is limited to the Merchant account.
Select Permissions
- Click Administration on the left side of the main page.
- Go to the Add-ons tab. Select the Merchant portal and click it. The system redirects you to the respective page.
- Then, navigate to the Configuration page by clicking it in the left sidebar menu.
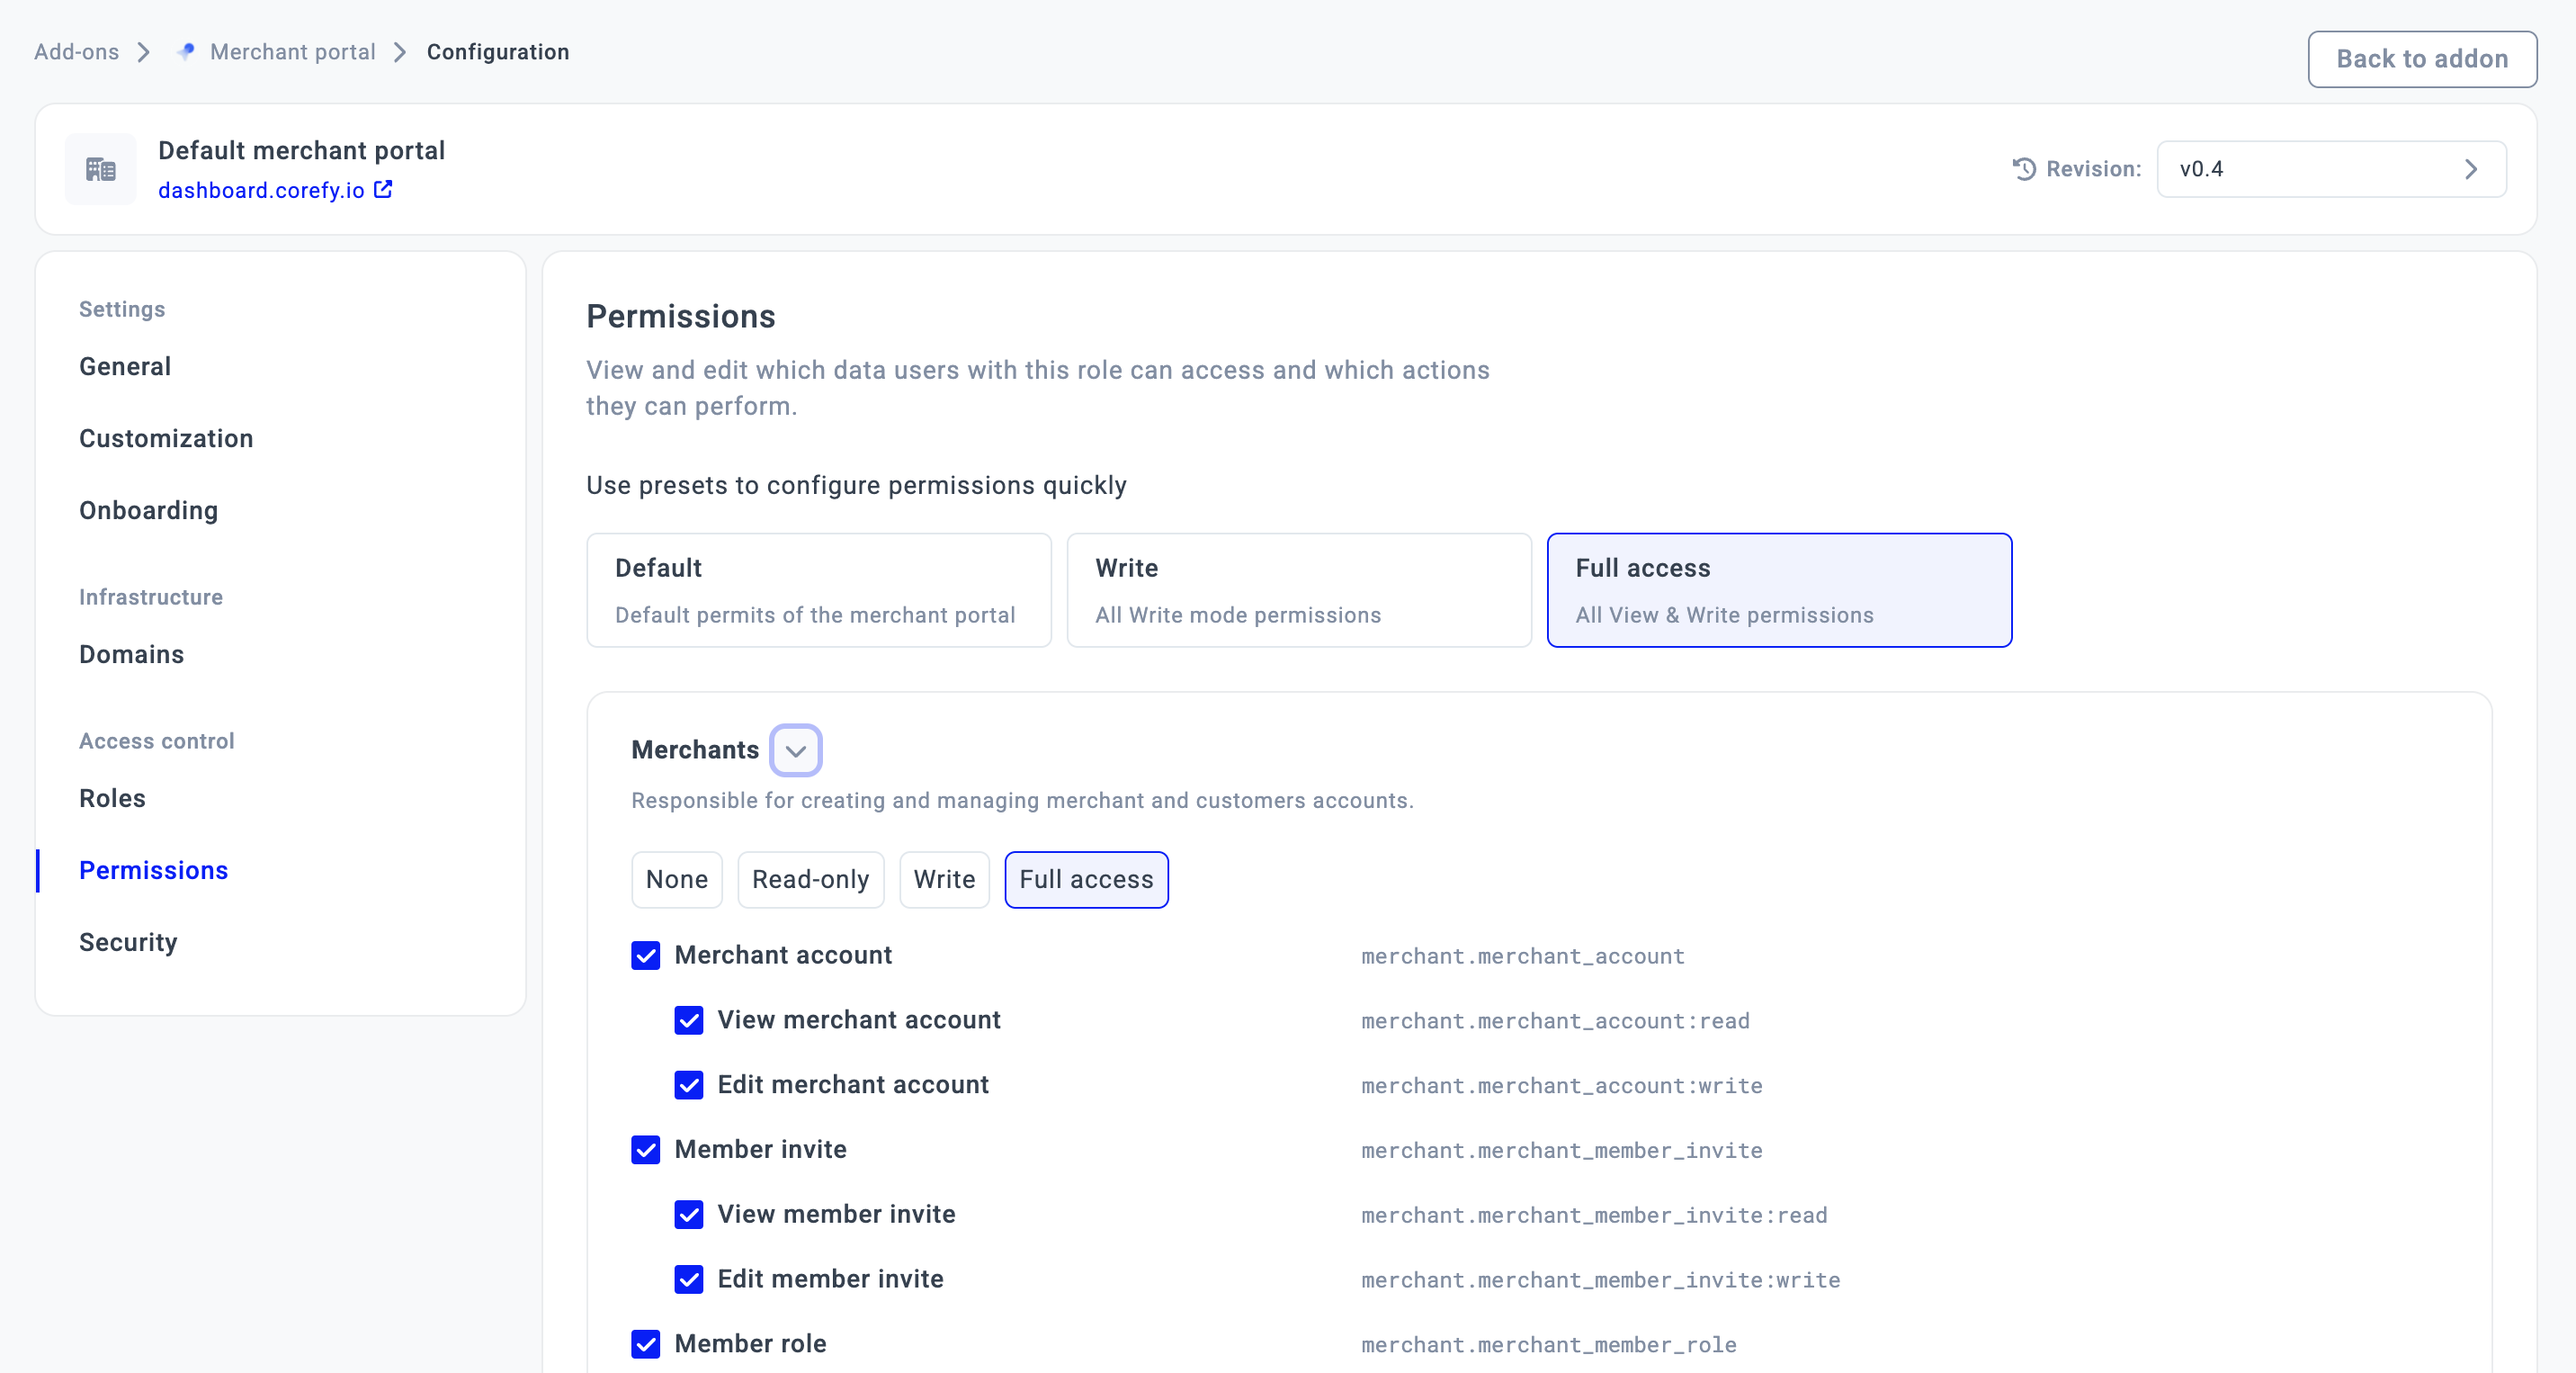
- Switch to the Permissions tab.
- Then, you can apply the ready-made preset of Permissions: Default, Write, Full access.
- If you need a specific scope, you can create Custom permissions and adjust them to your business case.
- Review the Permissions in the table below and ensure to read the inclined functionality they cover.
| Entity | Actions | Owner | Administrator | Manager | Developer | Viewer |
| Merchants | ||||||
| Merchant account | View | ✅ | ✅ | ✅ | ✅ | ✅ |
| Edit | ✅ | ✅ | ❌ | ❌ | ❌ | |
| Member invite | View | ✅ | ✅ | ❌ | ❌ | ❌ |
| Edit | ✅ | ✅ | ❌ | ❌ | ❌ | |
| Member role | View | ✅ | ✅ | ❌ | ❌ | ❌ |
| Edit | ✅ | ✅ | ❌ | ❌ | ❌ | |
| Merchant | View | ✅ | ✅ | ✅ | ✅ | ✅ |
| Edit | ✅ | ✅ | ❌ | ❌ | ❌ | |
| Customer | View | ✅ | ✅ | ✅ | ❌ | ✅ |
| Edit | ✅ | ✅ | ✅ | ❌ | ❌ | |
| Getting started checklist | View | ✅ | ✅ | ✅ | ✅ | ✅ |
| Edit | ✅ | ✅ | ❌ | ❌ | ❌ | |
| Payments | ||||||
| Payment Request | View | ✅ | ✅ | ✅ | ❌ | ✅ |
| Edit | ✅ | ✅ | ✅ | ❌ | ❌ | |
| Payment Commit | View | ✅ | ✅ | ✅ | ❌ | ✅ |
| Edit | ✅ | ✅ | ✅ | ❌ | ❌ | |
| Payment Transaction | View | ✅ | ✅ | ✅ | ❌ | ✅ |
| Edit | ✅ | ✅ | ✅ | ❌ | ❌ | |
| API key vault | ||||||
| API key | View | ✅ | ✅ | ✅ | ✅ | ❌ |
| Edit | ✅ | ✅ | ✅ | ✅ | ❌ | |
| Webhooks | ||||||
| Webhook | View | ✅ | ✅ | ✅ | ✅ | ❌ |
| Edit | ✅ | ✅ | ✅ | ✅ | ❌ | |
| Processing | ||||||
| Checkout | View | ✅ | ✅ | ✅ | ✅ | ✅ |
| Edit | ✅ | ✅ | ✅ | ❌ | ❌ | |
| Firewall | ||||||
| Firewall rule | View | ✅ | ✅ | ✅ | ❌ | ✅ |
| Edit | ✅ | ✅ | ✅ | ❌ | ❌ | |
| Events | ||||||
| Events | View | ✅ | ✅ | ✅ | ❌ | ✅ |
| Lists | ||||||
| List | View | ✅ | ✅ | ✅ | ❌ | ✅ |
| Edit | ✅ | ✅ | ✅ | ❌ | ❌ | |
The covered functionality
- Merchant account permissions set the availability specifics for a Merchant account entity and all the included functionality, with Account, Scheme and Payment method settings.
- Member invite permission allows access to the functionality that includes inviting other users to join a platform. In the Members section, users with the relevant permission can invite new users by specifying their email addresses and assigning the appropriate Roles. It is also possible to revoke the invitation or resend it.
- Member role permission enables assigning specific Roles to the Merchant portal members.
- Customer permission grants users access to the Customer module and its scope of features. They can view all Customers of the current Merchant account, add information about the Customer, review their Payment accounts, and payments.
- Getting started checklist permission allows you to follow a respective checklist and review its steps.
- Payment Request, Payment Commit, and Payment Transaction permissions grant users access to the Transactions module, allowing them to view and moderate Payment Request, Commit, and Transaction entities with limited access to certain fields (e.g., Payment Route, Payment Scheme).
- API key permission is granted to the chosen users and allows them to create, view and change the API key settings in the Developers section.
- Webhook permission is granted to the chosen users and allows them to create, view and change the Webhook settings in the Developers section.
- Checkout permission gives access to view or update the Checkout integration, Branding, Layout, Fields, and Methods.
- Firewall rule permission gives access to viewing and editing the Firewall rules.
- Events permission gives access to the corresponding module and allows viewing or managing system Events related to the Merchant account.
- List permission allows viewing or editing Lists on an entity level. In the Administration/Lists section, the Administrator or Owner can create and review their own Lists belonging to the current Merchant account.