Lists management
The List is a simple yet convenient form of organising data of a similar type. It grants the possibility to analyse certain information, regroup it or visualise its resembling and contrastive aspects.
Our system supports different ways of creating the Lists, yet all of them are stored and may be accessed via the Administration settings.
Thus, let’s look at arranging the data into a List.
Create a List
→ In the Administration settings:
- Navigate to the Administration tab.
- Then, go to the Lists tab and click Create New list.
- The system initiates opening a modal. Enter the list Name in the corresponding text field.
- Then, select the Value type from the combo box. The Value type determines what information should be stored in the given List.
- Choose who can access the List. Click Whole Organisation to grant access to its every Member. To enable limited access, click Merchant and select the Merchant account in the combo box below. Click Create a List.
- To add items to the List, click Add item. Enter the item Value manually, and add the Expiry date and a Comment if needed. Click Add item.
- If you decide to add the Expiry date, be aware that the item is no longer valid after it expires.
Add Items to a List
→ In a particular entity
- Go to the entity that you want to include in a List.
- The flow is similar to different entities and presupposes working with the Lists tab of a given entity.
- You need to click the Add to List button. It triggers the opening of a modal.
- Select a List you want to add the entity to from the combo box. Add Expiry date and a Comment if needed. The given entity becomes an item in a List you created previously.
- To review particular cases where this approach is applied, go to the Add Merchant to a List and Add Customer to a List guides.
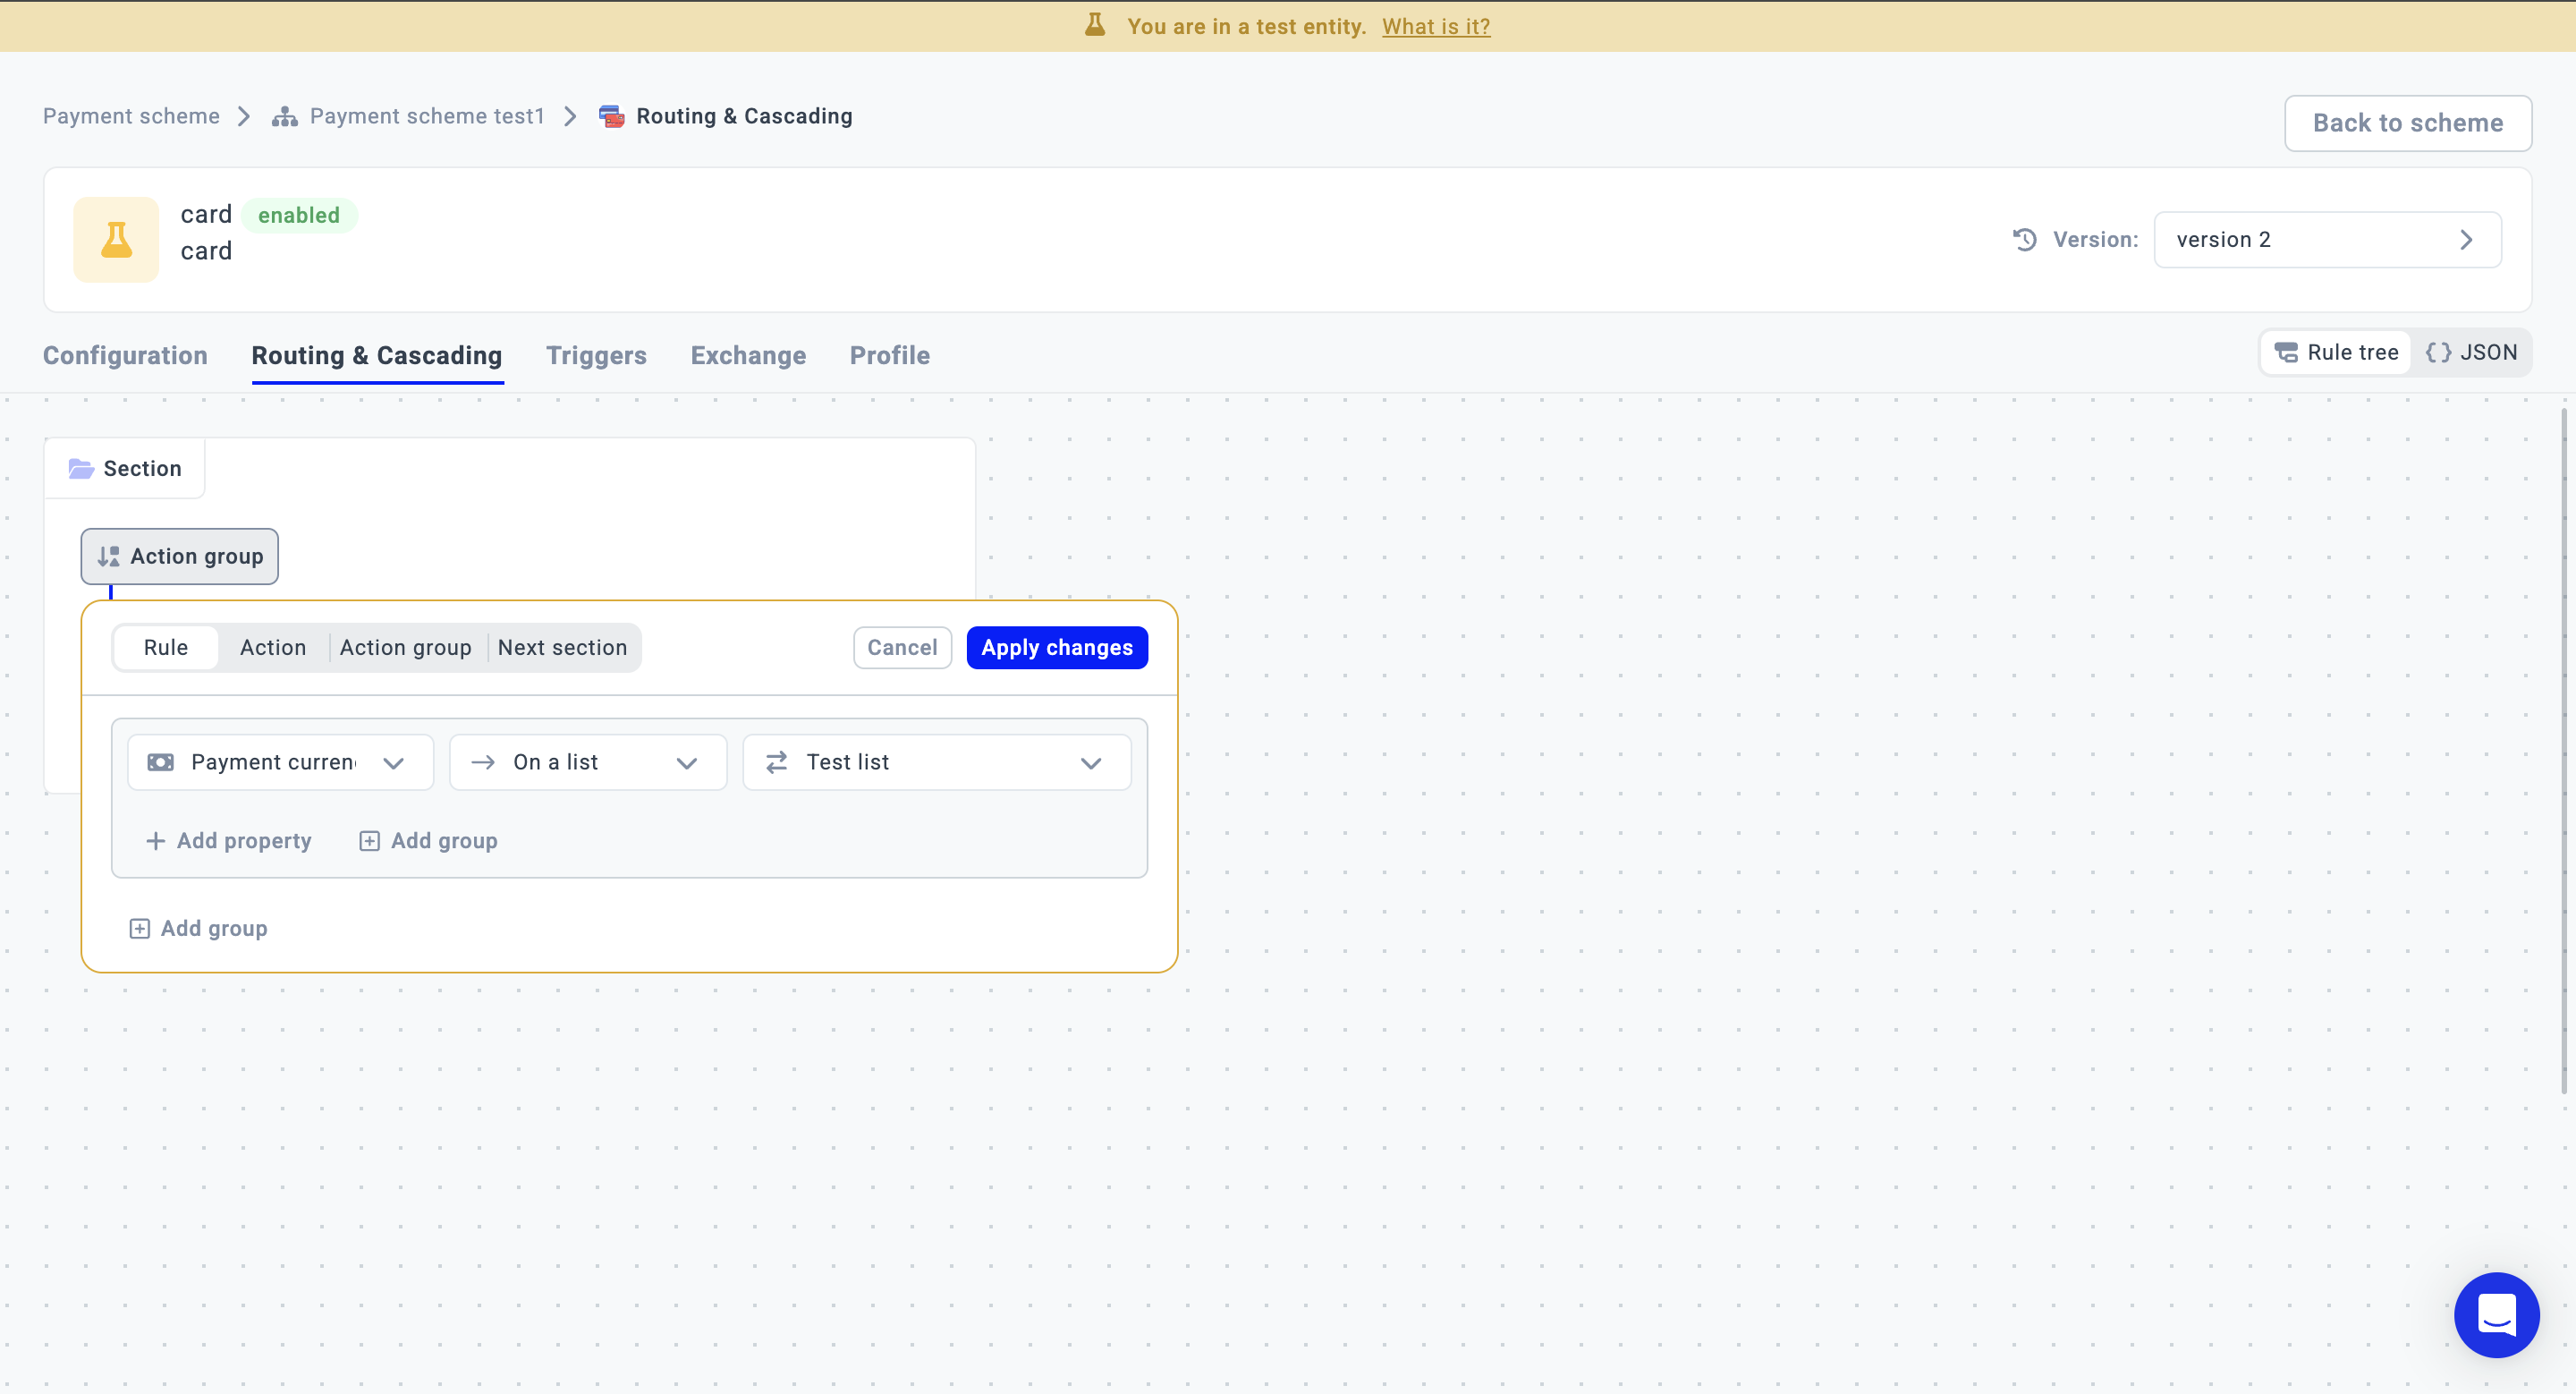
→ Directly via Processing
- Navigate to the Processing and switch to the Routing & Cascading tab.
- Click the Action group and set up a Rule.
- Choose the Payment currency in a Condition property field and the On a List or Not on a List option as the Relational operator.
- Then, choose the specific List among the existing ones in the corresponding field. Click Apply changes.
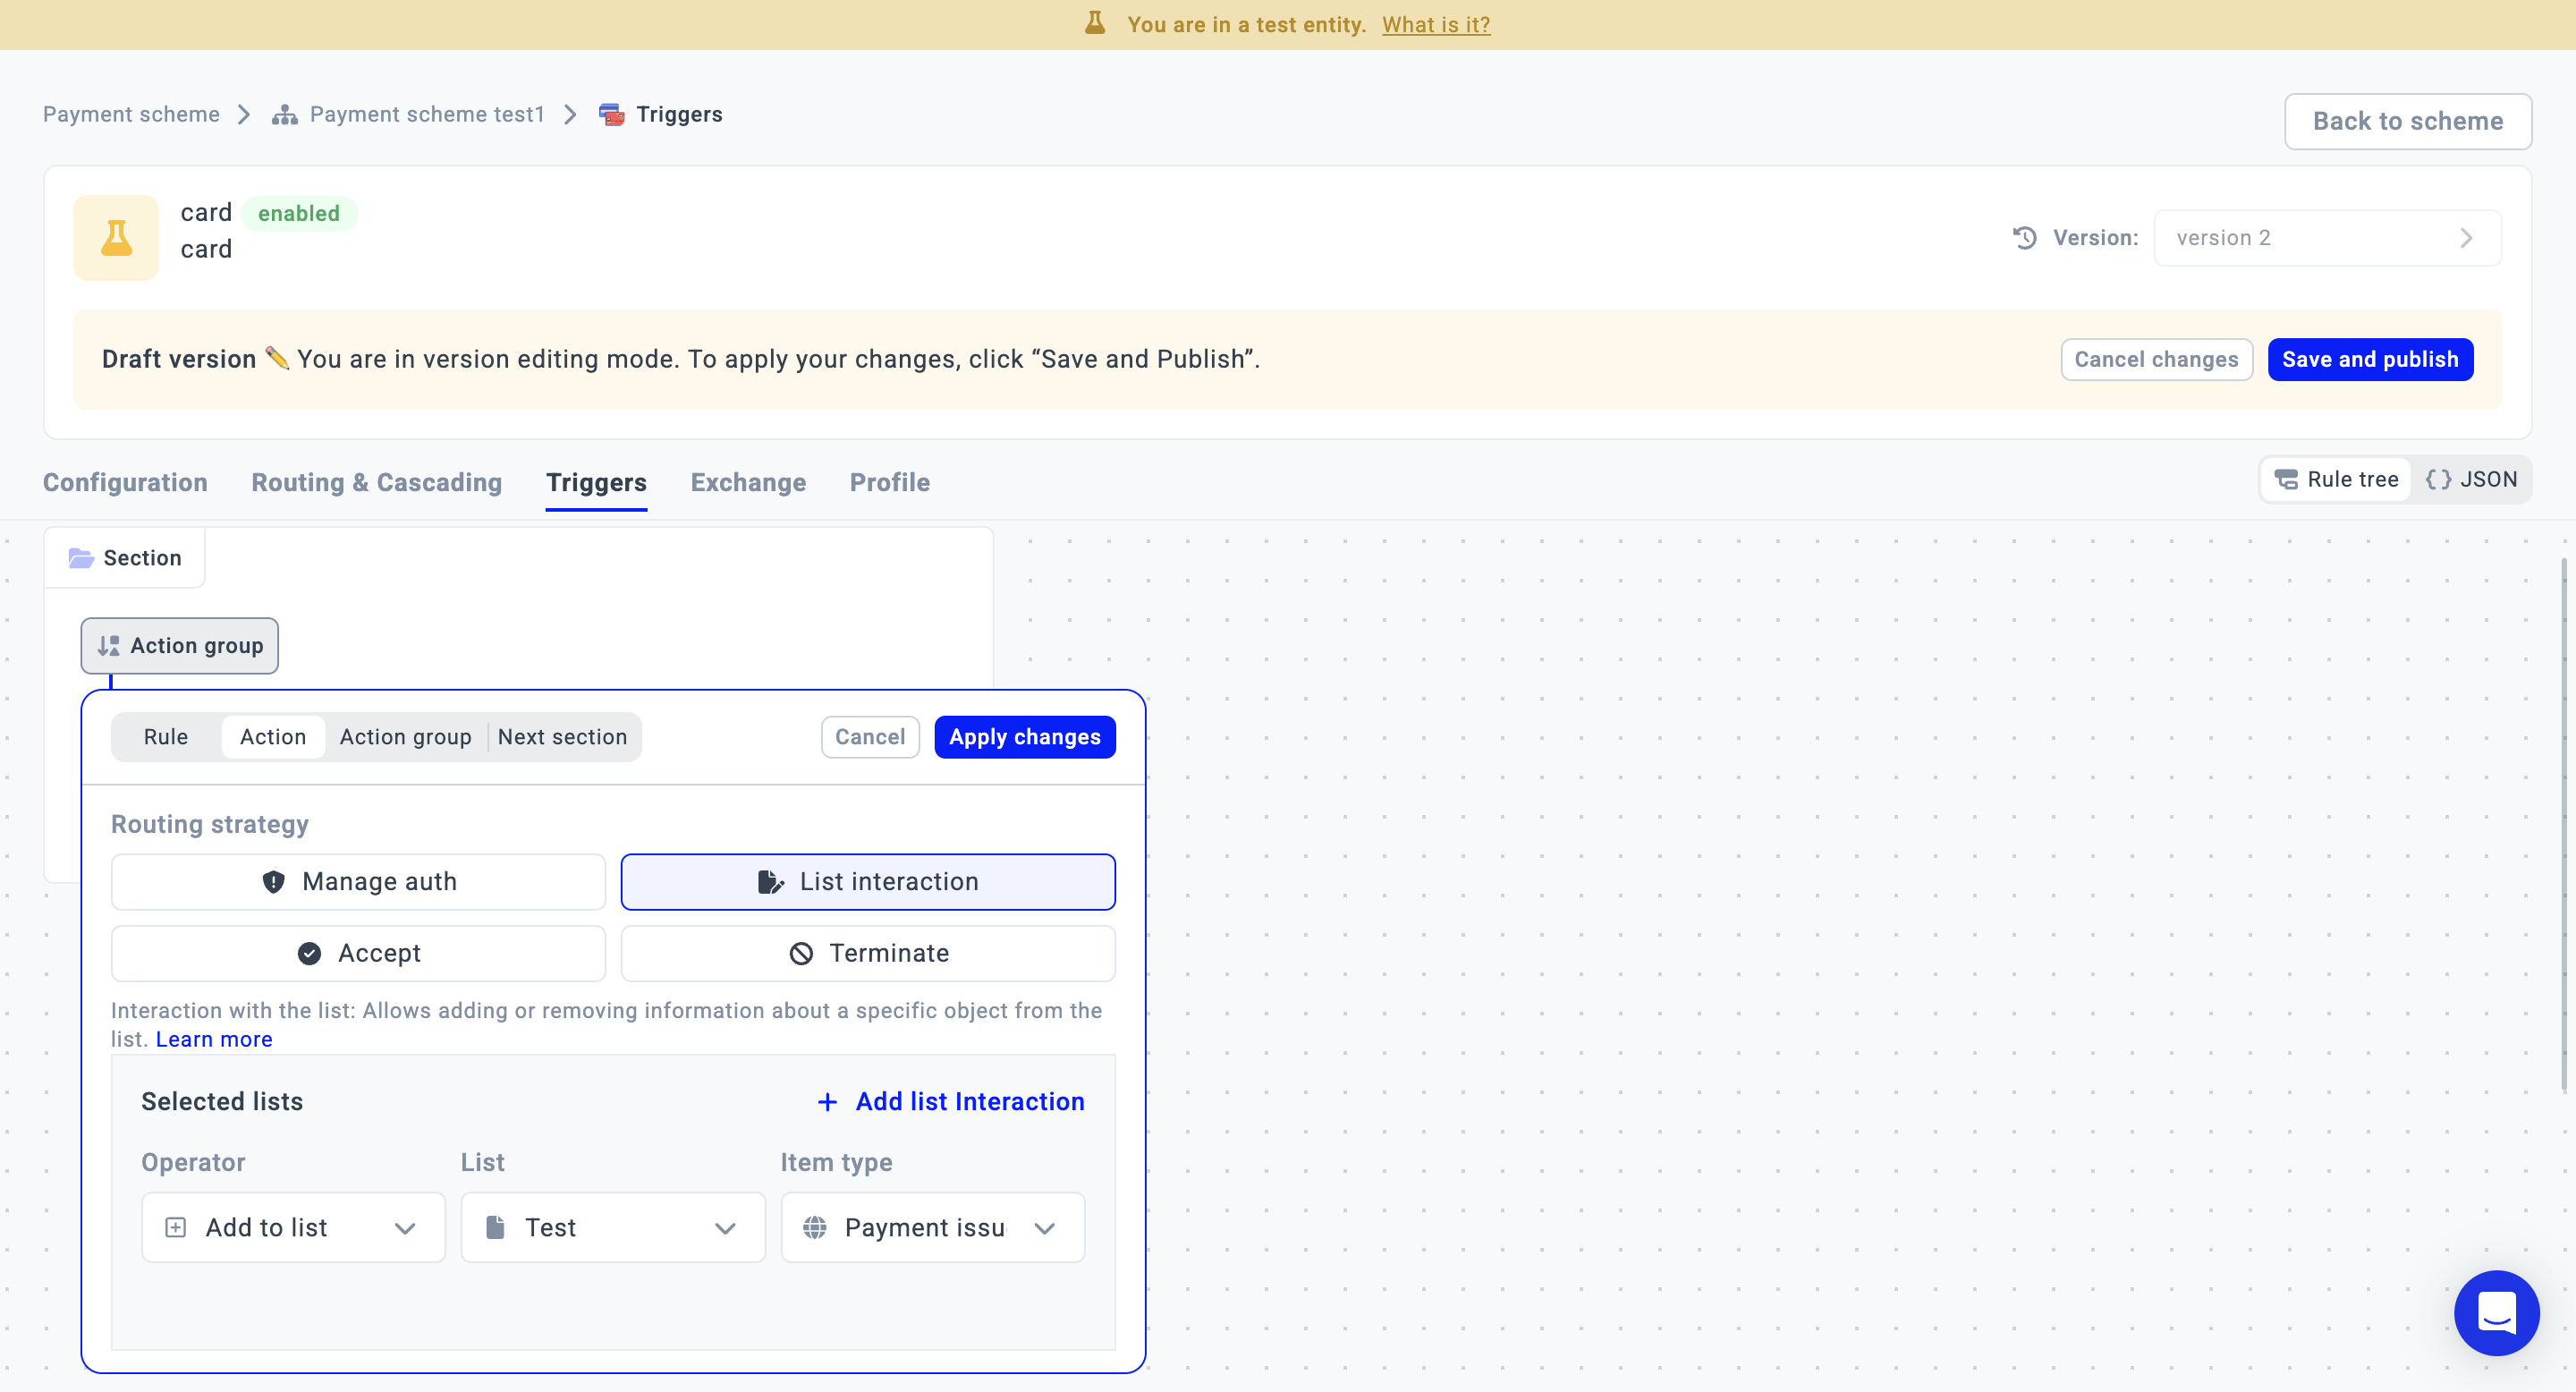
- Alternatively, you can navigate to Triggers and set up a Rule in the same way as in the Routing case.
- Choose the appropriate Condition property and the On a List or Not on a List option as the Relational operator.
- Specify the specific List among the existing ones in the corresponding field. Click Apply changes.
- Additionally, you can switch to Trigger actions and select the List interaction. Choose the Operator (Add to List or Remove from List), pick the specific List and indicate the Item type. Click Apply changes.
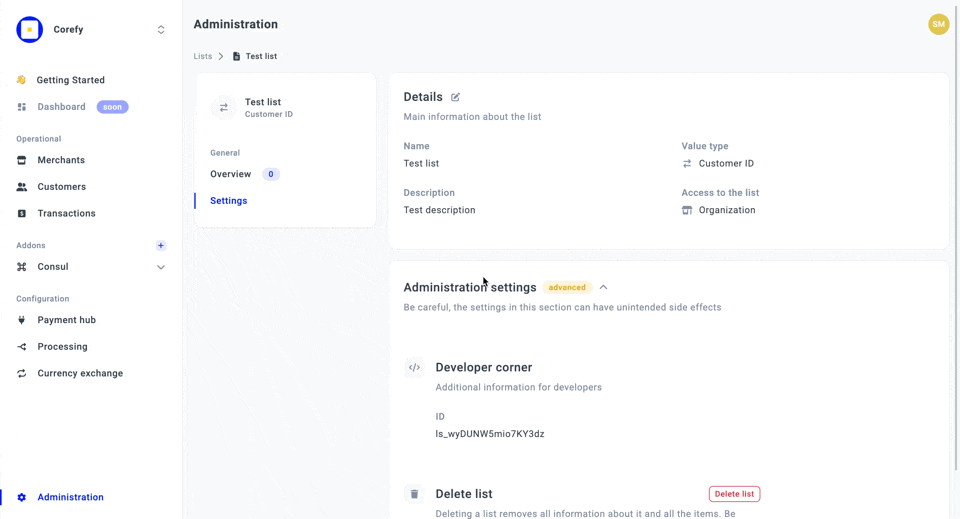
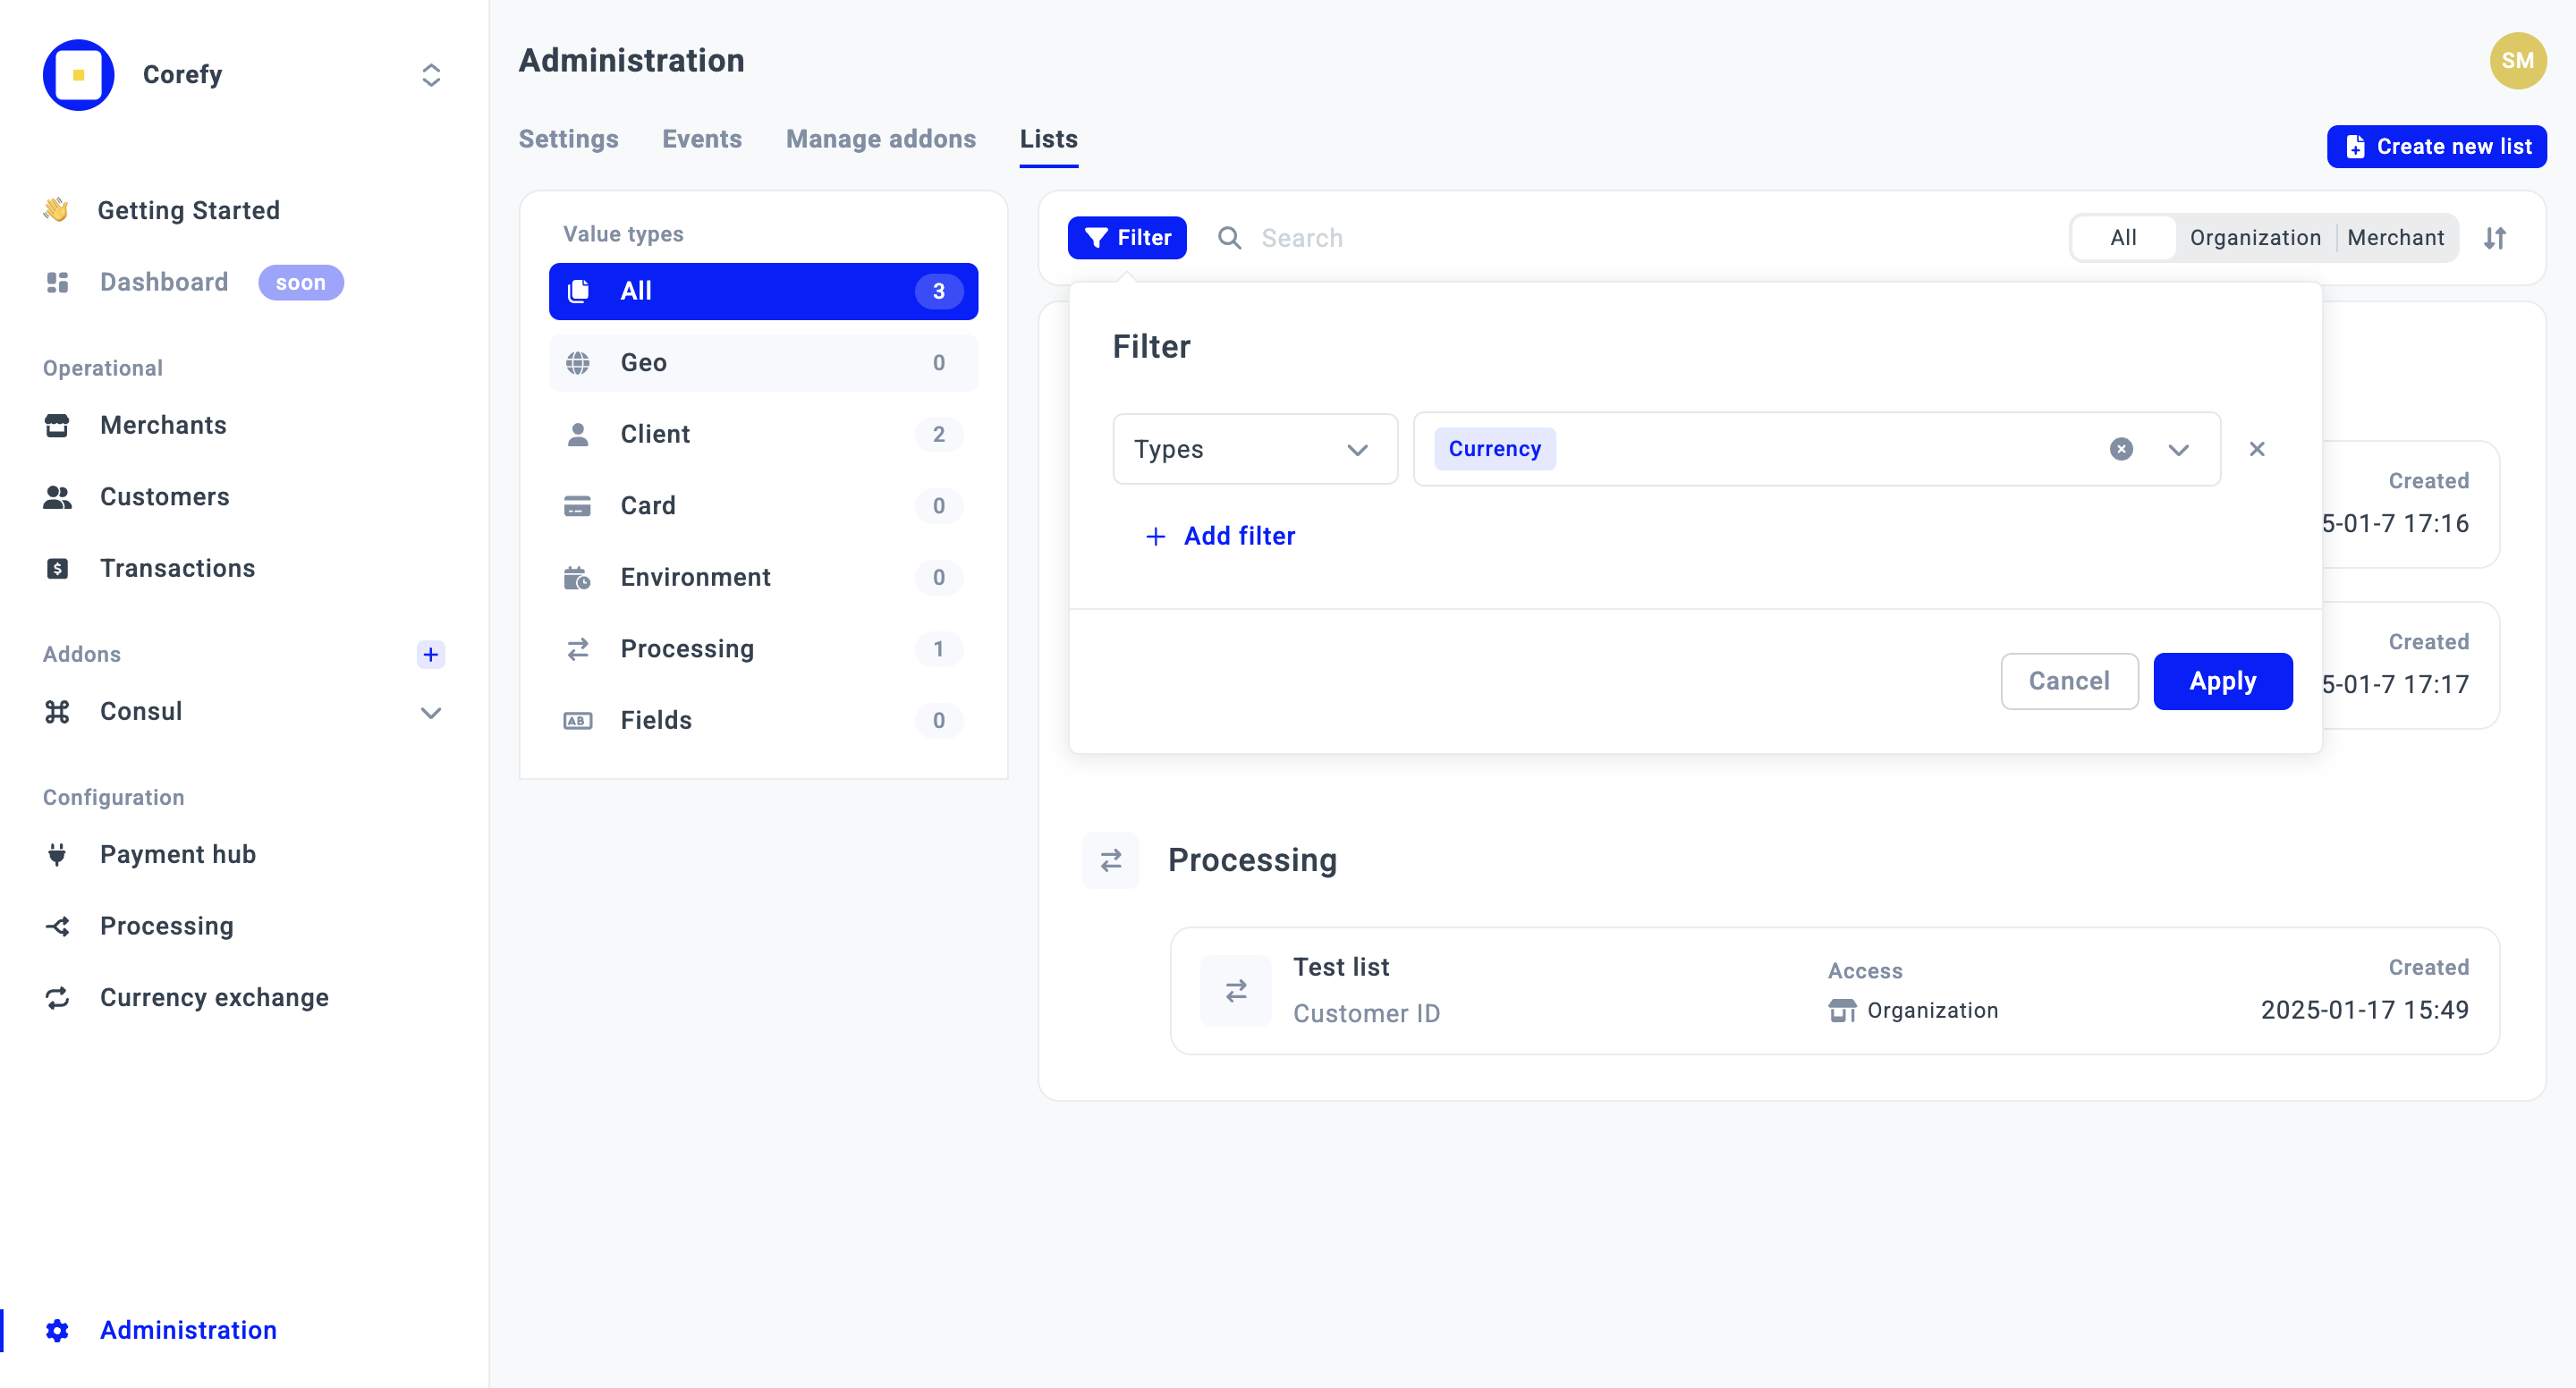
Manage Lists
- Navigate to the Administration settings and switch to the Lists tab.
- You can apply a Filter to sort out the data based on its Type.
- Also, you can track the Lists with the Organisation or Merchant access scope.
- If you need to edit a particular List, click it on the grid and go to its Settings tab.
- You can update the list Name and Description in the Details section.
- If you find the specific List no longer needed or valid, you can delete it in the Administration settings.