

Manage Routes
The Payment and Payout routes management is integral to the Provider account handling. To be able to initiate Payments or make Payouts, you need to apply the appropriate Routes beforehand. To do so, follow the instructions:
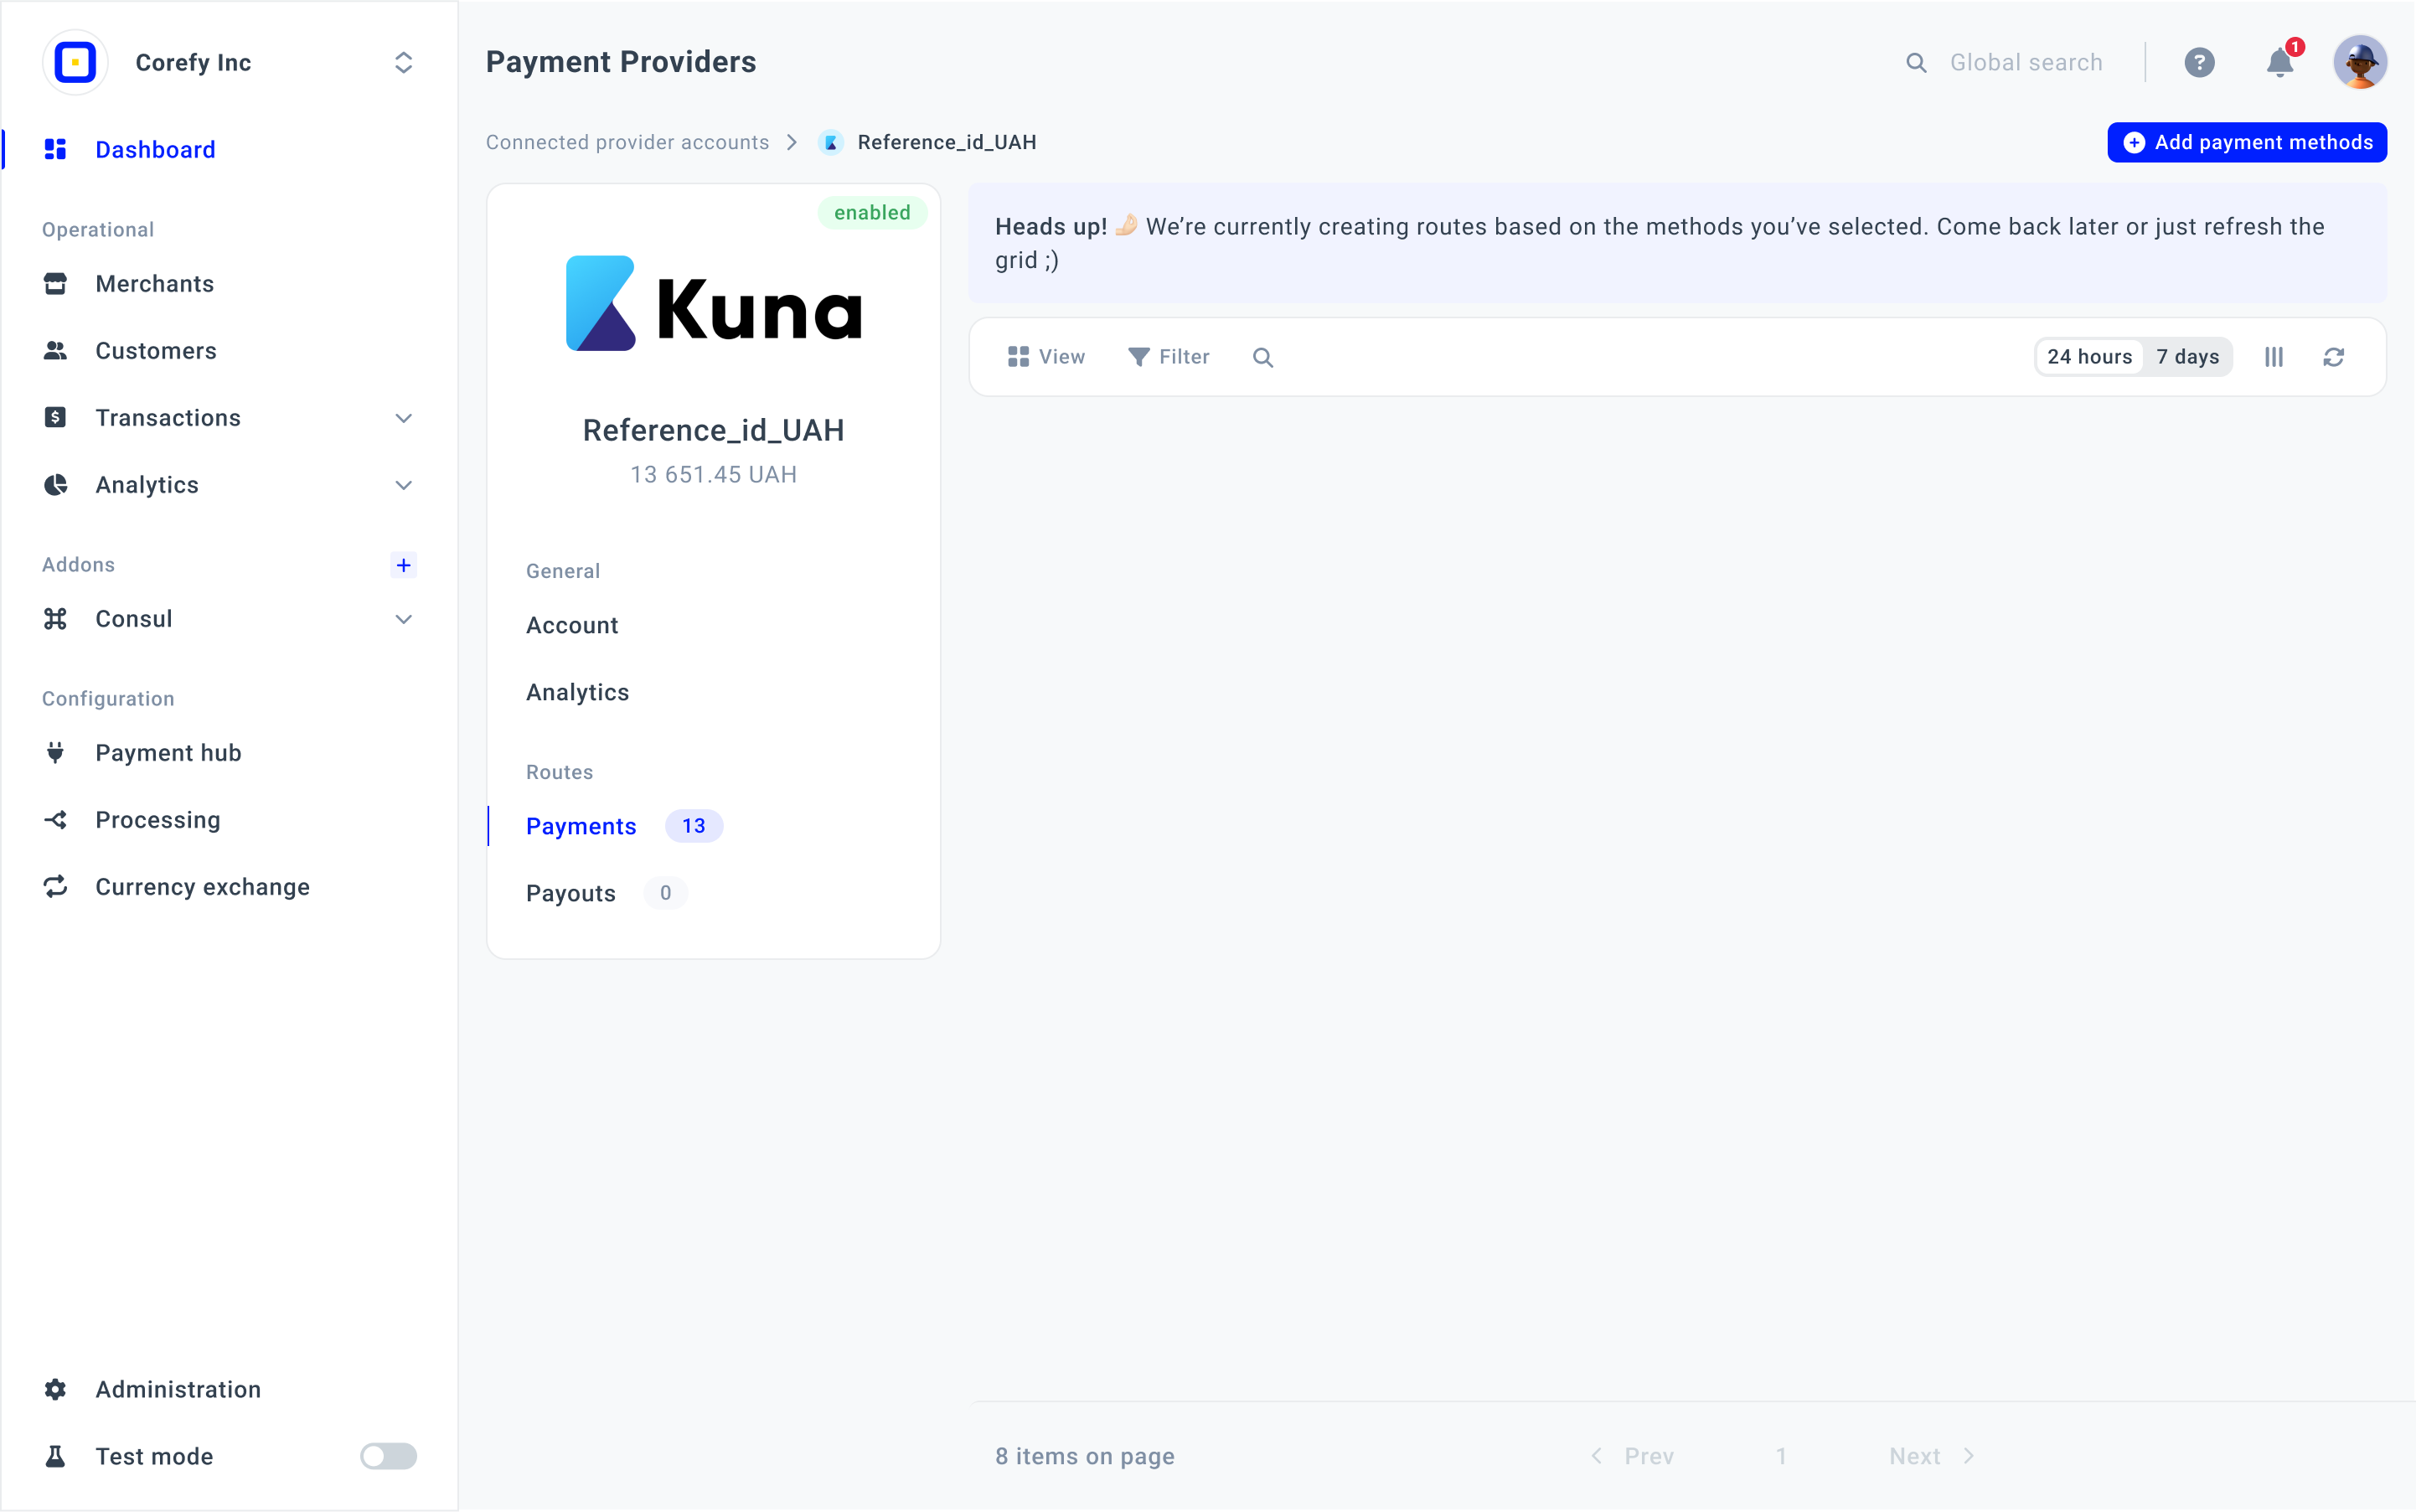
Initiate adding Routes
- Go to Payment Hub, where you can find the list of Providers previously added to the system.
- Click the specific Provider account on the Providers grid. Then, go to Payments or Payouts, depending on what you are mainly interested in.
- To add a new Route, click Add Payment methods or Add Payout methods accordingly. Choose the relevant Methods from those added based on the Provider, or select them all.
- After adding the Methods, the system starts initiating Routes. The Routes are built based on the Methods you have chosen.
- Update a page to access the list of available Routes.
Not all Providers may have Payment/Payout routes; it depends on the integration you have connected. To see the possible Methods, look at the Supported Payments/Payouts tabs in the integration overview.
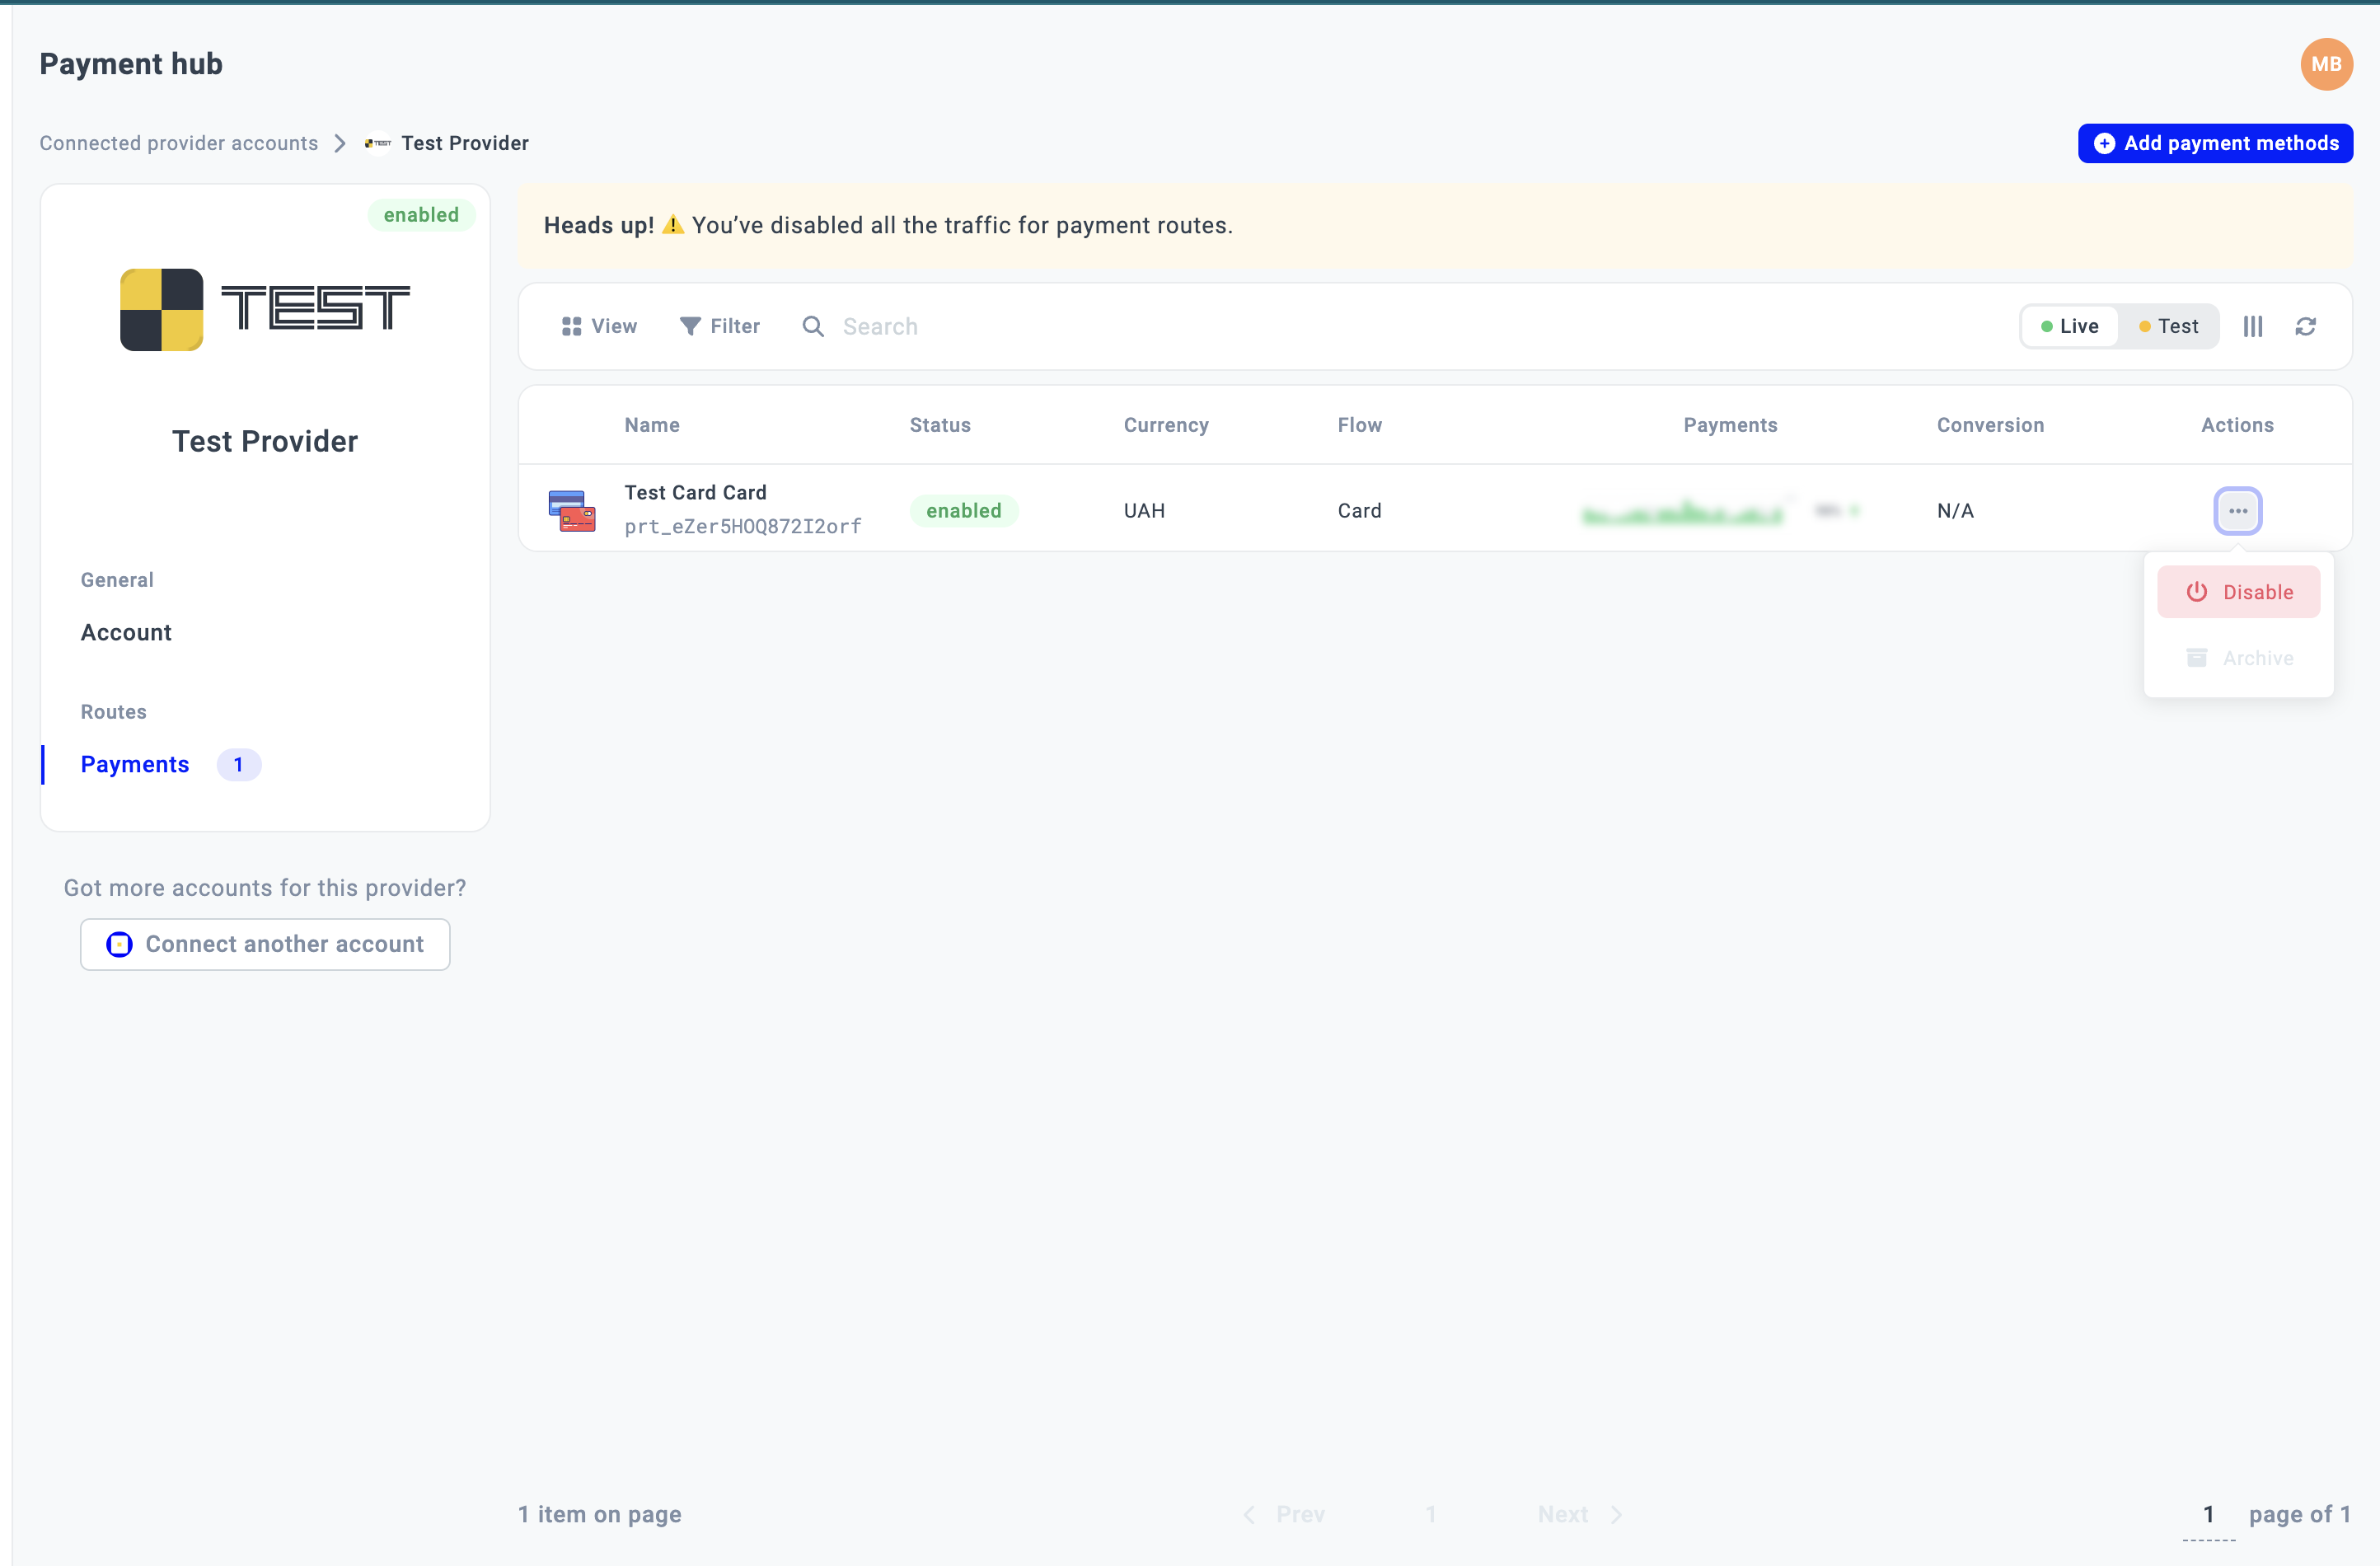
Manage Routes
- Each Route pertains to a set of actions you can perform regarding its management.
- To view the available actions, choose the definite Route and click the corresponding dropdown icon on the right side of the grid.
- You can Activate, Disable, Enable or Archive the Route.
- Some Methods require additional authorisation. Thus, you can Activate the Route if it is the exact precondition on the Provider side. To learn more about the activation flow, go to Methods guides and choose the guide that corresponds to your Provider.
- If the Route no longer serves your needs, you can Disable it. Be aware you cannot process payments or initiate payouts via the disabled Routes, even if they were specified in the Routing scheme. To learn more about Routing & Cascading, go to Routing guides.
- When the Route is disabled, you can either Enable or Archive it.
- After archiving, the Routes disappear from the grid list and are only available via the grid settings.
- Also, you can Unarchive the Route for further usage if needed.
Manage Routes grid
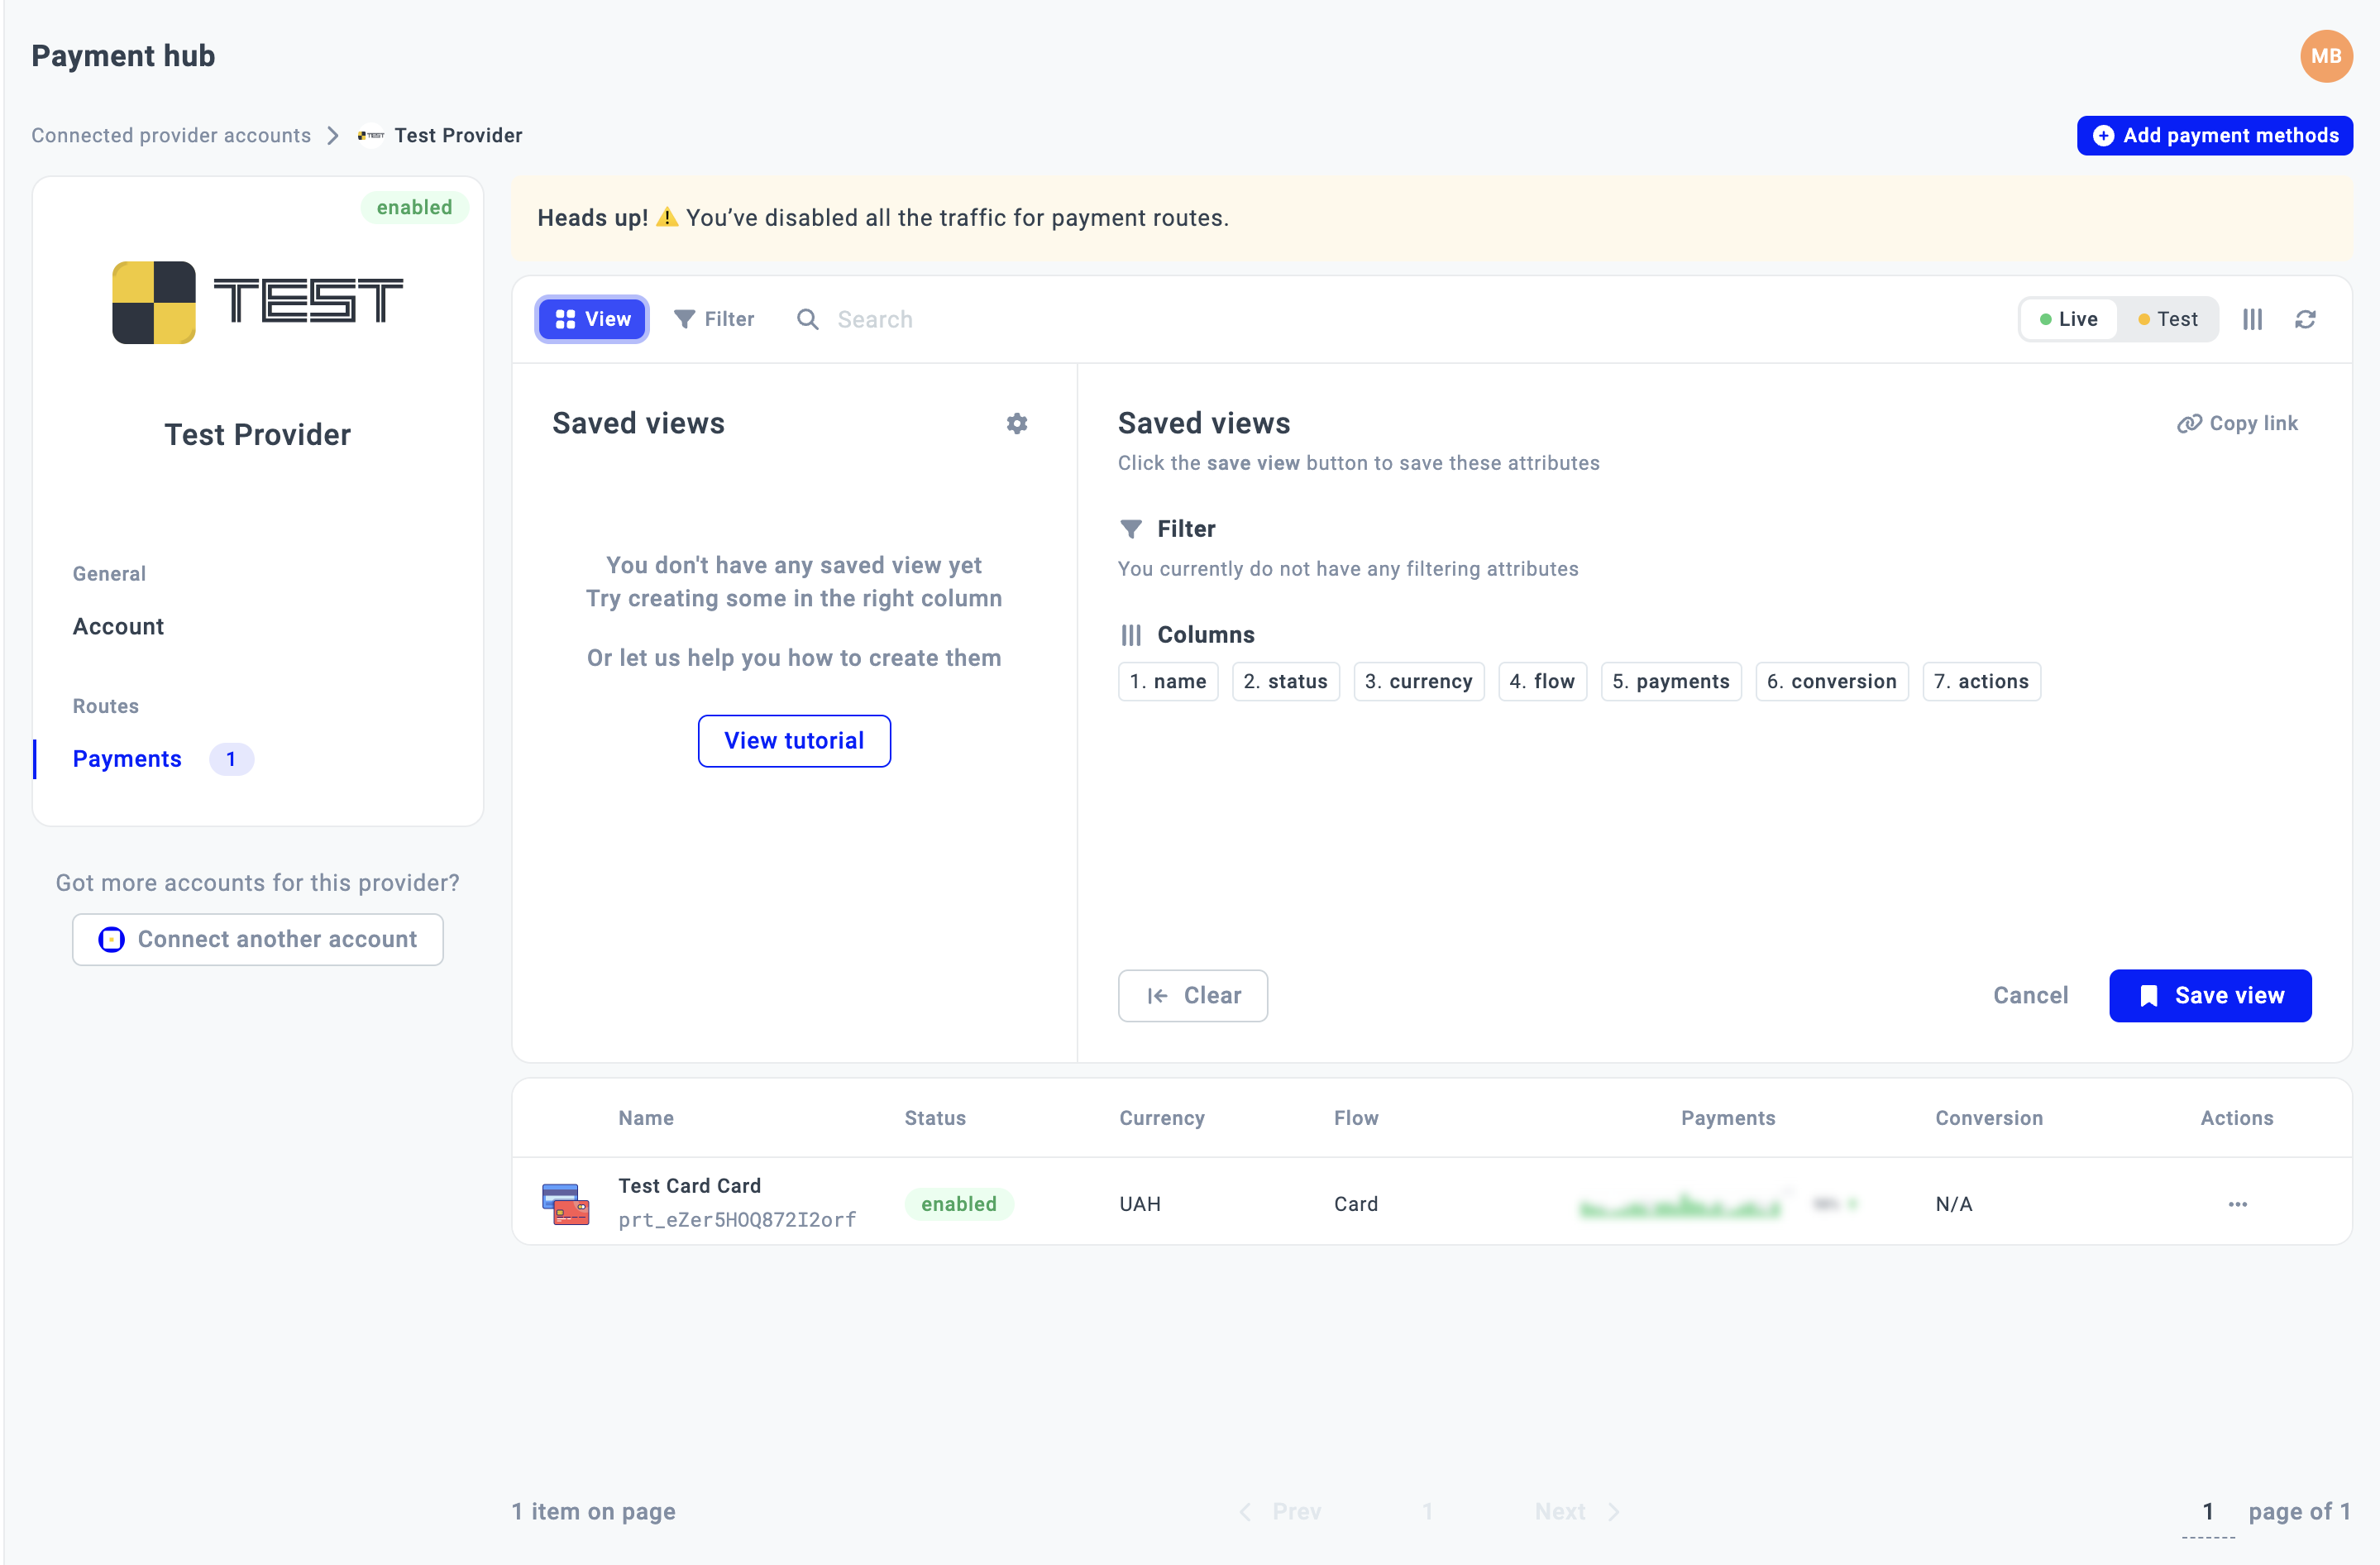
- To change the layout of the Routes grid, you can adjust the View options, apply Filter or rearrange the Columns.
- Some Payment/Payout methods support the addition of Live routes as well as Test routes. Test routes are designed to pursue test payments. Thus, we differentiate between Live and Test routes. You can switch between them at the top of the grid.
Review a specific Route
- Click a specific Route on the grid.
- The system opens a sidebar window displaying all the information related to this Route.
- The details include data of tree categories: General, Financial and Route features.
| Category | Included information |
| General information |
|
| Financial |
|
| Route features |
The Route features vary from Route to Route, depending on the related Flow.
For example, Card • Native (Card) on Paycore includes the following Route features:
true.
Otherwise, it is marked as false.
|
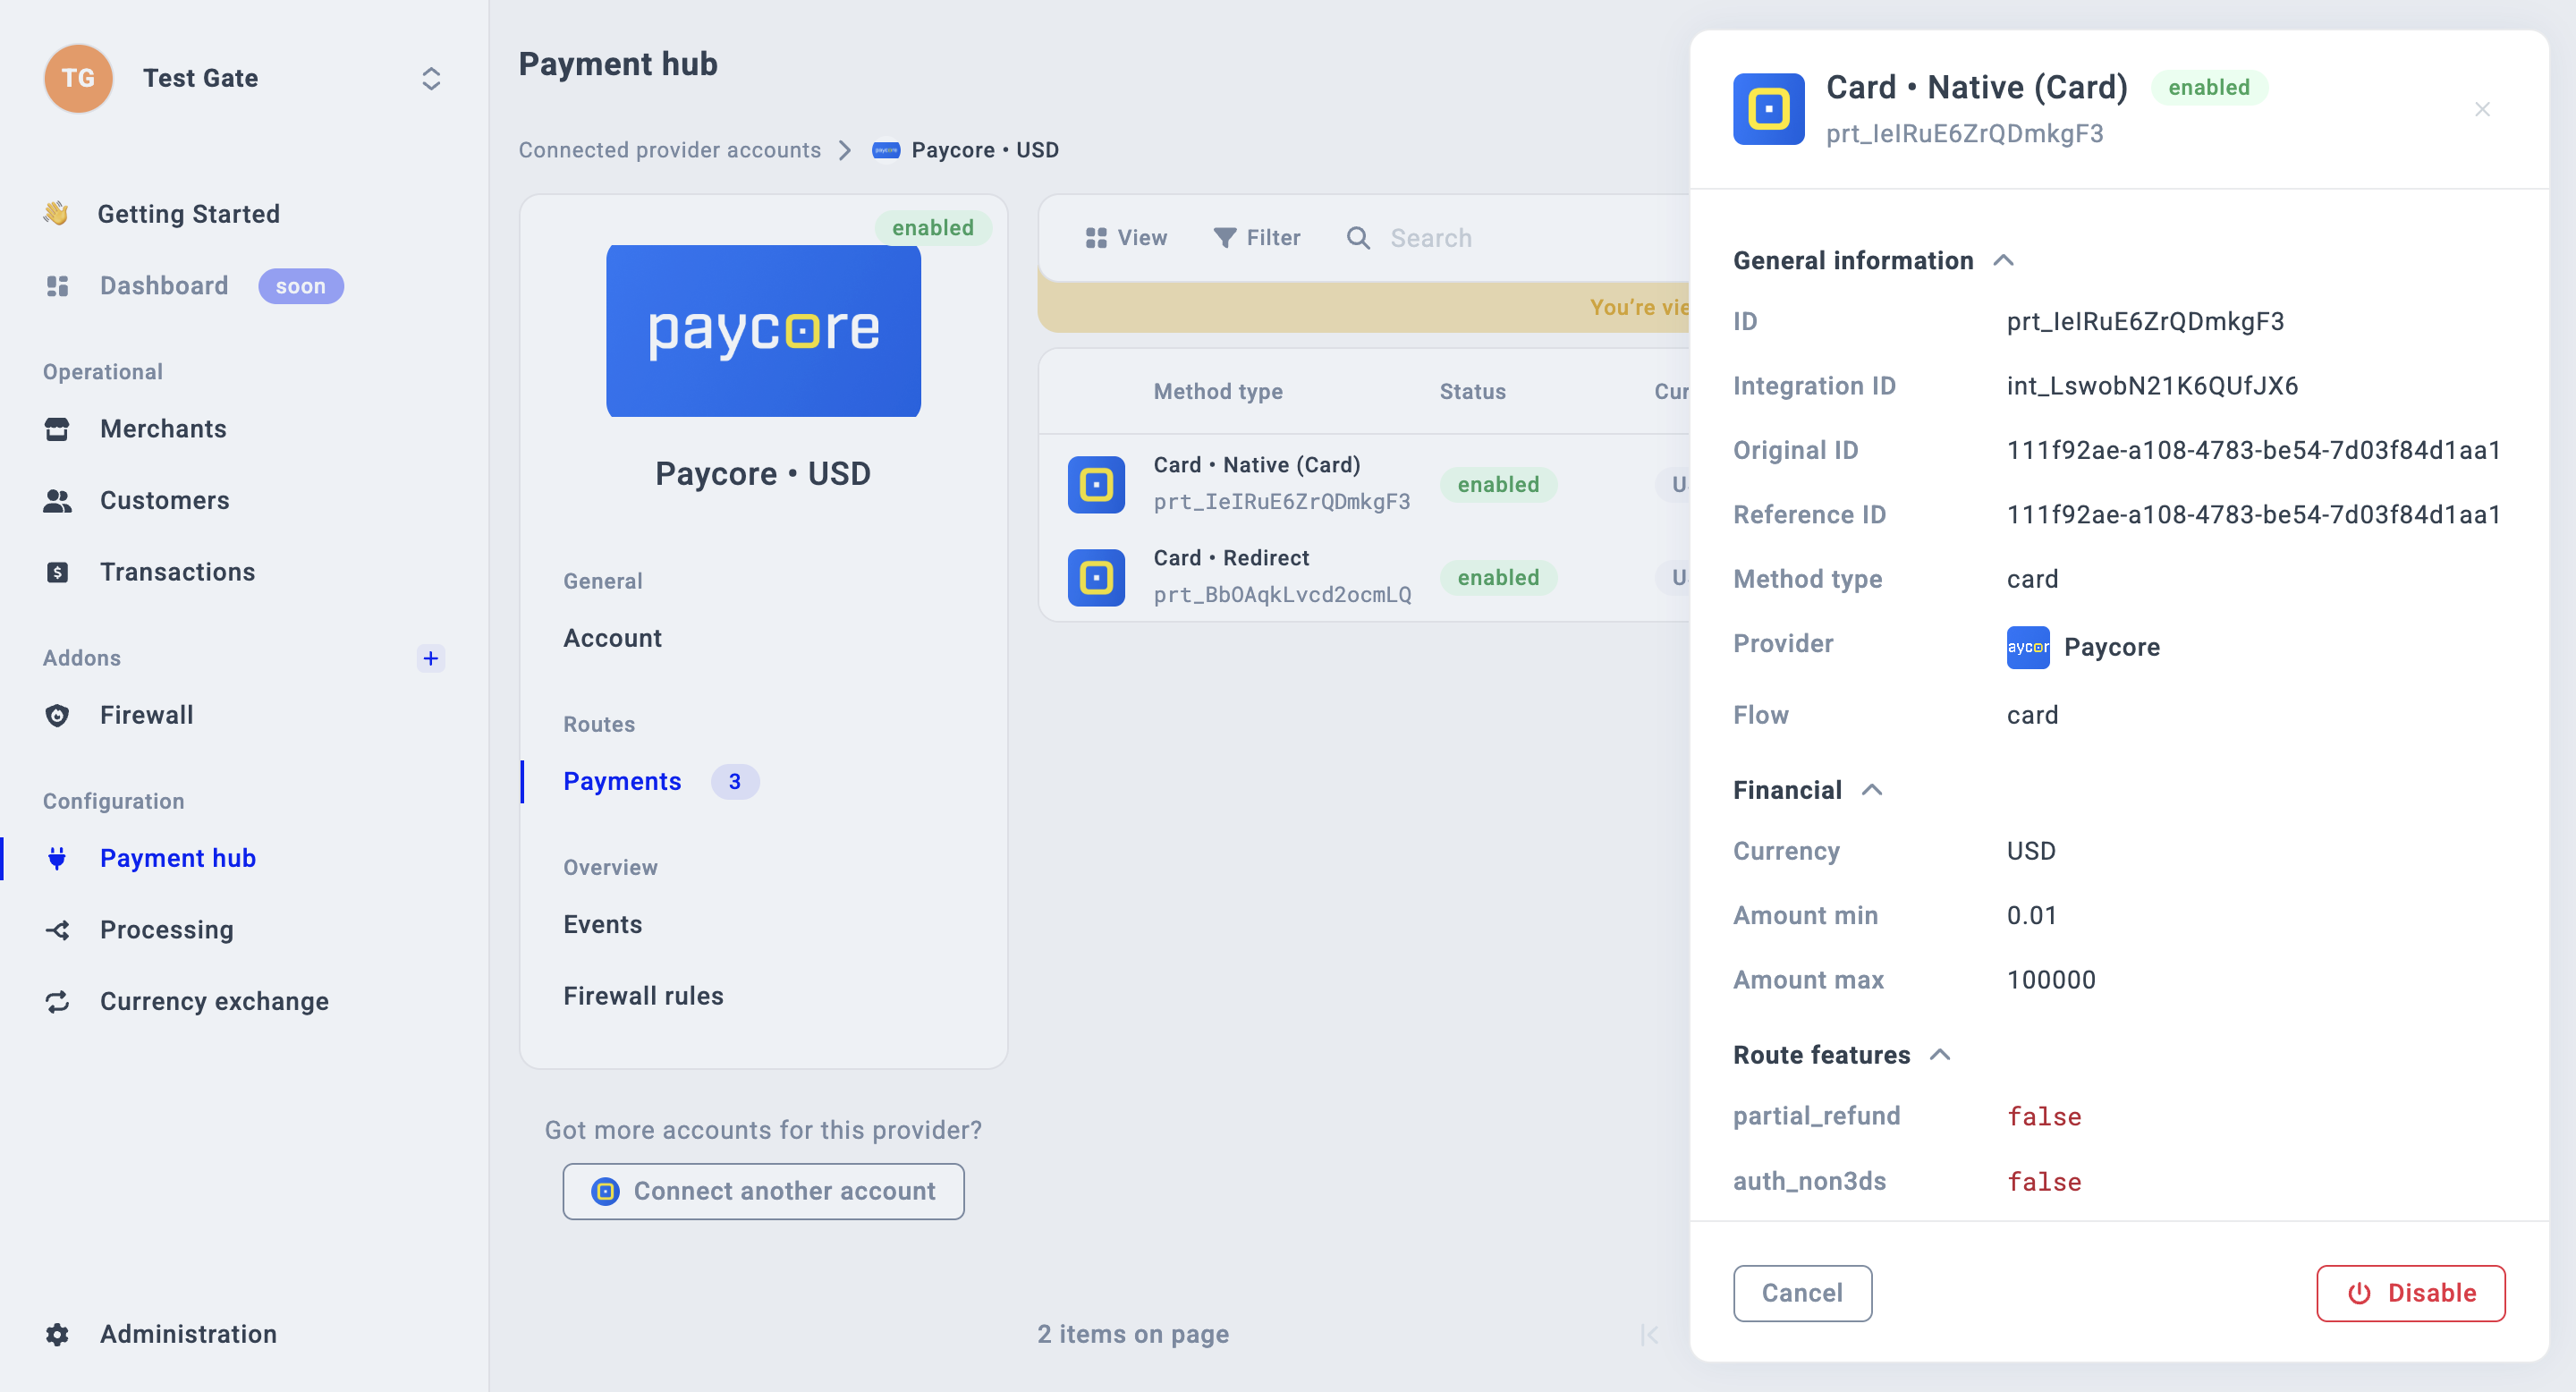
- You can deactivate the Route, by clicking Disable in the preview sidebar window. However, you can activate it later by clicking Enable.