Manage Payment scheme
Edit Payment scheme profile
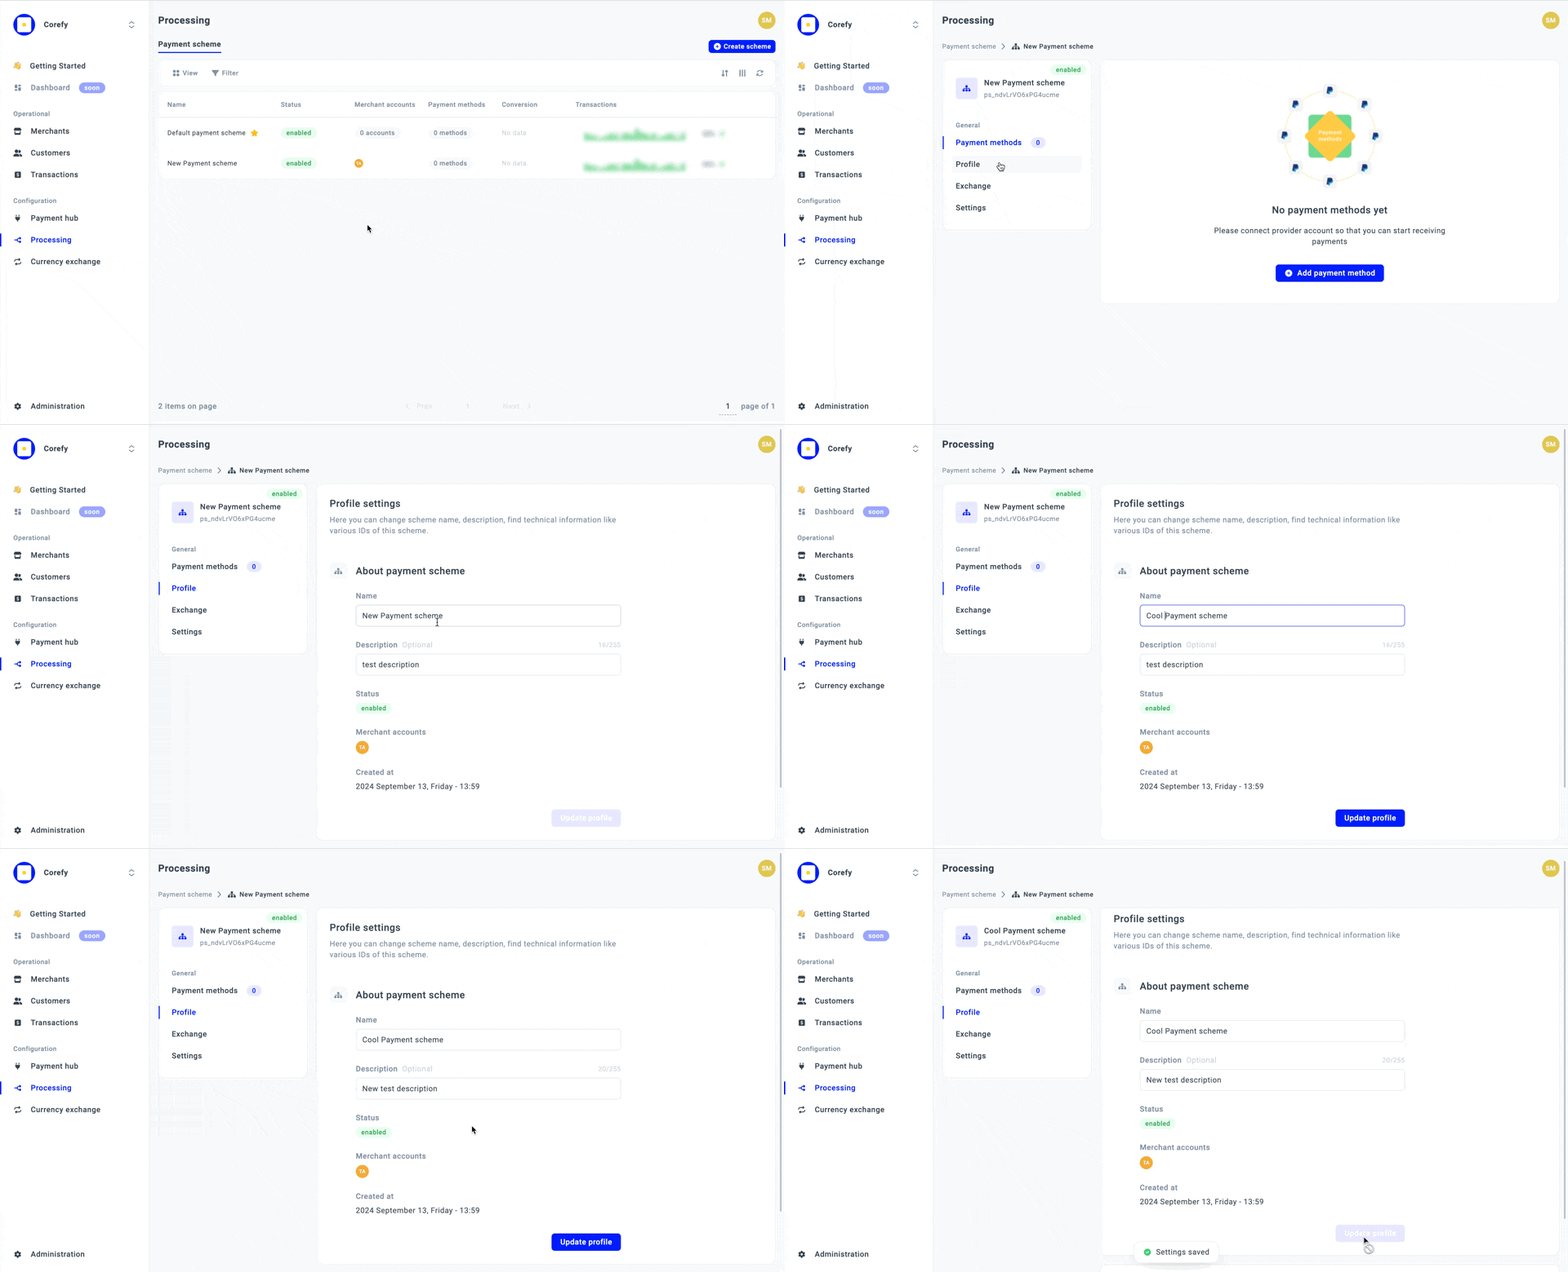
- Go to Processing and choose the Payment scheme you previously created on the grid.
- If you have not created the Scheme yet, go to Create Payment scheme guide to learn the details.
- Go to the Profile tab of the specific Payment scheme.
- You can update the scheme Name and Description. To begin editing, click the corresponding text fields and type the new data.
- Additionally, you can review the scheme Status and the connected Merchant account.
- After you finish making changes, click Update profile.

Manage Scheme Administration settings
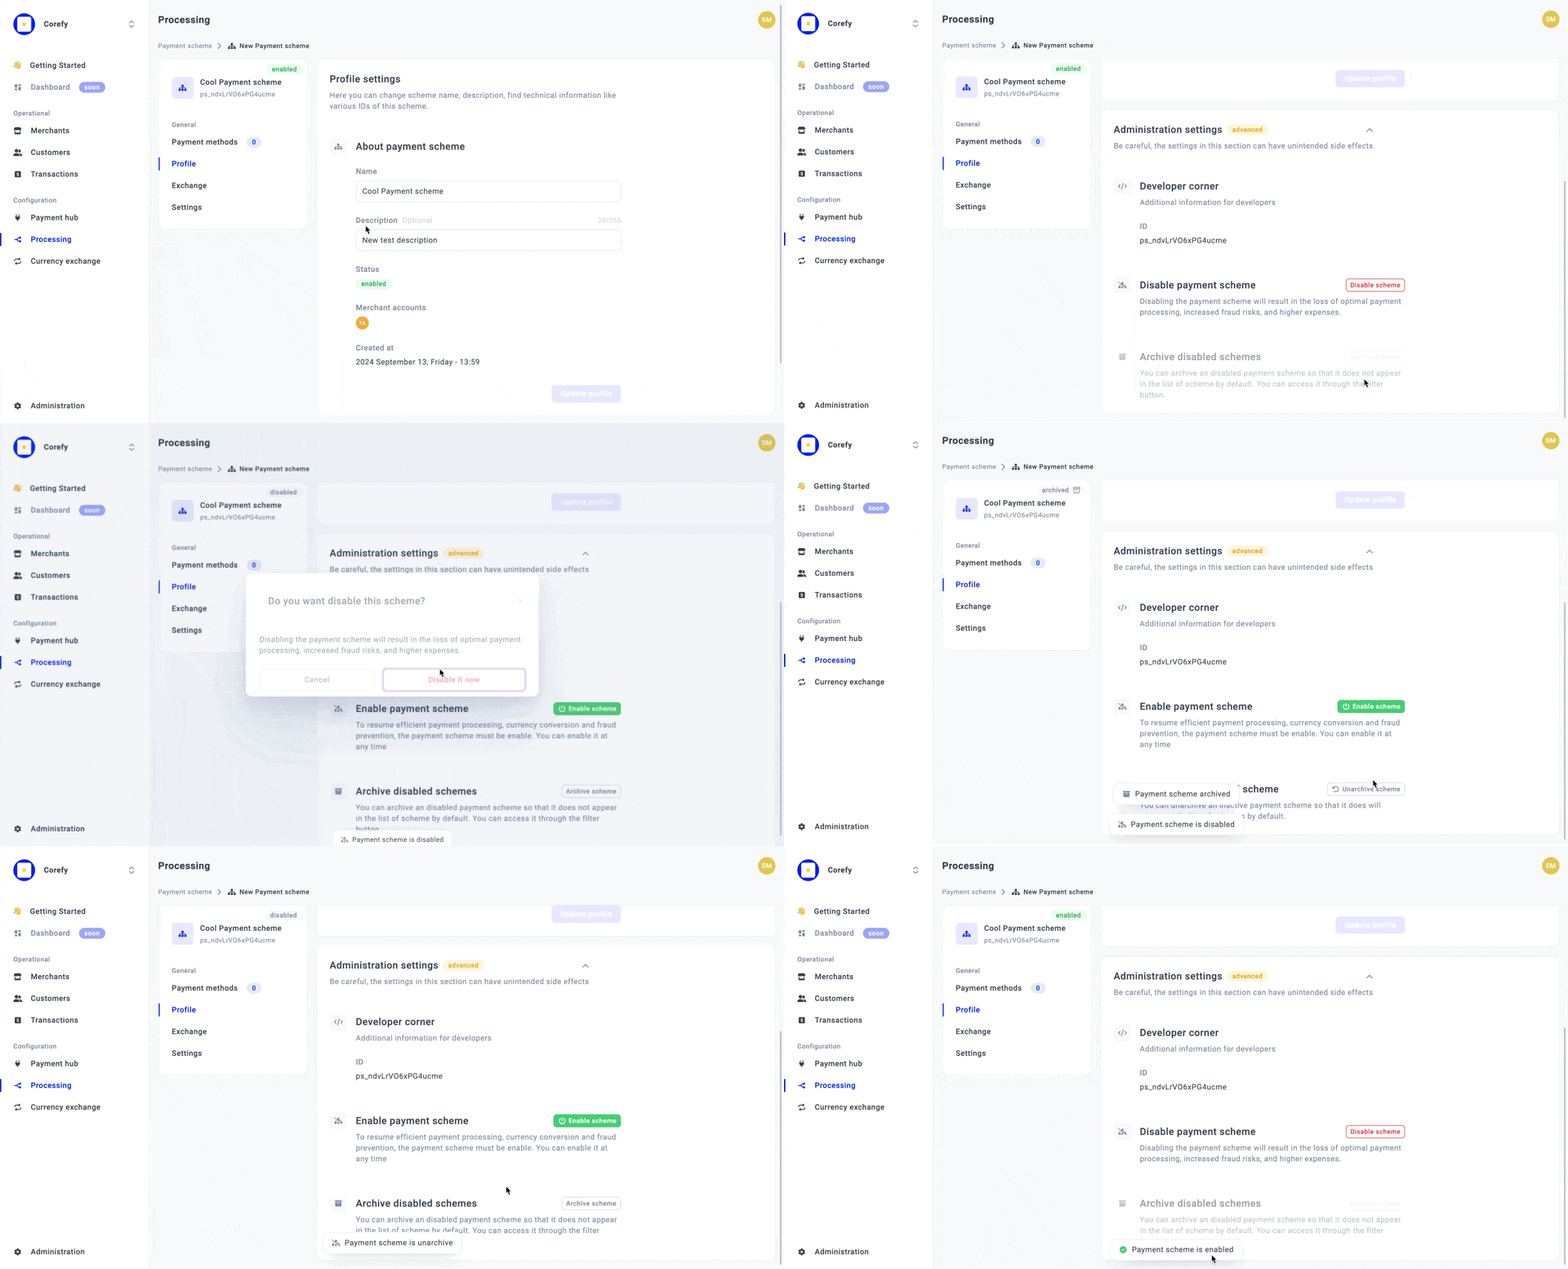
- To review the technical aspects of the Payment scheme, click the specific Scheme on the grid.
- Navigate to the Profile tab, namely Administration settings.
- You can review the Developer corner, which includes the scheme ID.
- Also, you have the option to Disable Payment scheme, but before doing so, pay attention to all the statuses that the Scheme can obtain and how it can influence the process:
| Status | Description |
| Enabled | The Payment scheme should be Enabled for you to be able to initiate processing and accept payments or make payouts. It becomes Enabled automatically after the creation. |
| Disabled | You can Disable the Scheme if you find it unnecessary. It can affect the processing and fraud detection. However, you can regain the ability to use your Scheme fully only after activating it. |
| Archived | You can hide an inactive Payment scheme so it does not appear in the list of Schemes. Use the Filter icon to review all the archived Schemes. |
- When the Payment scheme is disabled, click Archive to hide it from the grid. As this action does not presuppose deleting the Scheme, you can return displaying the archived Schemes via the Filter icon at any time. To switch it back to the Disabled status, click Unarchive.

Edit Default Payment scheme
The Default Payment scheme is created automatically and is built on the currencies you add when launching the Organisation. Primarily, it is attached to a particular Merchant account. The Default Payment scheme is marked with the yellow star icon in the Processing tab, where all the potential or already created Payment schemes are located.
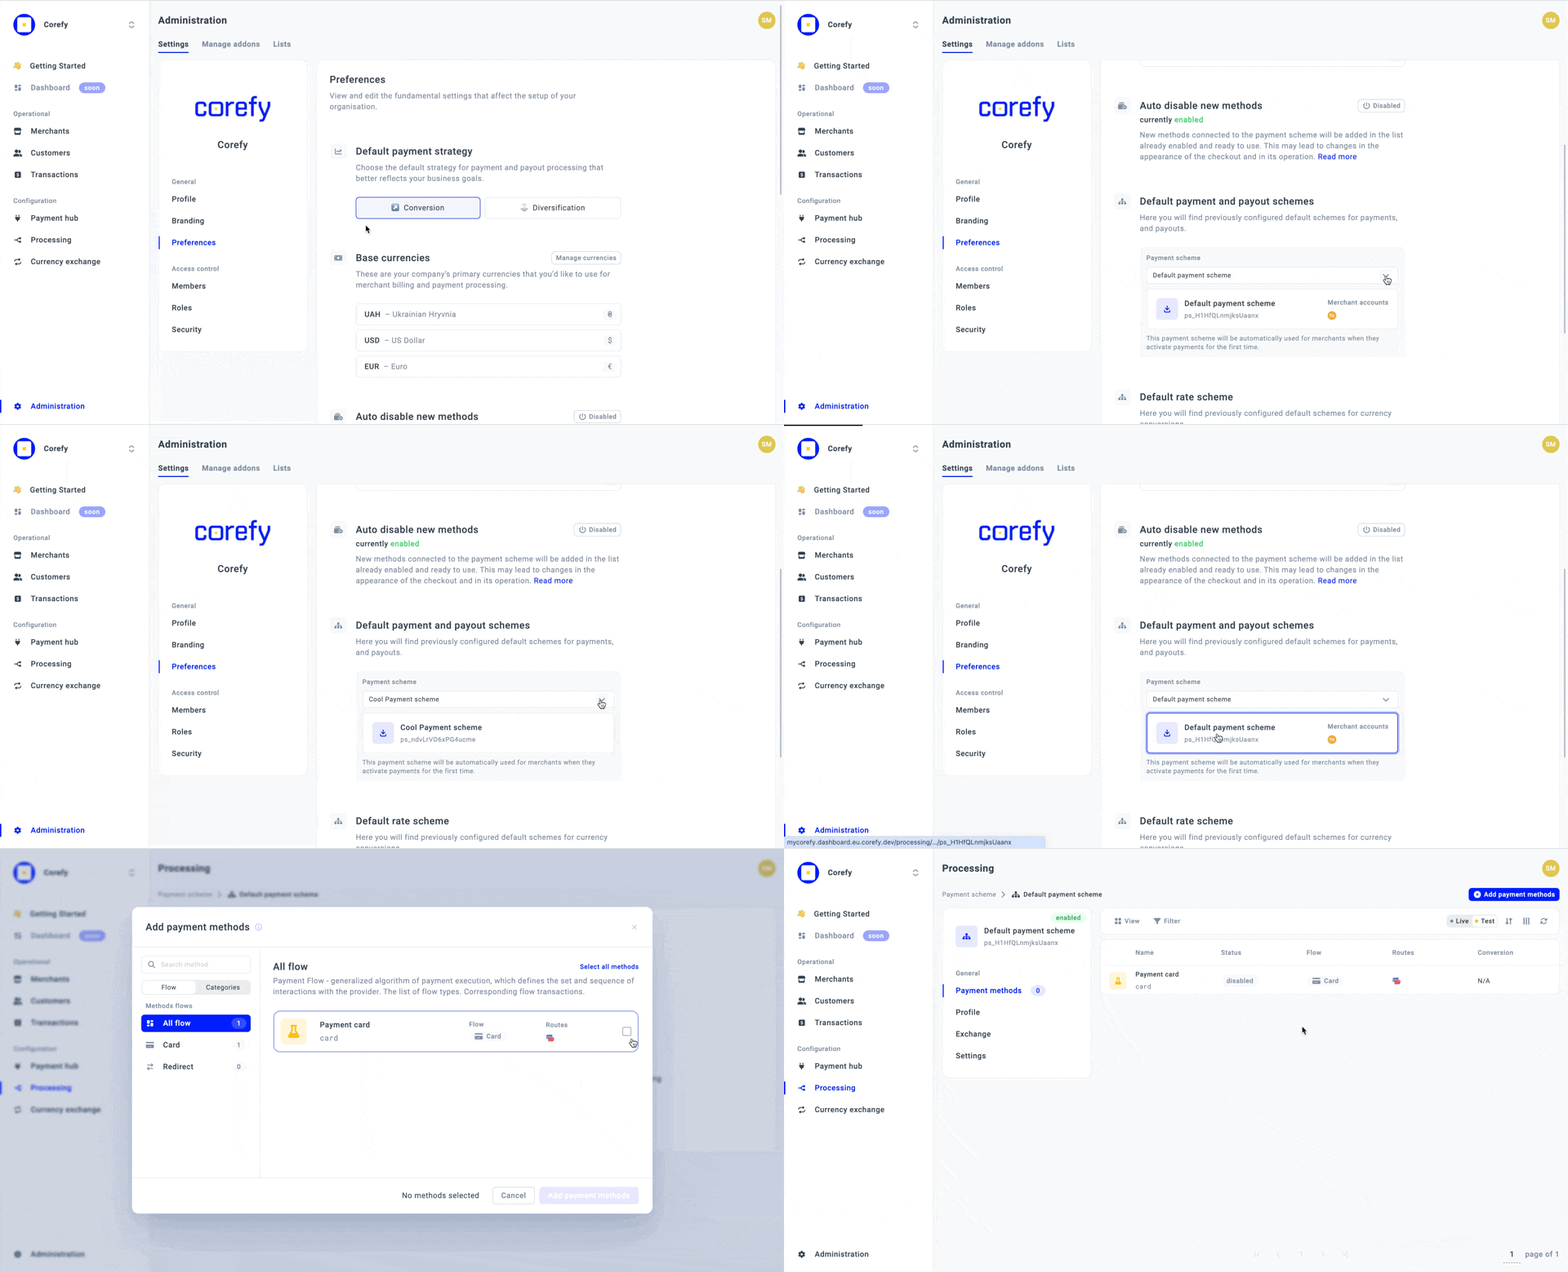
- To review the Default Payment scheme, go to the Administration section.
- Then, go to the Preferences tab and scroll to the Default Payment scheme.
- You can choose from a dropdown list any other Payment scheme previously configured and attach it to your Merchant account.
- To review the details of the particular Scheme, click it and the system should redirect you to the Scheme settings. You can manage the settings using the same flow as the one described for the Payment scheme above.
- The Default Payment scheme includes the Auto-adding new methods parameter enabled automatically. But you can also switch it off by clicking the corresponding toggle in the Scheme settings and add new Methods manually. To learn more about it, go to the Enable Auto-adding methods guide.
- Add a new Payment method to the Default Payment scheme by clicking Add Payment method.
- Choose the Methods you want to proceed with and click Add Payment method. To learn more about adding and enabling new Methods to the Payment schemes, go to the Add a New method guide.

Updated about 2 months ago
