Set up Apple Pay on Corefy
Before using the Apple Pay payment method, it is essential to configure its settings on our end. Thus, this guide explains how to enable Apple Pay on Corefy, covering the required setup steps, integration specifics, and verification process. By completing our setup checklist, you ensure that your Customers can seamlessly finalise payments via Apple Pay in compliance with Apple's security standards.
Apple Pay setup checklist
✓ Generate a Merchant Identifier
- Go to the Apple Developer account and sign in. If you have not worked with the Apple Developer account before, go to the Configure Apple Developer account guide.
- Navigate to the Certificates, Identifiers & Profiles section.
- Click Register a New Identifier.
- Select Merchant IDs.
- Enter a Description and an Identifier in the respective fields.
✓ Request a Payment Processing Certificate
- Create a new Directory.
- Open Keychain Access on your Mac.
- In the Keychain Access, go to the Certificate Assistant. Then, click Request a Certificate From a Certificate Authority.
- Enter the following data in the form:
- Email Address
- Common Name (it refers to the certificate name)
- CA Email Address → leave it empty
- Choose Saved to disk.
- Click Let me specify key pair information.
- After filling in the form, click Continue.
- Then, save the file
CertificateSigningRequestPaymentProcessingCertificate.certSigningRequestto your current Directory. - When creating a cryptographic Key pair, choose specific technical parameters:
- Key Type: Elliptic Curve (EC) – Elliptic Curve Cryptography
- Key Size: 256-bit
- Algorithm: ECDSA – Elliptic Curve Digital Signature Algorithm

✓ Extract and convert the Payment Processing Certificate
- Navigate to the Apple Developer Merchant ID list.
- Select your Merchant ID and click Create Certificate.
- When the system shows the question Will payments... be processed exclusively in China mainland?, answer No.
- Upload the file
CertificateSigningRequestPaymentProcessingCertificate.certSigningRequest. - Download the signed certificate as
apple_pay.cerand save it to your current Directory. - Convert the certificate to PEM format:
openssl x509 -inform DER -in apple_pay.cer -out apple_pay.pem✓ Retrieve a Private Key
- Open Keychain Access and choose the Key you previously generated
PetroPetrenkoProcessingCertificate. - Right-click the Key and select Export.
- Save the exported Key as a
.p12filePetroPetrenkoProcessingCertificate.p12in your current Directory. - Create a password for the file.
- Convert the
.p12file into a PEM-formatted Private Key:
openssl pkcs12 -in PetroPetrenkoProcessingCertificate.p12 -nocerts -nodes | sed -ne '/-BEGIN PRIVATE KEY-/,/-END
PRIVATE KEY-/p' > ProcessingCertificatePrivateKey.pem- The Private Key should be located in
ProcessingCertificatePrivateKey.pem.
✓ Create a Merchant Identity Certificate
- Open Keychain Access on your Mac.
- In the Keychain Access, go to the Certificate Assistant. Then, click Request a Certificate From a Certificate Authority.
- Enter the following data in the form:
- Email Address
- Common Name
- CA Email Address → leave it empty
- Choose Saved to disk.
- Then, save the file as
CertificateSigningRequestMerchantIdentityCertificate.certSigningRequest.
✓ Extract and convert the Merchant Identity Certificate
- Navigate to the Apple Developer Merchant ID list.
- Select your Merchant ID and click Create Certificate.
- Upload the
CertificateSigningRequestMerchantIdentityCertificate.certSigningRequestfile. - Download the signed certificate as
merchant_id.cerand save it to your current Directory. - Convert it to PEM format:
openssl x509 -inform DER -in merchant_id.cer -out merchant_id.pem✓ Export the Merchant Identity Private Key
- Go to Keychain Access and find the Merchant Identity Certificate you previously created.
- Right-click the certificate and export as
PetroPetrenkoMerchantIdentityCertificate.p12. - Create a password.
- Convert the Private key to PEM format:
openssl pkcs12 -in PetroPetrenkoMerchantIdentityCertificate.p12 -nocerts -nodes | sed -ne '/-BEGIN
PRIVATE KEY-/,/-END PRIVATE KEY-/p' > MerchantIdentityCertificatePrivateKey.pem
✓ Register Merchant Domains
- Open the Merchant IDs section in your Apple Developer account.
- Choose your Merchant ID, then select Add Domain.
- Enter your Domain and click Save.
- You must host Apple's verification file,
apple-developer-merchantid-domain-association, at the following location:
https://yourdomain.com/.well-known/apple-developer-merchantid-domain-association✓ Activate the Certificates and Keys on our platform
- Navigate to a Payment Hub and click New connection.
- The system redirects you to the catalogue of available Providers. From the list of Providers, choose the one that supports the Apple Pay payment method.
- Click Connect. To learn more about adding Providers, go to the Connect a Provider guide.
- After adding a Provider, go to its Payments tab.
- Click Add Payment methods and select Apple Pay.
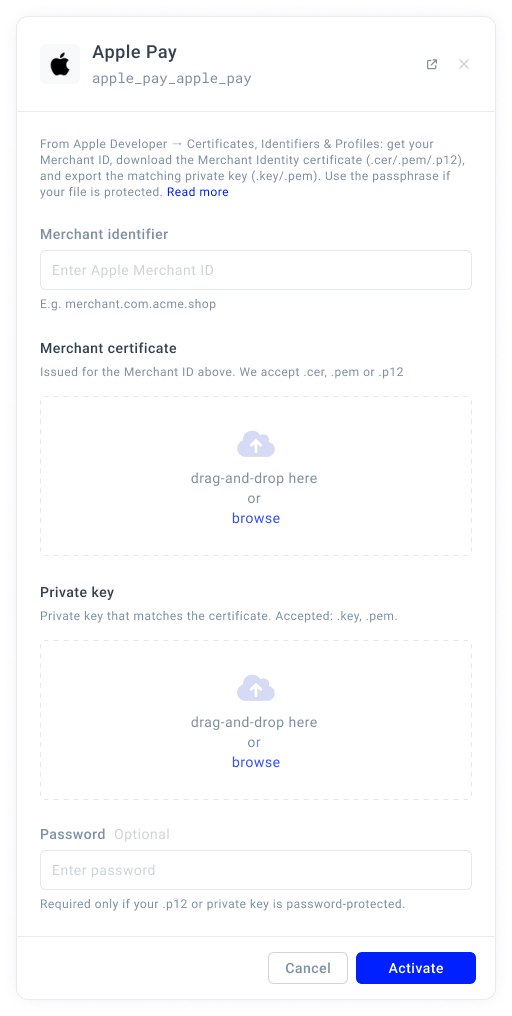
- After adding the Method to the grid, click Apple Pay > More options > Activate.
- The system opens a respective drawer.
- Enter the Merchant identifier in the corresponding field.
- Then, upload a Merchant certificate and Private key.
- Click Activate.
- Go to Processing and add an Apple Pay method to the Payment scheme. To learn the details, go to the Add a New method guide.
- Then, establish Routing for the future Apple Pay payments. To learn the details, go to the Apply Routing rules guide.
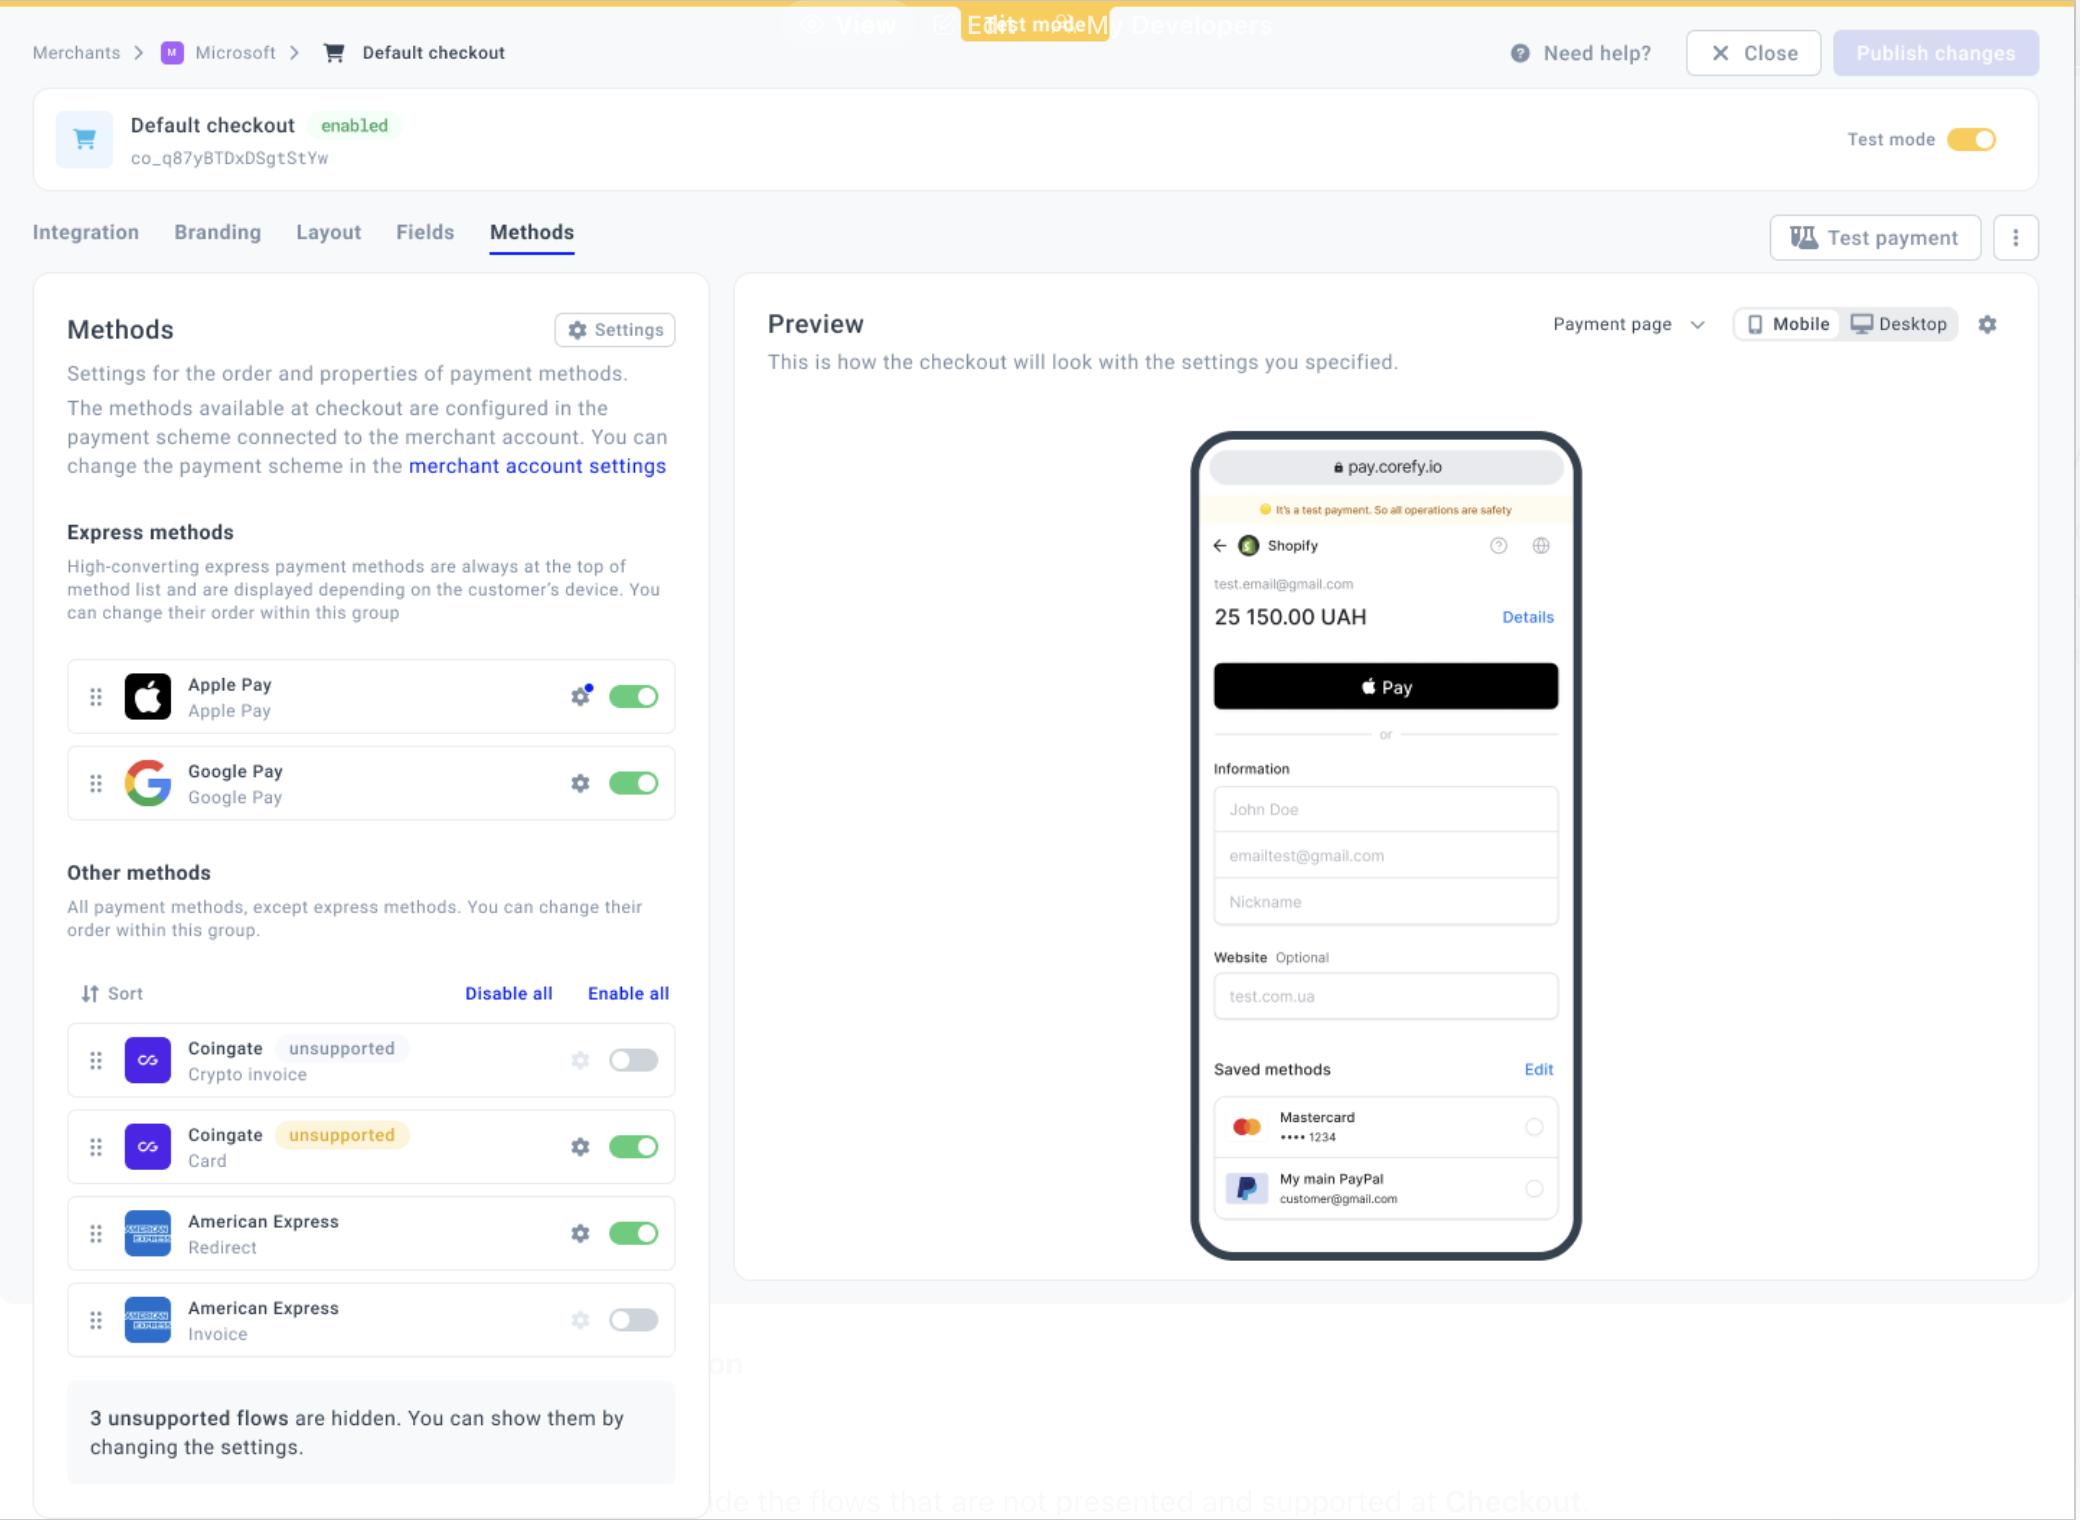
✓ Switch on the Apple Pay method for Checkout
- Go to Merchants and choose the Merchant account on the grid.
- Navigate to the Checkouts tab and select the Checkout you want to proceed with.
- Then, go to the Methods tab.
- To enable Express methods, go to the Methods settings and toggle the corresponding option on.
- Then, switch on the Apple Pay toggle in the Methods list. After that, the Apple Pay button should be displayed at Checkout.