Manage Webhooks
Update Webhook settings
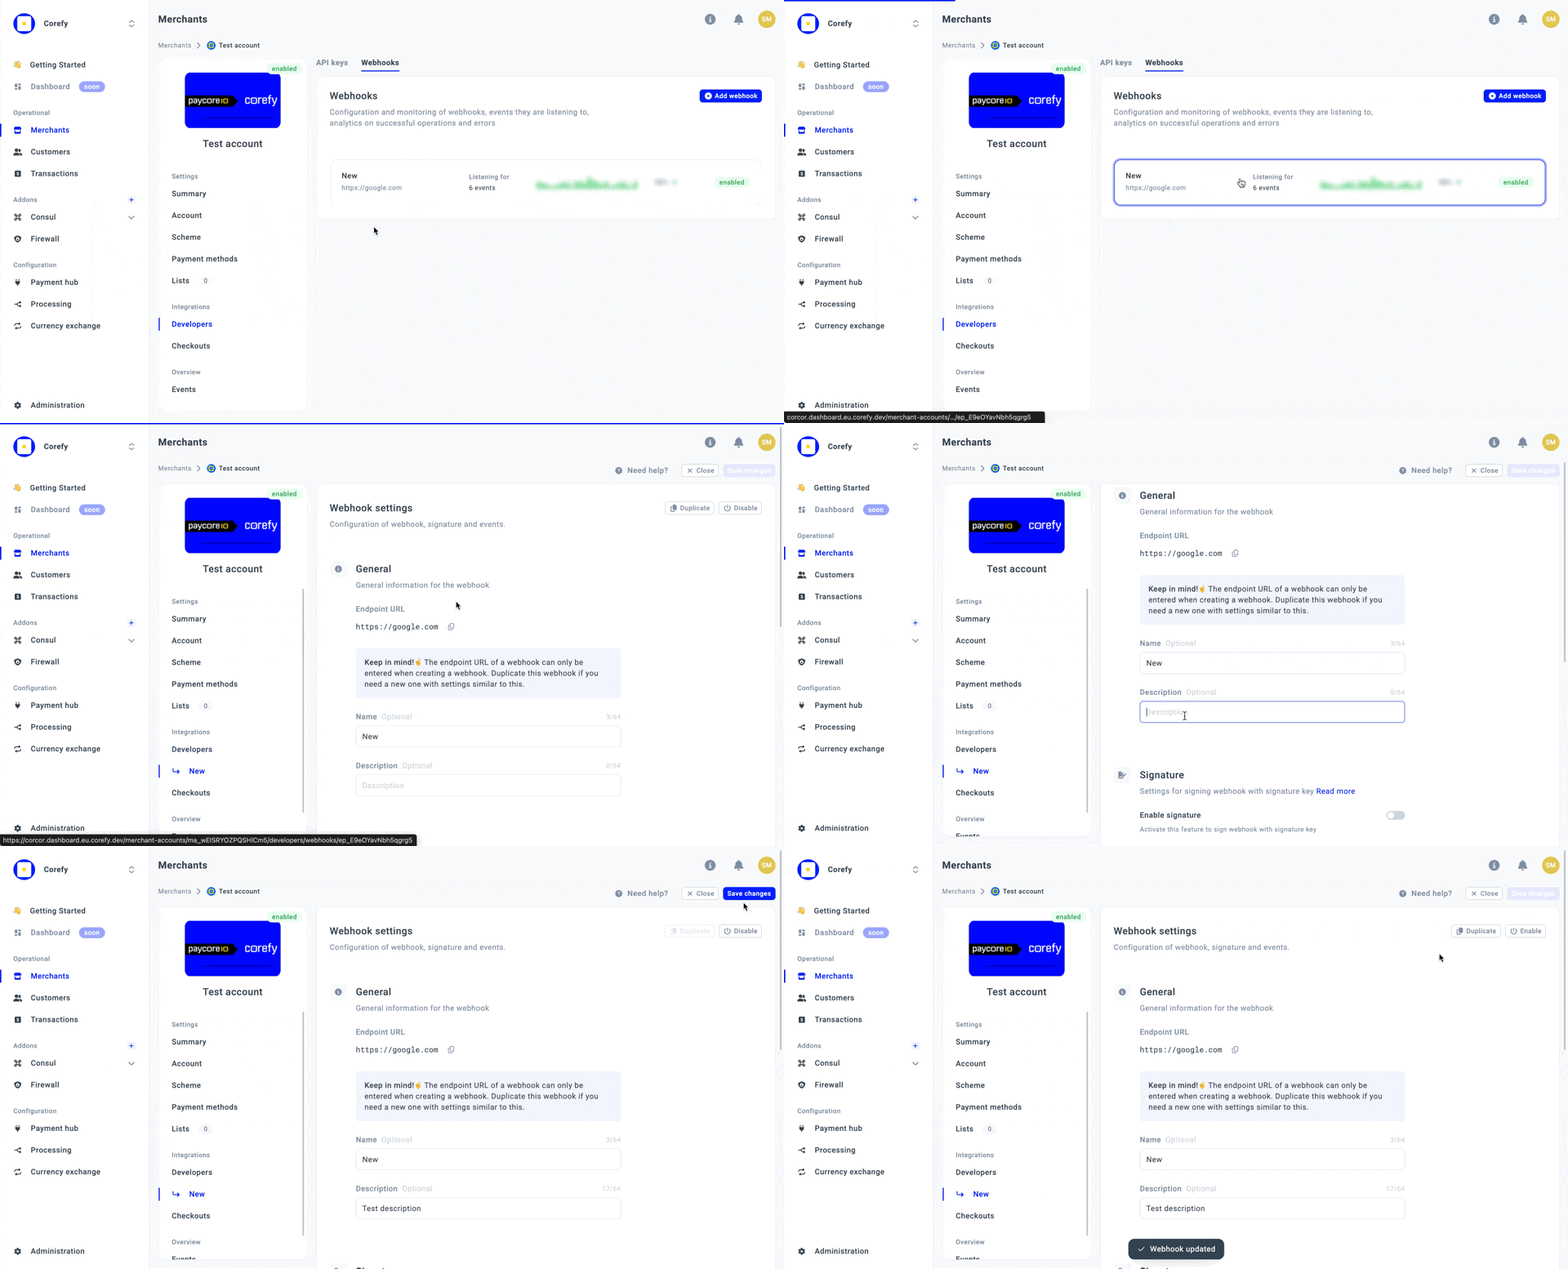
- Go to the Merchants tab and click the Merchant account on the grid.
- Then, navigate to the Developers tab of the specific Merchant account.
- You can review the list of the previously added Webhooks. Also, you can check the Error rate, Status, and Events the particular Webhook is listening to.
- Then, click the particular Webhook to review or update its details.
- To edit the General block that contains the Webhook name and Description, start typing the new data in the corresponding text field.
- After making the valuable edits, click Save changes.

Manage Administration settings
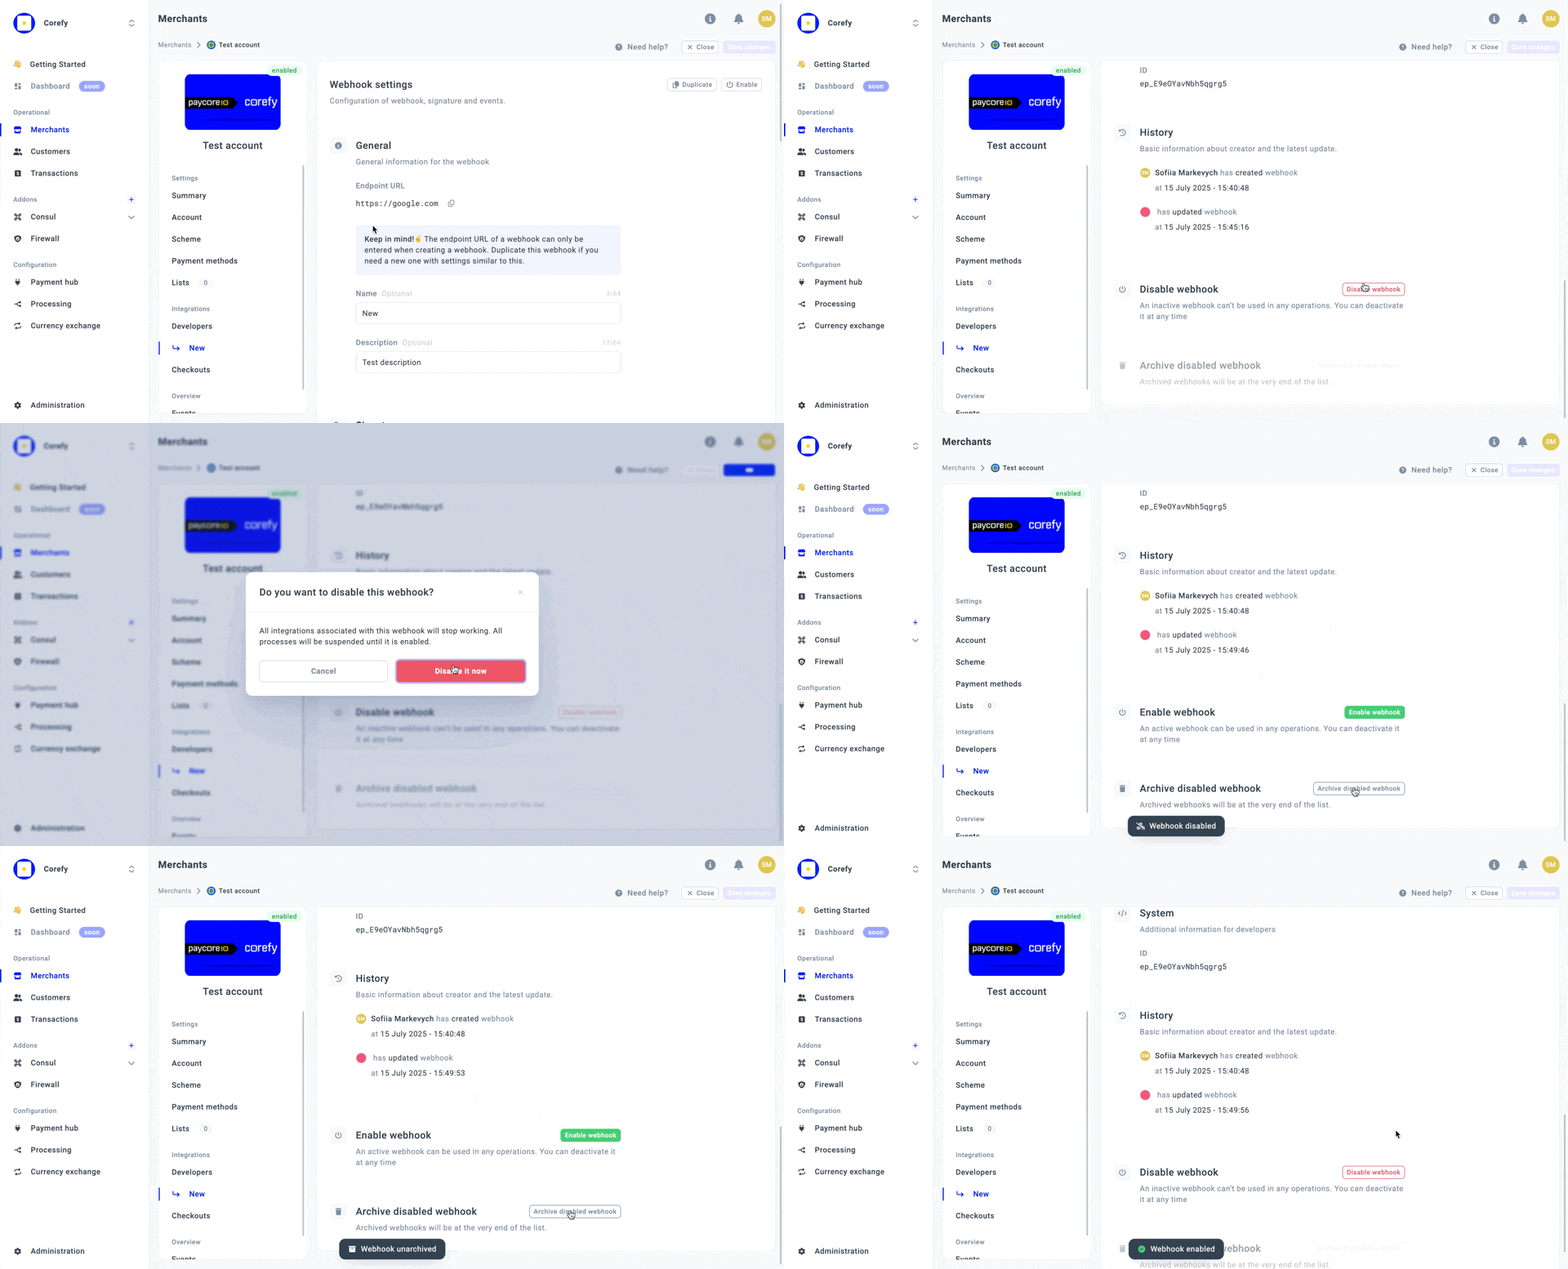
- Navigate to the Developers tab and click the specific Webhook on the grid.
- You can review the Developers corner, which includes the webhook ID, and the History, which contains basic information about the Webhook creator and the latest update.
- If you no longer need the Webhook, click Disable. If necessary, you can Enable it at any time later.
- When the Webhook is disabled, click Archive disabled webhook to remove the Webhook from the list.
- Here is a short overview of each status a Webhook can possess:
| Status | Description |
| Enabled | When you create a Webhook, it automatically becomes Enabled in our system and can be used further. |
| Disabled | You can disable a Webkook if you find it unnecessary. The system should no longer react to the previously selected and established Events. However, you can regain the ability to use the Webhook fully only after activating it. |
| Archived | You can hide a Webhook from the list if it is no longer valid and relevant. |

Updated 3 months ago
