

Configure Self-Hosted Merchant Documentation
Set up a fully managed and synchronised Merchant Documentation project using GitHub and GitBook.
This guide provides a walkthrough for setting up your documentation ecosystem, covering everything from preparing a GitHub Organisation and creating the necessary repositories to configuring automated synchronisation. You can also learn how to seamlessly connect your repositories to GitBook, apply custom white-label branding, and publish your documentation for your audience.
GitHub configuration
Prepare your GitHub Organisation and repositories for self-hosted documentation management.
1. Create a GitHub Organisation
To implement self-hosted and managed Merchant Documentation, create a dedicated GitHub Organisation.
- Open GitHub.
- Click New organisation.
- To review details about GitHub Organisations, go to About organisations.
- Select the Free plan.
The Free plan fully covers all required functionality for this project.
- Enter the Organisation name. It is preferable to use "MerchantPortalDoc".
- Complete verification and confirm creation.
Use a dedicated Organisation because all documentation repositories should be stored and managed inside it.
2. Create Documentation Repositories
After creating your Organisation, create the required repositories. By default, Corefy provides source code for the following documentation sections:
Create the Main Repository
- Open your Organisation.
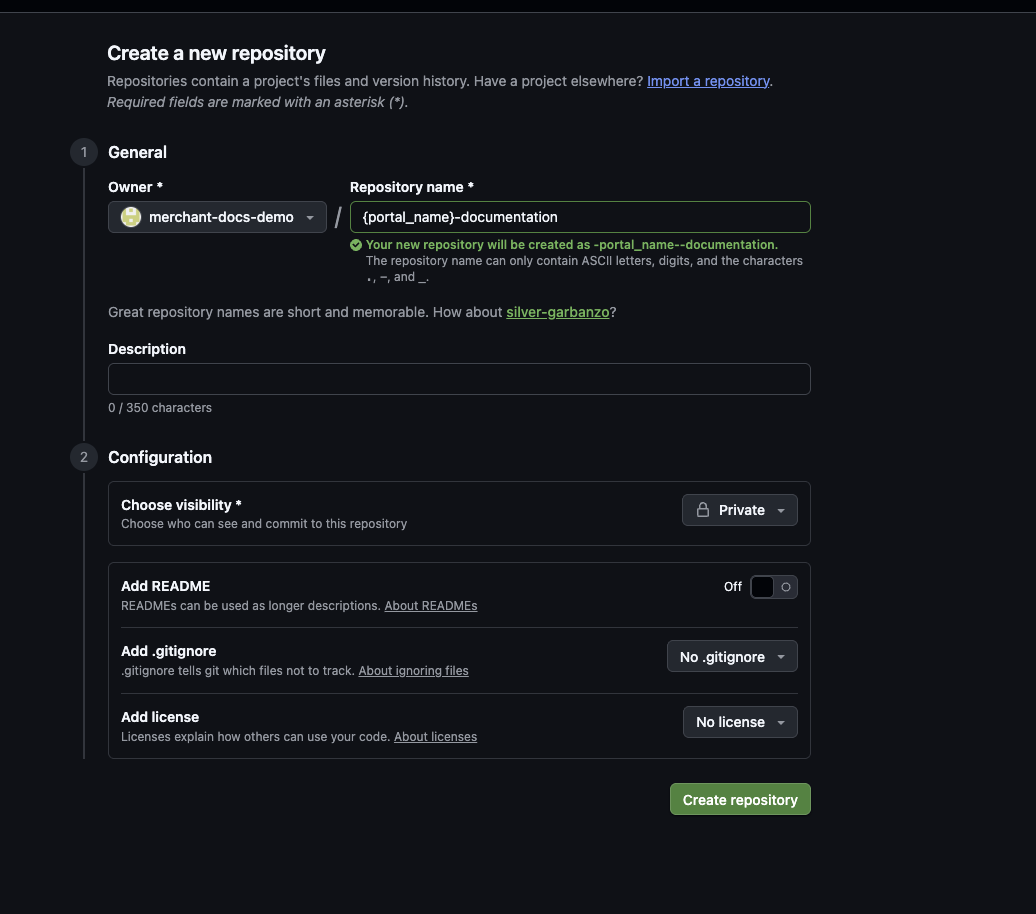
- Click New repository.
- Configure the repository:
- Repository name: "portal_name"-documentation
- Visibility: Private
- Add README: Off
- Add .gitignore: No .gitignore
- Add license: No license
- Click Create repository.
Create Additional Repositories
Repeat the same steps for:
- "portal_name"-home
- "portal_name"-api-reference
- "portal_name"-changelog
In the example configuration, only the Documentation and API References repositories were implemented.

3. Configure Synchronisation with Source Documentation
Set up automated synchronisation between your repositories and Corefy source documentation.
Generate a Personal Access Token (Account Manager / DevOps Step)
Generate a Personal Access Token (Account Manager / DevOps Step)
This step must be completed by your Account Manager or DevOps team.
-
Open Personal access token.
-
Select Fine-grained tokens.
-
Click Generate new token.
-
Configure:
-
Token name: Client name
-
Expiration: No expiration
-
Resource owner: corefydoc
-
Repository access: Select Only select repositories
-
Select all four repositories.
-
Click Generate token.
-
Securely store the generated token.
-
Do not share this token publicly. Store it securely.
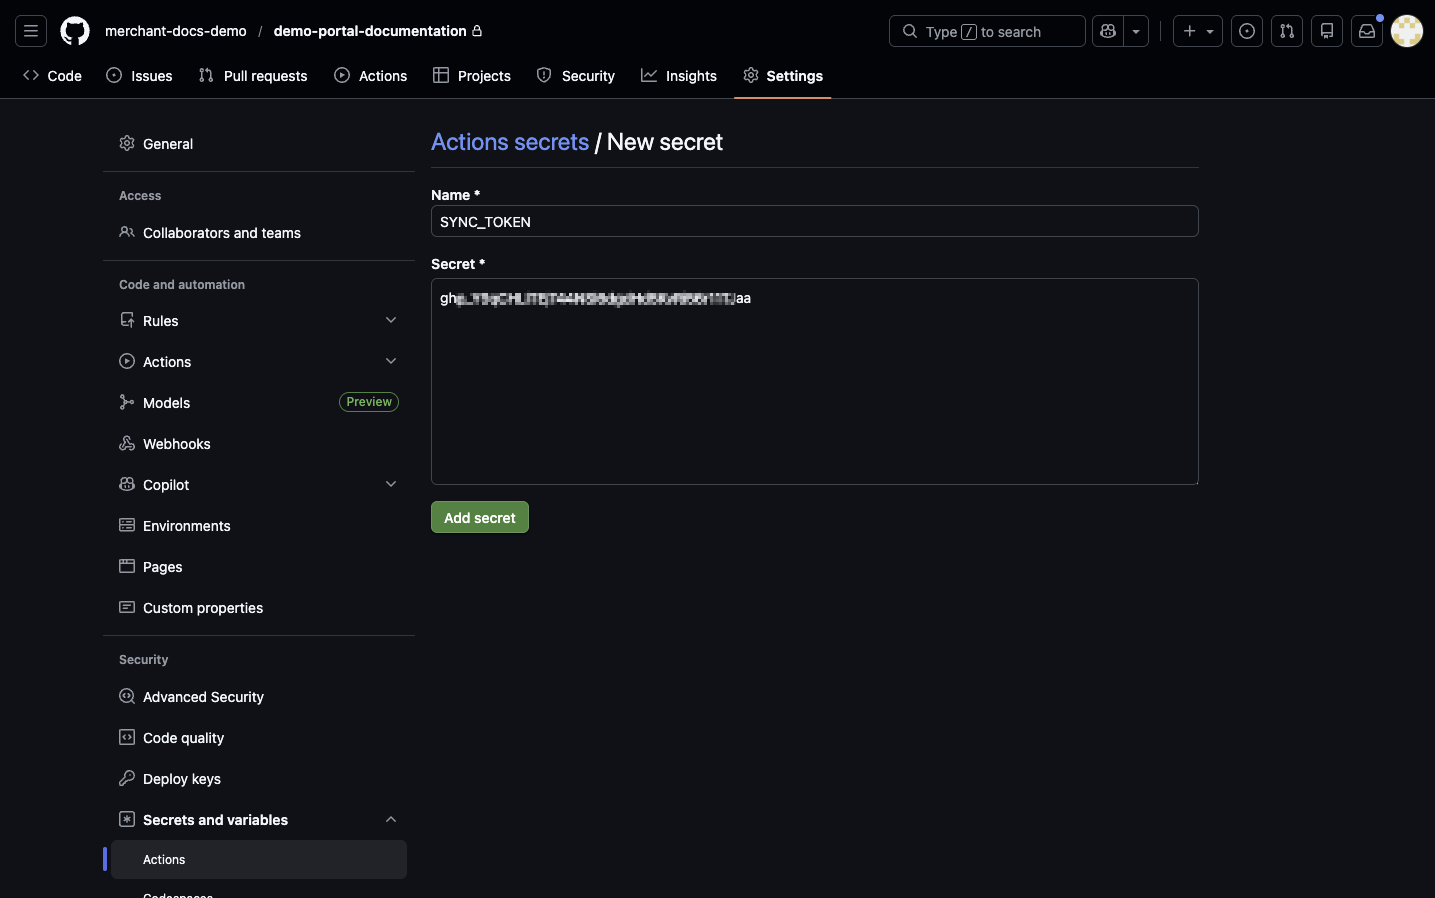
Add Repository Secret
- Open your repository.
- Go to Settings.
- Open Secrets and variables > Actions.
- Click New repository secret.
- Enter:
- Name: SYNC_TOKEN
- Secret: Paste the token received from your Account Manager.
- Click Add secret.
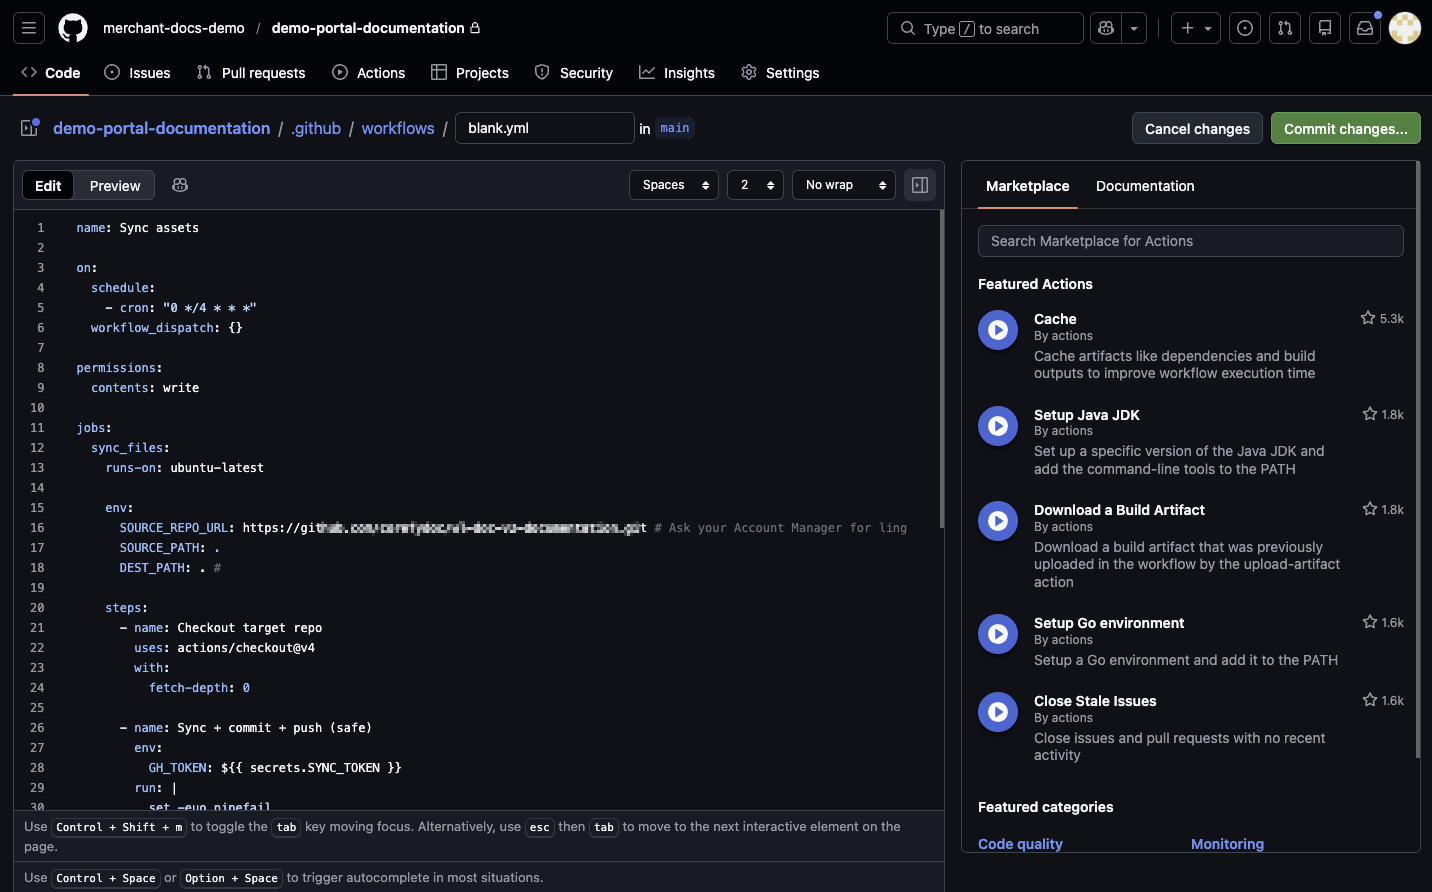
Configure GitHub Actions Workflow
- Open the Actions tab.
- Select Simple workflow.
- Remove the pre-filled code.
- Insert the following configuration:
name: Sync assets

on:
  schedule:
    - cron: "0 */4 * * *"
  workflow_dispatch: {}

permissions:
  contents: write

jobs:
  sync_files:
    runs-on: ubuntu-latest
    env:
      SOURCE_REPO_PATH: github.com/ # Set link from your Account Manager
      SOURCE_PATH: "."
      DEST_PATH: "."

    steps:
      - name: Checkout target repo
        uses: actions/checkout@v4
        with:
          fetch-depth: 0

      - name: Sync + commit + push
        env:
          GH_TOKEN: ${{ secrets.SYNC_TOKEN }}
        run: |
          set -euo pipefail
          git config user.name "github-actions[bot]"
          git config user.email "github-actions[bot]@users.noreply.github.com"

          git remote set-url origin "https://x-access-token:${GH_TOKEN}@github.com/${GITHUB_REPOSITORY}.git"
          BRANCH="${GITHUB_REF_NAME}"
          # 1) Clonned source
          rm -rf repo-a-source-temp
          git clone --depth 1 "https://x-access-token:${GH_TOKEN}@${SOURCE_REPO_PATH}" repo-a-source-temp
          # Validate repositoris
          echo "Checking downloaded files:"
          ls -R repo-a-source-temp | head -n 20
          # 2) Sync
          # rsync -av source/ destination/
          # --delete
          rsync -av --delete \
            --exclude ".git/" \
            --exclude ".github/" \
            --exclude "repo-a-source-temp/" \
            "repo-a-source-temp/" \
            "./"
          rm -rf repo-a-source-temp
          # 3) Validate before commit
          git add -A

          echo "Changes detected:"
          git status --short
          if git diff --cached --quiet; then
            echo "No changes found. Everything is already up to date."
            exit 0
          fi
          git commit -m "chore(sync): mirror from source repo"

          git fetch origin "${BRANCH}"
          git rebase "origin/${BRANCH}" || git rebase --abort
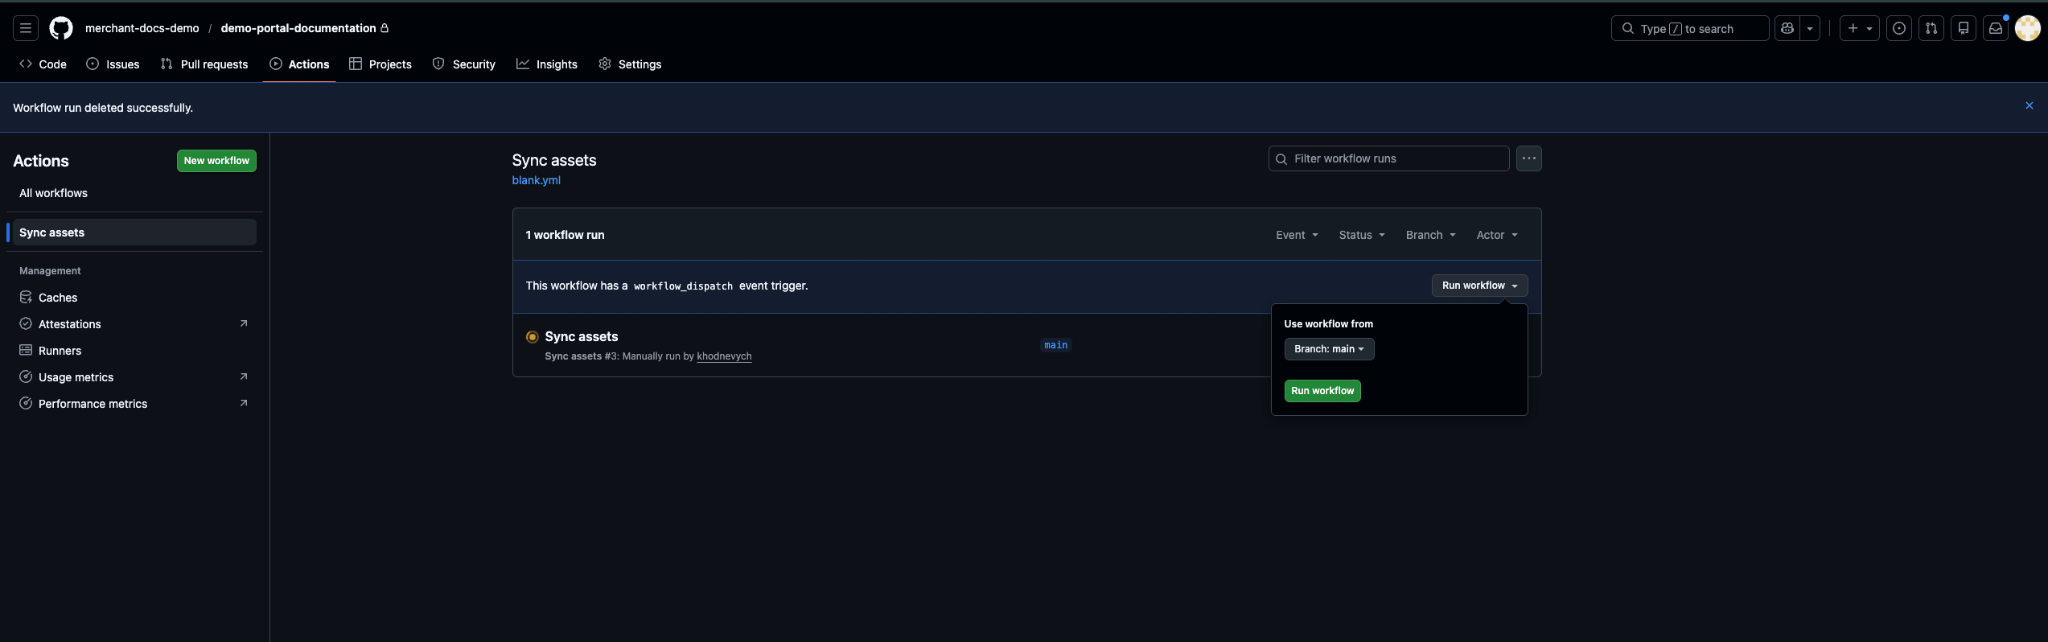
git push origin "HEAD:${BRANCH}"- Click Commit changes.
- Click Run workflow to start the first synchronisation.
- Repeat the configuration for other repositories.
GitBook Configuration
Set up GitBook and connect it to your repositories.
1. Create a GitBook Account
- Open GitBook .
- Click Sign up.
- Complete registration.
- Enter your Organisation Name (for example: "Demo Portal").
- Open Docs sites.
- Select your created site.
- Choose Docs template.
- Click Use Docs template.
The Docs template allows full control over sections, structure, and content.
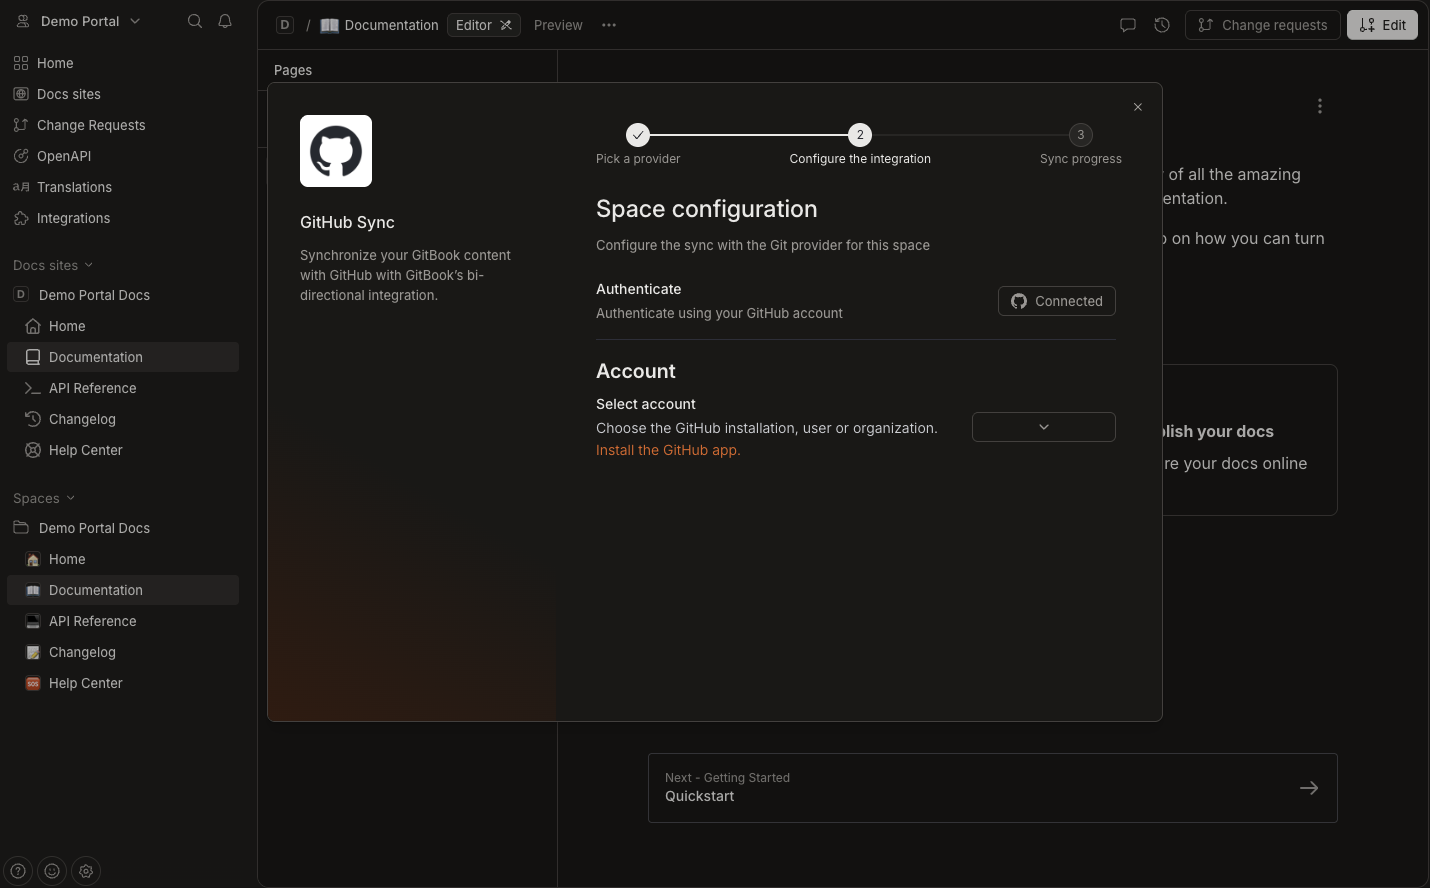
2. Configure GitHub Synchronisation
- Open your created Documentation site.
- Click Set Up GitSync.
- Select Sync GitHub.
- Connect your GitHub account.
- Install the GitHub App.
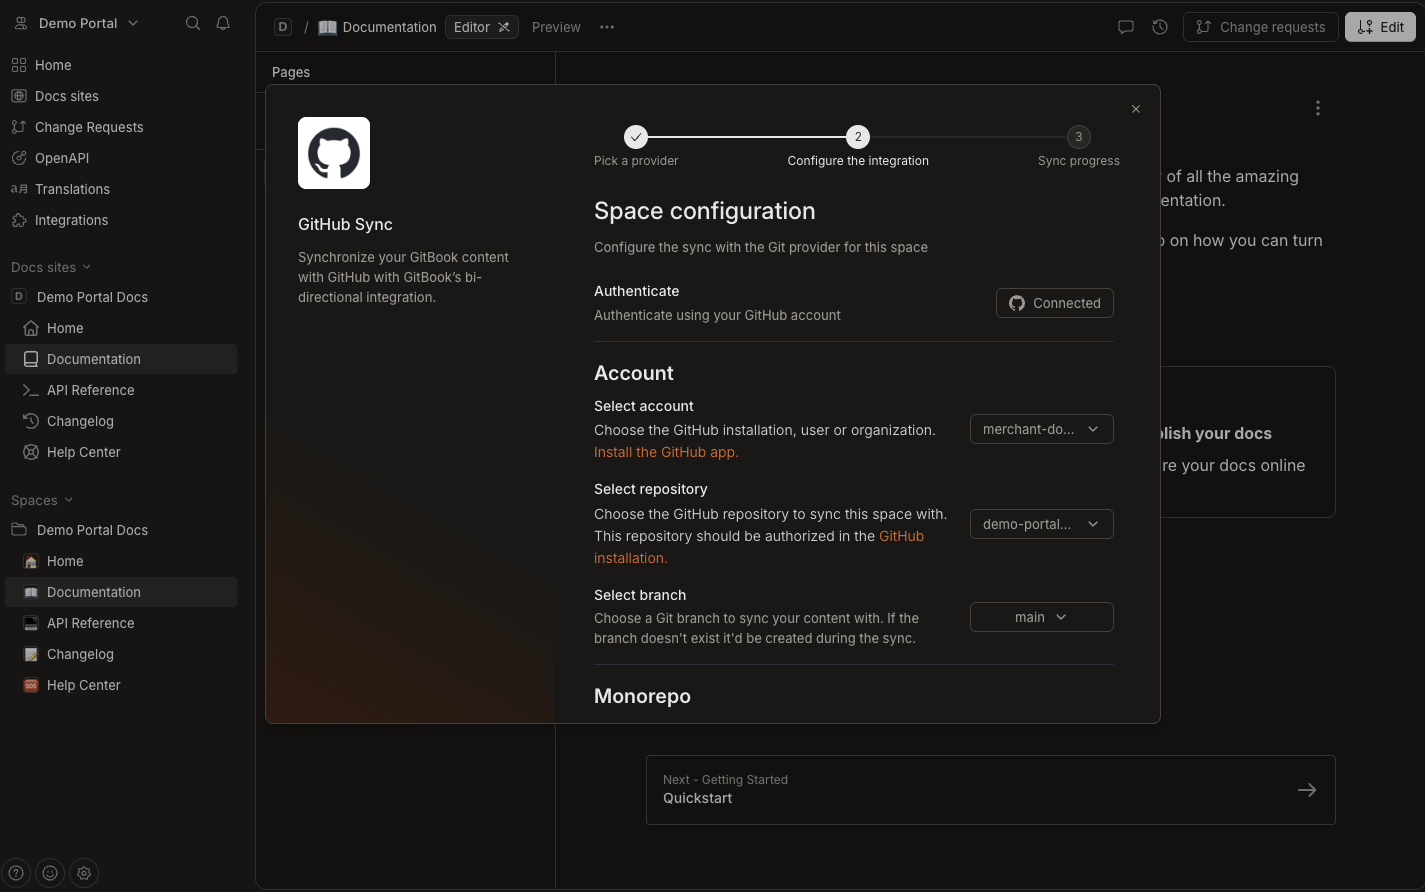
- Select All repositories.
- Choose your target repository.
- Select branch
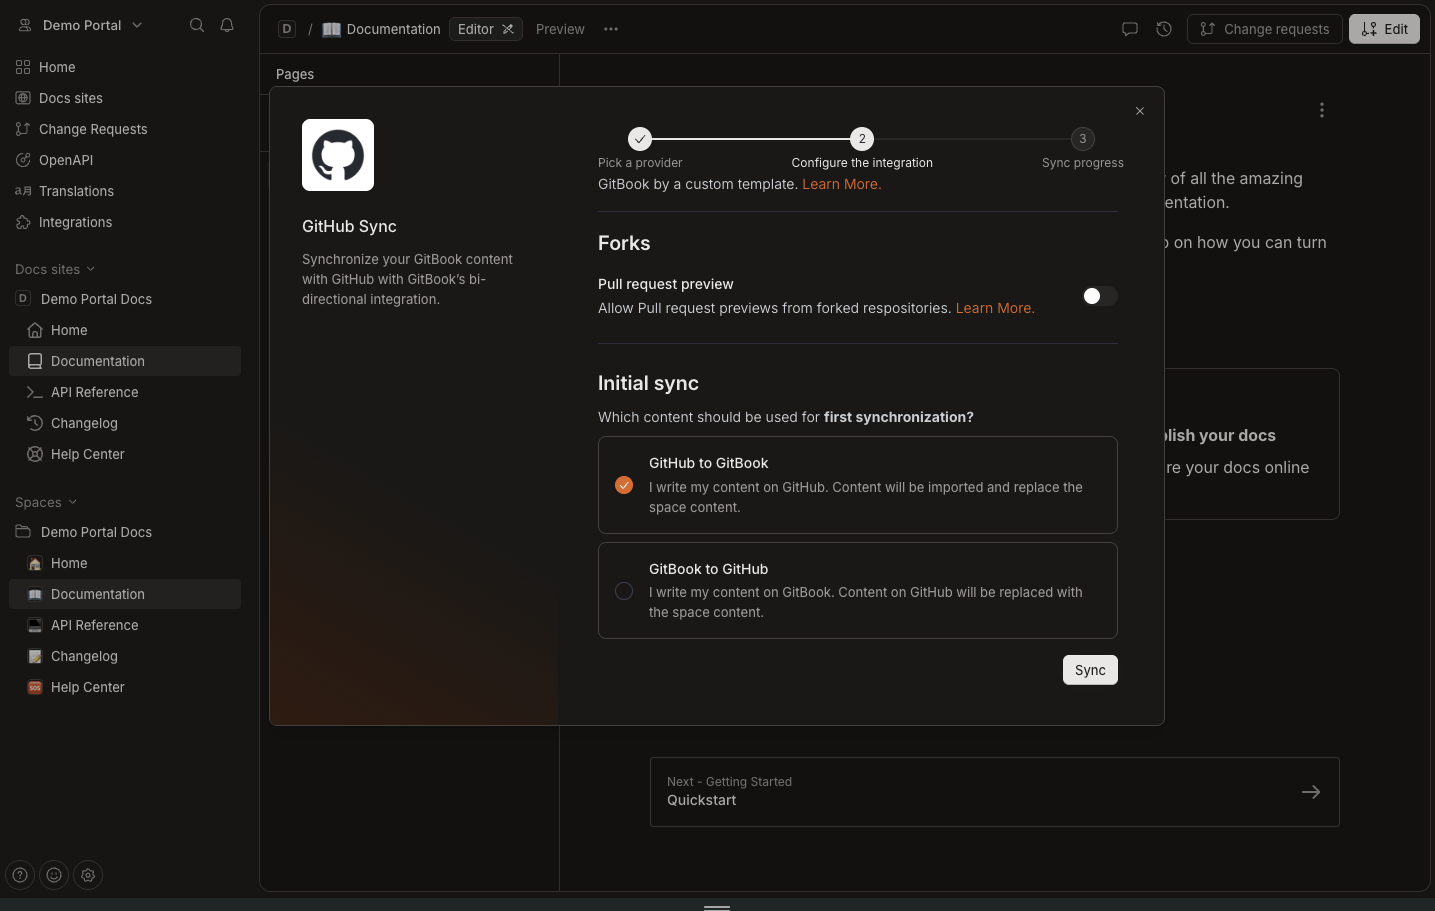
main. - Keep other settings as default.
- Ensure initial sync is set to GitHub to GitBook.
- Click Sync.
- Repeat this step for other repositories.
White Label Merchant Documentation
Customise and publish your documentation.
1. Update Company Information
By default, Corefy provides documentation adaptable for any PSP.
- Open the Introduction page.
- Replace Company name with your company name.
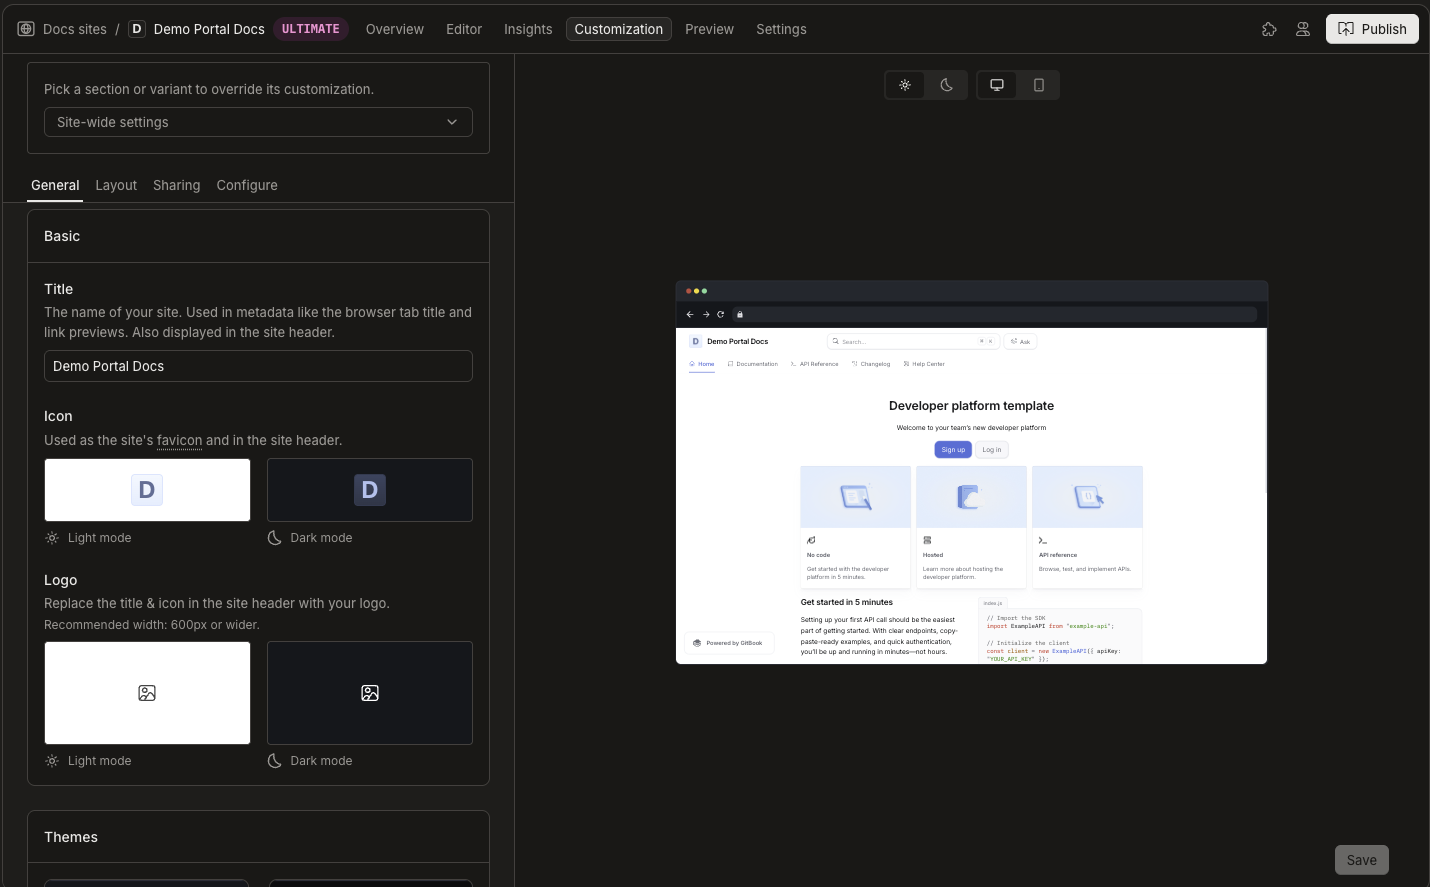
2. Apply Branding
- Open Customisation.
- Update:
- Logo
- Icon
- Colors
- Layout
3. Configure Domain and URL
- Open Settings.
- Navigate to Domain and URL.
- Configure:
- Custom domain (if supported by your plan).
- Or use the Default GitBook subdomain.

4. Publish Documentation
After completing customisation:
- Click Publish.
- Confirm publication.
- Access your live documentation.
Your Merchant Documentation is now fully configured and published.
Change Management
Control page visibility and manage content updates in your Merchant Documentation.
1. Hide Pages and Sections
Disable sections that you do not want to support in your Merchant Portal.
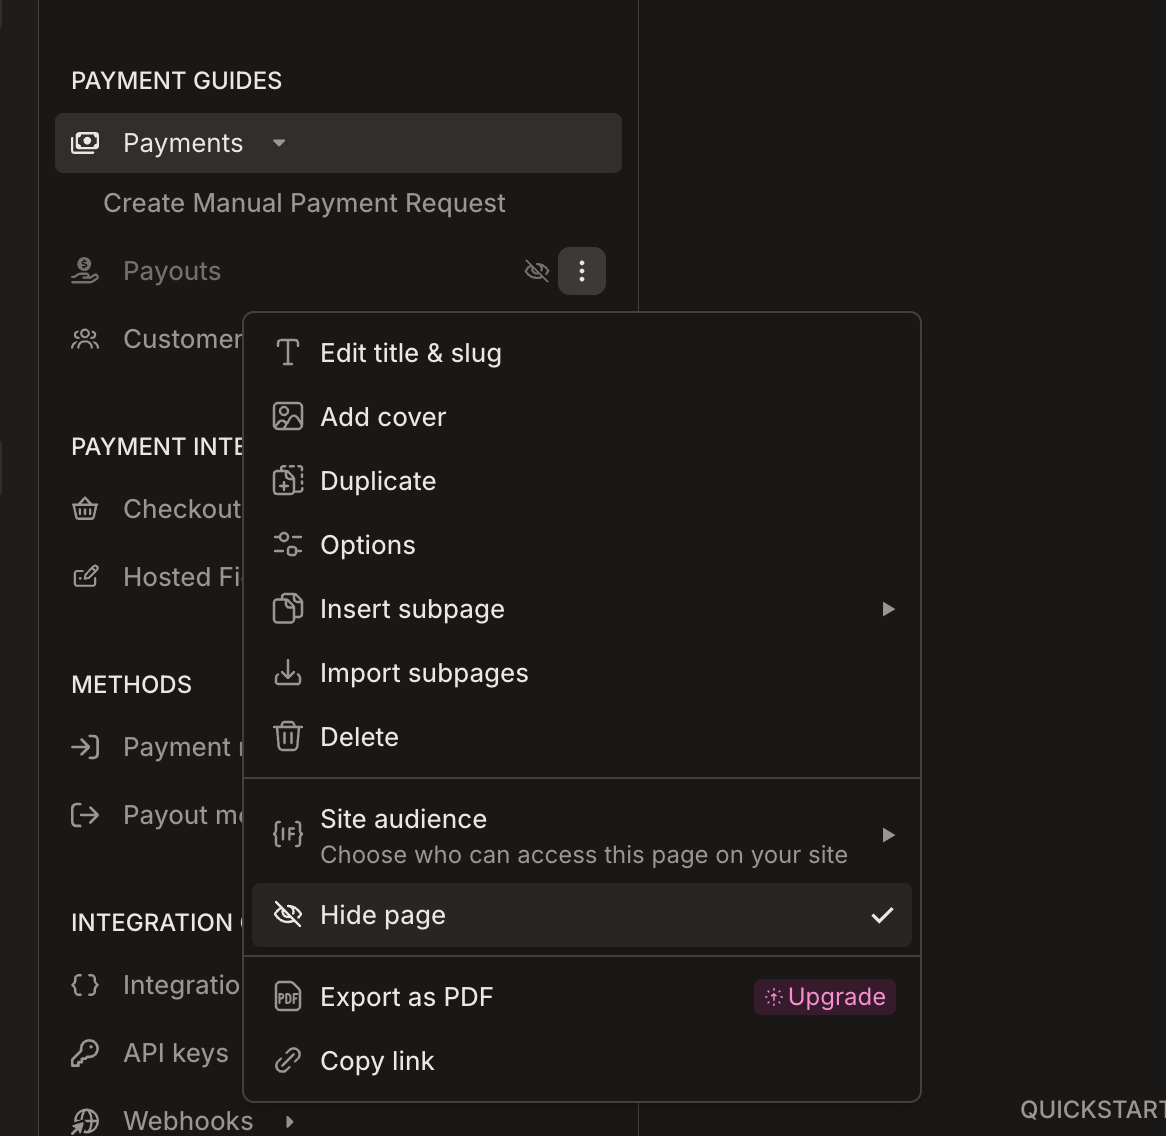
Hide a Page
- Open your Docs site.
- Click Edit.
- Select the page in the left navigation panel.
- Click the three-dot menu.
- Select Hide page.
- Click Merge to confirm changes.
Hidden pages remain in the repository but are not visible in the navigation.
- If you want to restore a page, repeat the same steps and disable Hide page.
2. Manage Content Updates
Corefy continuously improves the source documentation. Your repositories synchronise automatically every four hours.
You have two possible approaches:
- Keep automatic synchronisation enabled.
- Disable automatic synchronisation and review changes manually.
Disable Automatic Synchronisation
If you want to control incoming changes manually, disable scheduled synchronisation.
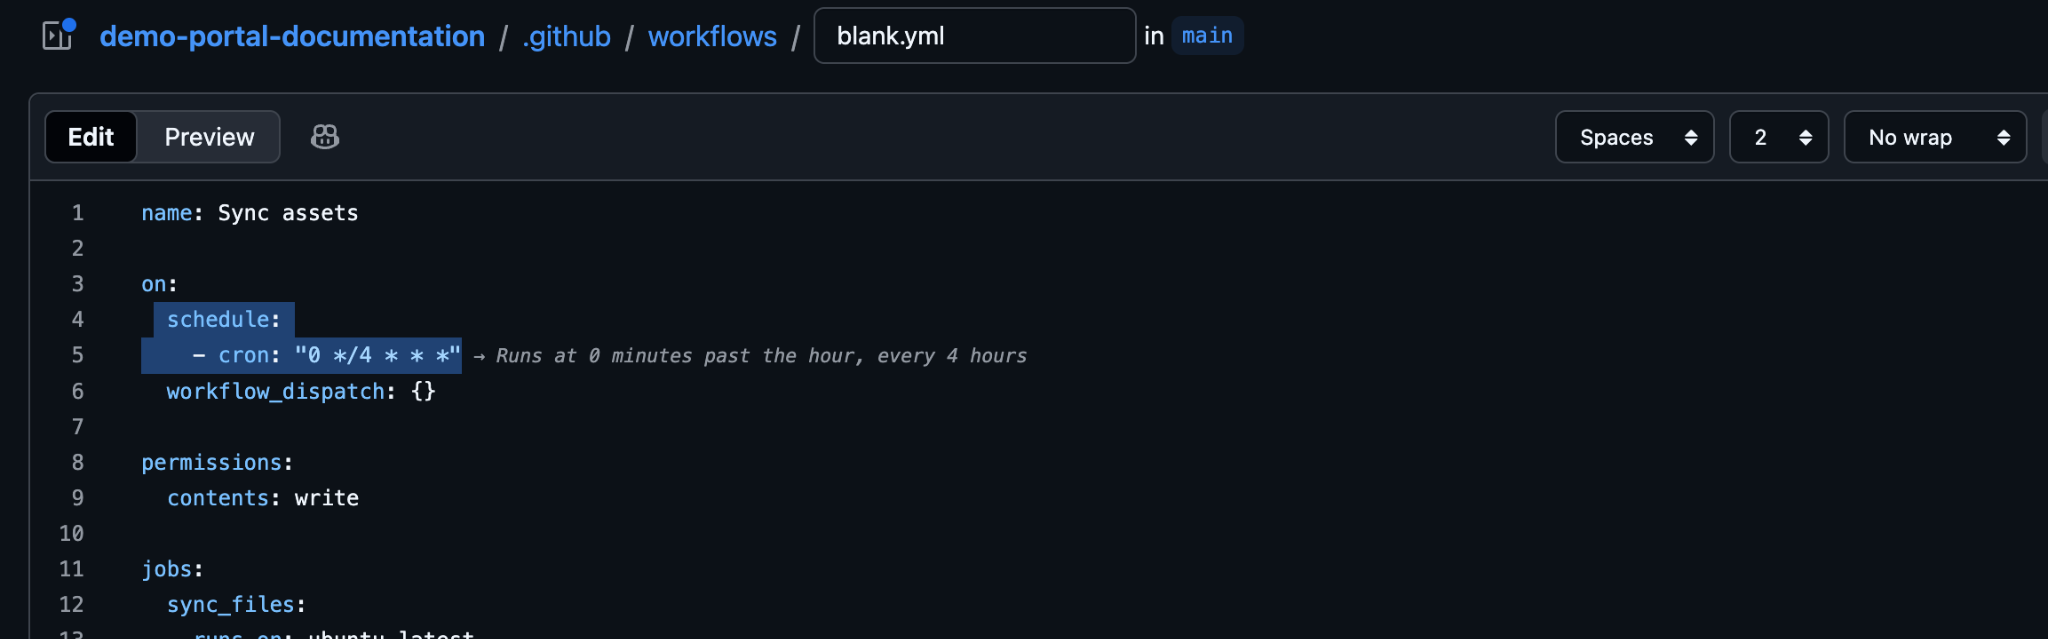
Remove Scheduled Sync
- Open your GitHub repository.
- Go to Actions.
- Select Sync assets.
- Click View workflow file.
- Click the pencil icon to edit.
- Locate the line:
- cron: "0 */4 * * *" - Remove the line.
- Click Commit changes.
After removing the cron configuration, the workflow runs only when you manually trigger it using Run workflow.
After disabling the schedule, updates from Corefy should not apply automatically.
Control Updates Manually
If you want full control over content changes:
- Run synchronisation manually when required.
- Review updates before publishing.
- Compare changes inside GitHub before merging.
- This approach is recommended if:
- Your content differs from the original Corefy template.
- You apply heavy customisation.
- You maintain additional compliance or legal adjustments.
The sync script uses the rsync command with the
--deleteflag. Therefore, any file you wish to keep must be explicitly excluded in the GitHub Actions configuration.
- Navigate to the
.github/workflows/directory and open the sync YAML file (e.g.,sync.yml). - Locate the
rsync -av --deletesection. - Add a new line:
--exclude "your-page-name.md"before the source/destination paths.
rsync -av --delete \
  --exclude ".git/" \
  --exclude "README.md" \
  --exclude "your-new-page.md" \  # <--- Add your file here
  "repo-a-source-temp/" \
"./"- Save your .
yamlfor on Git Actions and run changes for the Markdown file. - Afterward, you can easily sync your documentation without changes for your files.
Use a Separate Environment
For advanced control, create a second GitHub Organisation and GitBook environment.
Use this environment to:
- Receive automatic updates.
- Review changes.
- Manually apply approved updates to production.
This setup provides a staging environment for documentation.
Recommended Update Strategy
The beast practice is to review and update the documentation every few months.
If you want to maintain stability:
- Disable automatic synchronisation.
- Perform scheduled manual updates.
- Test changes before publishing.
- If you prefer continuous updates:
- Keep synchronisation enabled.
- Review changes regularly.
- Monitor the Actions tab for workflow runs.
Updated 5 months ago